IT tutorials
 
Graphics
 

Adobe Flash Catalyst CS5 : Configuring the Repeating Item's Appearance

5/30/2013 9:12:06 PM
- Free product key for windows 10
- Free Product Key for Microsoft office 365
- Malwarebytes Premium 3.7.1 Serial Keys (LifeTime) 2019

When you designate the repeating item in the data list, Catalyst automatically adds five instances of it in a vertical list. The Properties panel makes it easy to change this to a horizontal or tile list and set the spacing between items. Follow these steps:

  1. Before changing the list to a horizontal list as required by the design, remove the other sample magazines from the design (see Figure 1). If necessary, click HomeState on the navigation bar to return to the main application. Then, click on the magazines that you did not include in the data list and press the Delete key to remove them.

    Figure 1. Removing the extra sample magazines
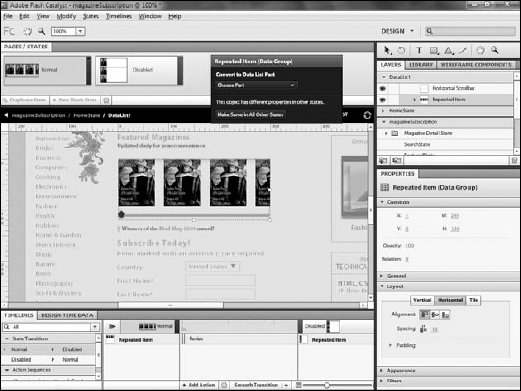
  2. Double-click the data list to return to its editing mode (see Figure 2).

    Figure 2. Returning to edit the data list
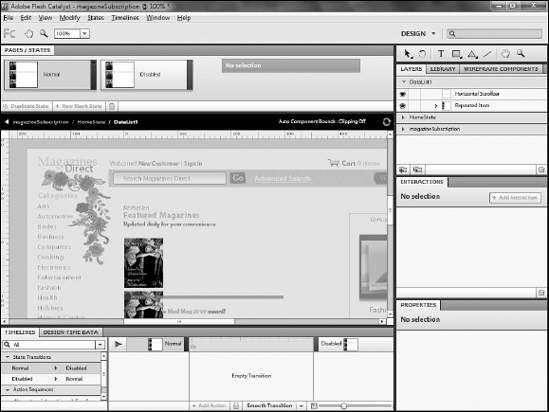
  3. Click on the repeating item.

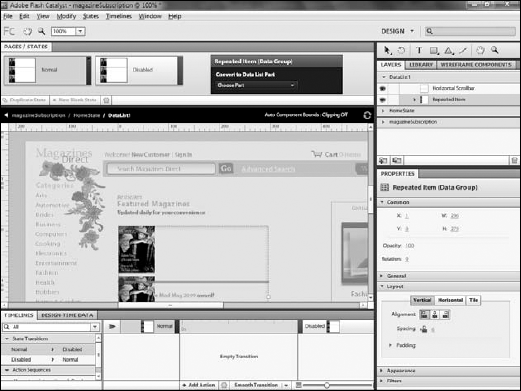
  4. On the Properties panel, click to expand the Layout section (see Figure 3).

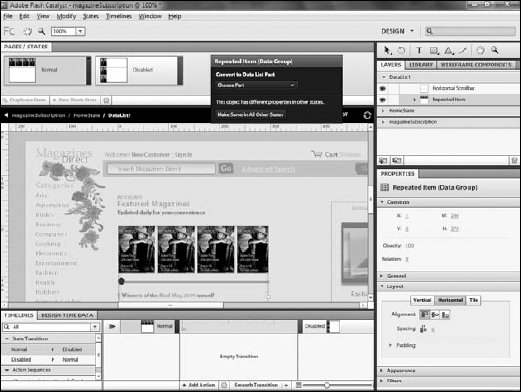
  5. Click the horizontal alignment button to change the list orientation to horizontal (see Figure 4).

    Figure 3. The Layout section of the Properties panel for the repeating item, showing the default settings
    Figure 4. Changing the list orientation to horizontal
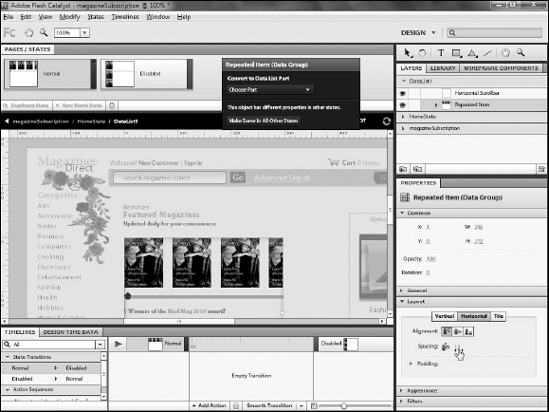
  6. Click and drag to change the horizontal spacing value (see Figure 5). There is no correct amount of horizontal spacing for data items; rather, as you scrub the value pay attention not to the actual value but instead to the artboard, as you will see the value being applied to the data list directly. Scrub until the list is showing the amount of spacing that looks good to you.

    Figure 5. Changing the spacing in the list
  7. If necessary, use the Select tool to resize the data list to fit the items (see Figure 6). The size adjustment will only apply to the Normal state of the data grid.

  8. Click Make Same on All Other States on the HUD to apply the size adjustment to the Disabled state as well (see Figure 7).

Figure 6. Resizing the data list

Figure 7. Applying the size adjustment to other states

The data list will now be set up to your liking. In this example, you have adjusted it to be a horizontal list and have better spacing. You do not need to do anything to get the scrollbar to work. A data list component will automatically detect if a scrollbar component exists within it and use it.
 
Others


Top 10
 
- Microsoft Visio 2013 : Adding Structure to Your Diagrams - Finding containers and lists in Visio (part 2) - Wireframes,Legends
- Microsoft Visio 2013 : Adding Structure to Your Diagrams - Finding containers and lists in Visio (part 1) - Swimlanes
- Microsoft Visio 2013 : Adding Structure to Your Diagrams - Formatting and sizing lists
- Microsoft Visio 2013 : Adding Structure to Your Diagrams - Adding shapes to lists
- Microsoft Visio 2013 : Adding Structure to Your Diagrams - Sizing containers
- Microsoft Access 2010 : Control Properties and Why to Use Them (part 3) - The Other Properties of a Control
- Microsoft Access 2010 : Control Properties and Why to Use Them (part 2) - The Data Properties of a Control
- Microsoft Access 2010 : Control Properties and Why to Use Them (part 1) - The Format Properties of a Control
- Microsoft Access 2010 : Form Properties and Why Should You Use Them - Working with the Properties Window
- Microsoft Visio 2013 : Using the Organization Chart Wizard with new data
Technology FAQ
- Is possible to just to use a wireless router to extend wireless access to wireless access points?
- Ruby - Insert Struct to MySql
- how to find my Symantec pcAnywhere serial number
- About direct X / Open GL issue
- How to determine eclipse version?
- What SAN cert Exchange 2010 for UM, OA?
- How do I populate a SQL Express table from Excel file?
- code for express check out with Paypal.
- Problem with Templated User Control
- ShellExecute SW_HIDE
programming4us programming4us