IT tutorials
 
Graphics
 

Adobe InDesign CS5 : Working with Objects and Layers - Aligning Objects

5/22/2013 4:02:12 AM
- Free product key for windows 10
- Free Product Key for Microsoft office 365
- Malwarebytes Premium 3.7.1 Serial Keys (LifeTime) 2019
In addition to using grids and guides to align objects to a specific point, you can align a group of objects to each other. The alignment buttons on the Align and Control panels make it easy to align two or more objects relative to each other or to the page. Before you select an align command, specify how you want InDesign to align the objects. You can align the objects in relation to the page, margins, spread, or selection. In addition to the alignment buttons, you can also use the Gap tool (New!) to align and adjust the size of a gap between two or more objects. You can resize objects with commonly aligned edges at the same time, while keeping the gaps between them fixed.

Align Objects

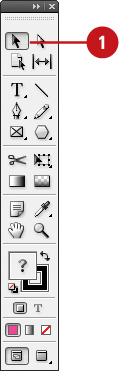
1. Select the Selection tool on the Tools panel.

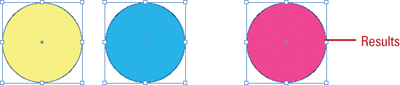
2. Select two or more objects to align them.

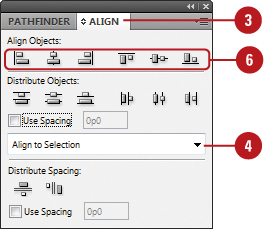
3. Select the Align panel.

  • Click the Window menu, point to Object & Layout, and then click Align.

4. Click the Alignment list arrow, and then select how you want to align the objects:

  • Align to Selection. Aligns objects to themselves.

  • Align to Margins. Aligns objects to the margin size.

  • Align to Page. Aligns objects to the page size.

  • Align to Spread. Aligns objects to the spread size.

5. If you want to align objects to an object, click the Object menu, and then click Lock to lock the object in place.

6. Use the alignment buttons on the Align or Control panel.

  • Align Top or Bottom Edges.

  • Align Left or Right Edges.

  • Align Horizontal or Vertical Centers.

Align Objects Using the Gap Tool

1. Select the Gap tool on the Tools panel.

2. Position the pointer between two objects.

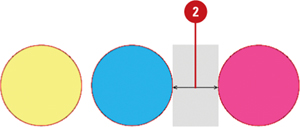
3. Use any of the following actions:

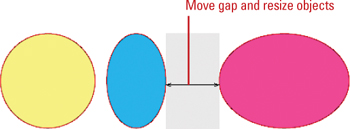
  • Move Gap and Resize Objects. Drag to move the gap and resize all objects aligned along the gap.

  • Move Gap Two Nearest Objects. Hold down Shift and then drag to move the gap between only the two nearest objects.

  • Resize Gap and Not Move It. Hold down Ctrl (Win)  and then drag to resize the gap instead of moving it. Hold down Shift to resize the gap between only the two nearest objects.

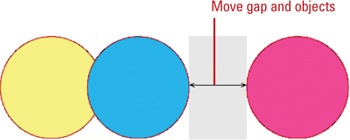
  • Move Gap and Objects. Hold down Alt (Win) or Option (Mac), and then drag to move the gap and objects in the same direction. Hold down Shift to resize the gap between only the two nearest objects.

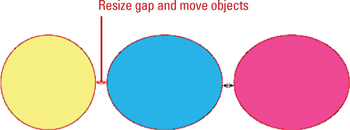
  • Resize Gap and Move Objects. Hold down Ctrl+Alt (Win) , and then drag to resize the gap and move the objects. Hold down Shift to resize the gap between only the two nearest objects.

 
Others
 
- Adobe InDesign CS5 : Working with Objects and Layers - Grouping and Combining Objects
- Corel Painter X : Drawing People - Self-Portrait (part 3) - Let Yourself Go
- Corel Painter X : Drawing People - Self-Portrait (part 2) - Mix and Match
- Corel Painter X : Drawing People - Self-Portrait (part 1) - Be Yourself
- CorelDRAW X5 : Navigation and Page Setup - Zooming and Panning Pages
- CorelDRAW X5 : Navigation and Page Setup - Setting View Mode
- CorelDraw 10 : Complex Shapes - Drawing Perfect Shapes
- CorelDraw 10 : Complex Shapes - Creating Spirals, Drawing Grids
- CorelDraw 10 : Complex Shapes - Polygons and Stars
- Adobe Dreamweaver CS5 : Working with Web Page Tables - Inserting a Table in Standard Mode
 
 
Top 10
 
- Microsoft Visio 2013 : Adding Structure to Your Diagrams - Finding containers and lists in Visio (part 2) - Wireframes,Legends
- Microsoft Visio 2013 : Adding Structure to Your Diagrams - Finding containers and lists in Visio (part 1) - Swimlanes
- Microsoft Visio 2013 : Adding Structure to Your Diagrams - Formatting and sizing lists
- Microsoft Visio 2013 : Adding Structure to Your Diagrams - Adding shapes to lists
- Microsoft Visio 2013 : Adding Structure to Your Diagrams - Sizing containers
- Microsoft Access 2010 : Control Properties and Why to Use Them (part 3) - The Other Properties of a Control
- Microsoft Access 2010 : Control Properties and Why to Use Them (part 2) - The Data Properties of a Control
- Microsoft Access 2010 : Control Properties and Why to Use Them (part 1) - The Format Properties of a Control
- Microsoft Access 2010 : Form Properties and Why Should You Use Them - Working with the Properties Window
- Microsoft Visio 2013 : Using the Organization Chart Wizard with new data
Technology FAQ
- Is possible to just to use a wireless router to extend wireless access to wireless access points?
- Ruby - Insert Struct to MySql
- how to find my Symantec pcAnywhere serial number
- About direct X / Open GL issue
- How to determine eclipse version?
- What SAN cert Exchange 2010 for UM, OA?
- How do I populate a SQL Express table from Excel file?
- code for express check out with Paypal.
- Problem with Templated User Control
- ShellExecute SW_HIDE
programming4us programming4us