When creating a drawing, it’s important to design with a particular paper size and orientation in mind. You can use either of the following procedures to specify these settings.
To set a page size and orientation using the property bar:
|
1.
|
With nothing selected on the drawing page, choose the Pick Tool from the toolbox.
|
|
2.
|
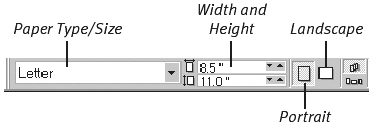
On the Property Bar, click the down arrow beside the Paper Type/Size drop-down list and choose a paper (Figure 1). Figure 1. You can set page size and orientation for a document by choosing options from the property bar.
|
|
3.
|
Click the Portrait (vertical) or Landscape (horizontal) icon to set a page orientation.
|
To set a page size and orientation using the Options dialog box:
|
1.
|
Choose Layout > Page Setup. The Options dialog box appears (Figure 2), open to the Size section. Figure 2. Standard and advanced page options can be set in the Options dialog box.
|
|
2.
|
Click the Normal Paper radio button.
|
|
3.
|
Choose a paper size from the Paper drop-down list.
|
|
4.
|
Click the Portrait or Landscape radio button to set the page orientation.
|
|
5.
|
|
|
6.
|
|
|
7.
|
Click OK to accept the settings.
|
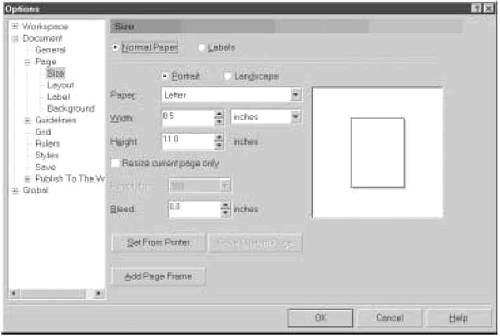
Custom Paper SizesAlthough most common paper sizes are supported by CorelDraw, you can also define and use custom paper sizes. Choose Custom from the Paper list (Figure 8.2) and specify the paper dimensions. If you want to be able to reuse this custom size for other documents, click the Save Custom Page button and enter a name for the paper in the dialog box that appears. |
Tips
-
To set a new paper size for this page only, switch to the appropriate document page before beginning the second step list.
-
To simultaneously change the orientation for all pages in the current document, choose Layout > Switch Page Orientation.
-
You can add a hairline frame around the page by clicking the Add Page Frame button in the Options dialog box,
-
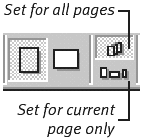
Another way to set the orientation for just the current page is to click the bottom button of the Set Default or Current Page and Orientation pair on the property bar (Figure 3) and then click an orientation button. You can also use this technique to set a different paper size for just the current page.
Figure 3. To set options for all document pages, click the top button. To set options for the current page only, click the bottom button.

-
To simultaneously set the orientation or paper size for all pages in a document, click the top button of the Set Default or Current Page and Orientation pair on the property bar (Figure 8.3). Then select a paper size or orientation.
-
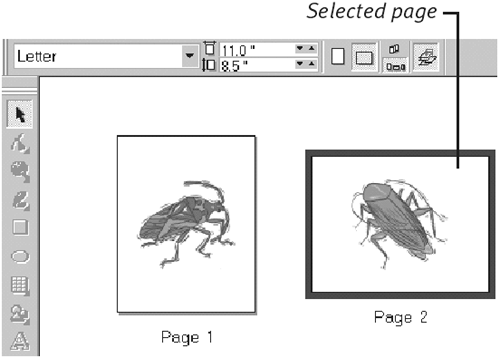
This pair of property bar buttons can also be used to set orientation or paper size in Page Sorter View (choose View > Page Sorter View), as shown in Figure 4. To alter the settings for an individual page, select the page’s thumbnail and click the top button of the Set Default or Current Page and Orientation pair.
Figure 4. Choosing page settings is very convenient in Page Sorter View.

-
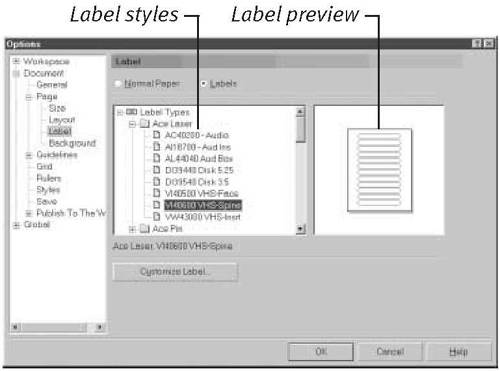
You can also design and print pages of labels with CorelDraw 10. In the Size section of the Options dialog box, click the Labels radio button. A list of common label manufacturers and their supported labels appears (Figure 5). Select a label style and then click OK. (If you can’t make the label list appear, start with a new document.)
Figure 5. CorelDraw 10 supports dozens of label styles and layouts.