In this section, you will
learn the different methods of deploying BizTalk applications. First,
you will discover how to deploy a BizTalk application manually. Then,
you will see how to export, import, or install a BizTalk application
using an MSI package. You'll also learn how you can utilize MSBuild as
an alternative to the MSI package. In addition, we will show how you can
incorporate PowerShell to deploy and manage your BizTalk applications.
Finally, you will investigate a BizTalk application deployment process
that allows you to move your BizTalk solution from your development
environment all the way to your production environment.
1. Steps in Deploying a BizTalk Application
There are two major steps
in order to deploy an application. First, you must import the BizTalk
application to a BizTalk Server Group. Importing a BizTalk application
registers all the BizTalk artifacts for a BizTalk application in the
Management Database. Once a BizTalk application has been imported into
the Management Database, all other BizTalk servers in the BizTalk Server
Group are now aware of the new BizTalk application and its artifacts.
However, before they can run the application themselves, they must have a
physical copy of all the BizTalk artifacts that are referenced in the
Management Database. Consequently, the second step is to install all
artifacts on each of the BizTalk servers in a BizTalk Server Group. This
step includes copying all artifacts to the target servers, registration
of COM libraries, registration of .NET assemblies in the Global
Assembly Cache, installing certificates in servers' certificate store,
and the configuration of virtual directories if needed.
Exercise 1 demonstrates how to perform some of the steps just mentioned.
The purpose of this
exercise is to illustrate how to deploy a BizTalk application manually
using the BizTalk Administration Console. You will learn how to
Create a BizTalk application. Deploy a BizTalk assembly manually. Create ports manually. Start a BizTalk application.
Open the BizTalk Administration Console: Select Start => All Programs => Microsoft BizTalk Server 2009 => BizTalk Server, and then click the Administration icon. In the BizTalk Server 2009 Administration Console, expand BizTalk Server 2009 => BizTalk Group => Applications.
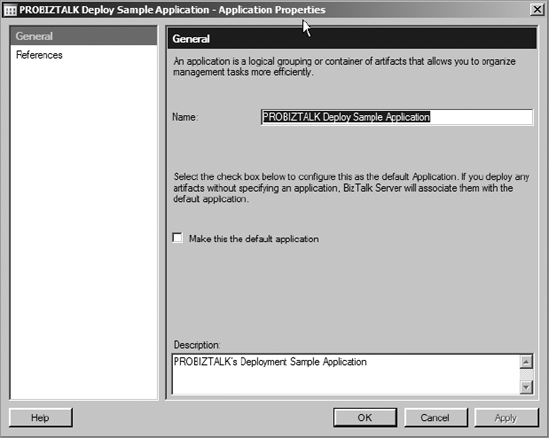
Create a new application: Right-click Applications, point to New, and then click Application. In the Applications Properties window shown in Figure 1, type PROBIZTALK Deploy Sample Application in the Name field. In the Applications Properties window, type PROBIZTALK's Deployment Sample Application in the Description field. In the Applications Properties window, click OK.
NOTE
You can add
references to other BizTalk applications by clicking the reference
section. You would do this when you have shared artifacts that are used
by more than one application.
Add the BizTalk assembly: In the BizTalk Server 2009 Administration Console, expand BizTalk Server 2009 => BizTalk Group => Applications => PROBIZTALK Deploy Sample Application. Right-click Resources, point to Add, and click BizTalk Assemblies. In the Add Resources window, click the Add button. Browse to the C:\DeploymentSampleApplication\DeploymentSampleApplication.dll, and then click Open. In the Add Resources window, click the OK button. Notice in the right pane of the BizTalk Server 2009 Administration Console the newly added assembly.
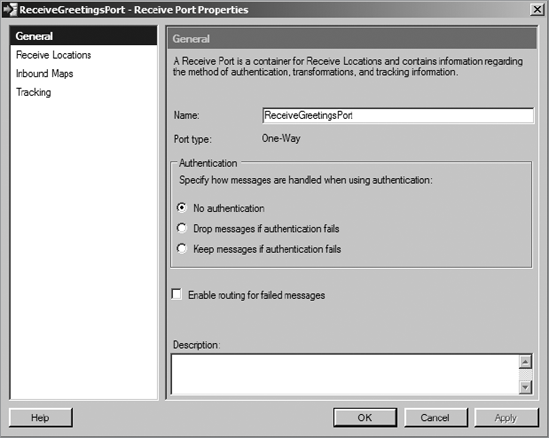
Create a receive port: In the BizTalk Server 2009 Administration Console, expand BizTalk Server 2009 => BizTalk Group => Applications => PROBIZTALK Deploy Sample Application. Right-click Receive Ports, point to New, and click One-way Receive Port. In the Receive Port Properties window shown in Figure 2, and type ReceiveGreetingsPort in the Name field. Click Receive Locations on the left pane, then click the New button on the right pane.
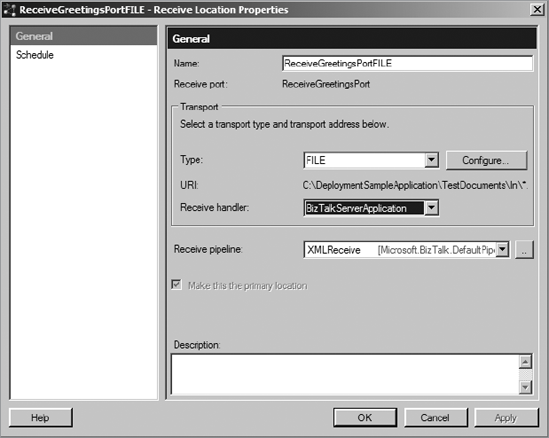
In the Receive Location window shown in Figure 3, type ReceiveGreetingsPortFILE in the Name field. Select FILE in the Type field. Click the Configure button. Type C:\DeploymentSampleApplication\Documents\In in the "Receive folder" field. Select BizTalk Server Application from the Receive Handler drop-down menu. Select XMLReceive in the Receive Pipeline field, and click the OK button. Click the OK button one more time to close the Receive Properties window.
Create a send port: In the BizTalk Server 2009 Administration Console, expand BizTalk Server 2009 => BizTalk Group => Applications => PROBIZTALK Deploy Sample Application. Right-click Send Ports, point to New, and click Static One-way Send Port. In the Send Port Properties window shown in Figure 4, type SendgreetingsResponsePort in the Name field. Select FILE in the Type field.
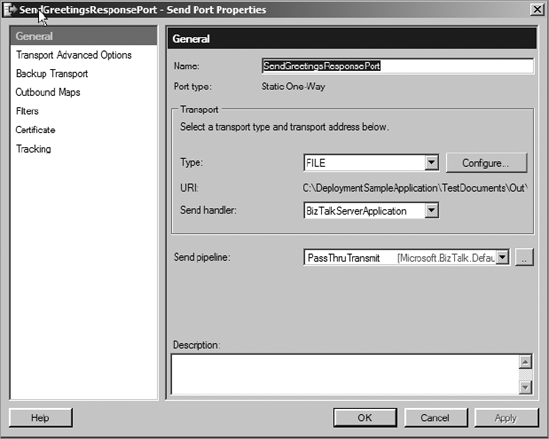
Click the Configure button. Type C:\DeploymentSampleApplication\Documents\Out in the "Destination folder" field. Select PassThruTransimit in the Send Pipeline field. Select BizTalk Server Application in the Send Handler drop-down menu
Configure the PROBIZTALK Deploy Sample Application: In the BizTalk Server 2009 Administration Console, right-click PROBIZTALK Deploy Sample Application, and click Configure. In the Configure Application window, click the ProcessGreetingsOrchestration orchestration. Select BizTalkApplication in the Host drop-down menu. In the Inbound Logical Ports section, select the ReceiveGreetingsPort port in the Port drop-down menu. In the Outbound Logical Ports section, select the SendGreetingsResponsePort port in the Port dropdown menu. In the Configure Application window, click the OK button.
Start the PROBIZTALK Deploy Sample Application: In the BizTalk Server 2009 Administration Console, right-click PROBIZTALK Deploy Sample Application, and click Start. In the Start 'PROBIZTALK Deploy Sample Application' window, click Start. Copy
C:\DeploymentSampleApplication\Documents\GreetingsSchemaInstance.xml to
the C:\DeploymentSampleApplication\Documents\In folder. The file will
be picked up by a BizTalk Server for processing, and shortly an output
document will be created in the C:\DeploymentSample
Application\Documents\Out folder.
|