1. Standard Edition Installation
As noted previously, Lync Server 2013
Standard Edition is designed for smaller deployments. Standard Edition
deployments can have only one server per pool and use SQL Server
Express on the same server as the front end. This results in limited
scalability and limited high-availability options. For this reason,
Standard Edition is recommended only for small deployments. The first
step for any Standard Edition deployment is to prepare the server as a
Central Management Store and prepare the database:
1. From the main Deployment Wizard screen, click Prepare the first Standard Edition Server in the right-hand pane.
2. Click Next at the first screen.
3. The window displays
the actions being performed to prepare the server as the first Standard
Edition Server, including setting up the central management store. Wait
as this process takes a few minutes to complete.
4. When it’s done, ensure that it completed successfully and click Finish.
The next step is to define the topology with Topology Builder.
2. Topology Builder for Standard Edition Deployments
Lync Server 2013 uses the published topology
to process traffic and maintain overall topology information. To ensure
that the topology is valid, it is recommended to run the Topology
Builder before your initial deployment and publish an updated topology
after each topological change. This example shows a Standard Edition
topology. Remember, if you change the topology later, it should be
republished to ensure consistency.
When you first launch Lync Server 2013 Topology Builder, you’ll see a fairly blank MMC screen, as shown in Figure 1. Compare that to the detailed result at the end of this example.
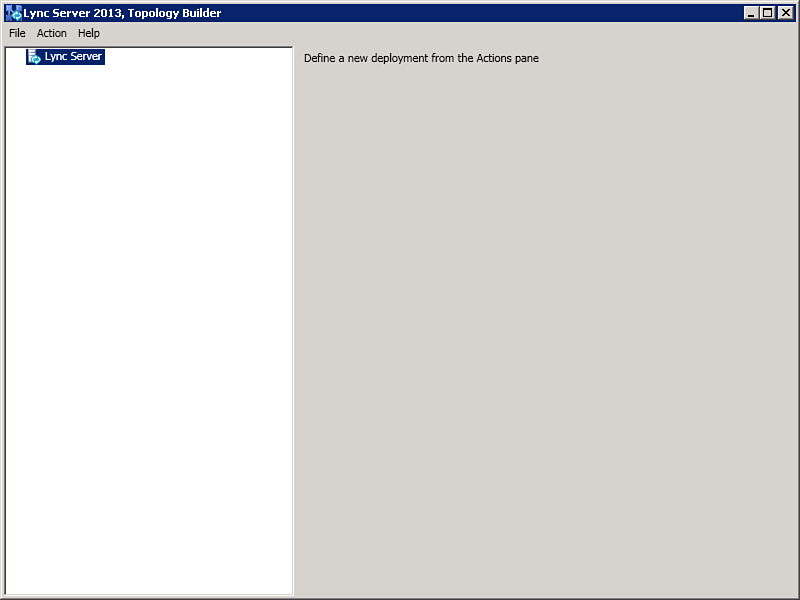
Figure 1. Topology Builder with no topology defined.
To begin using Topology Builder, follow these steps:
1. In the right-hand Action pane, click New.
2. Define the default SIP domain. In many deployments this is simply your domain name, as shown in Figure 2.
In more complex deployments you can add SIP domains by clicking the Add
button. When you are done defining SIP domains, click OK.
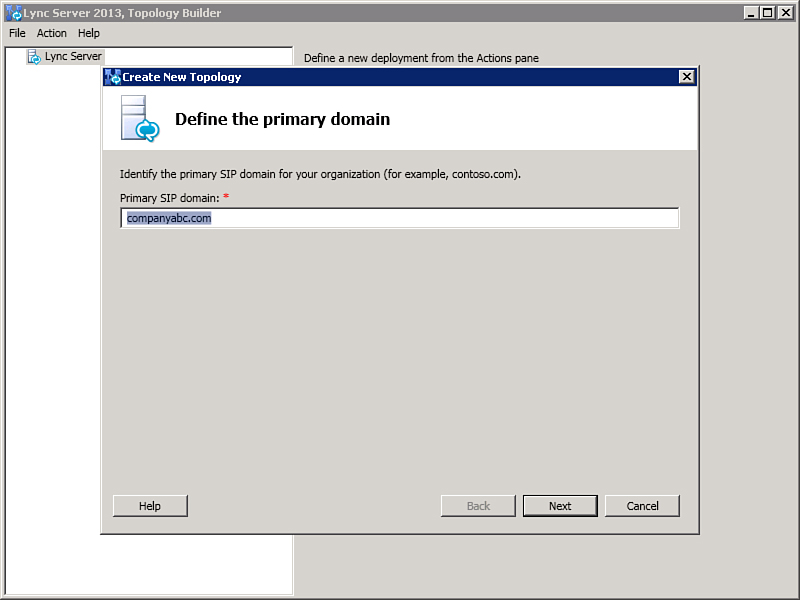
Figure 2. Define the default SIP domain.
3. In the right-hand Action pane, click Define Site. Enter the appropriate information as shown in Figure 3, and click OK.
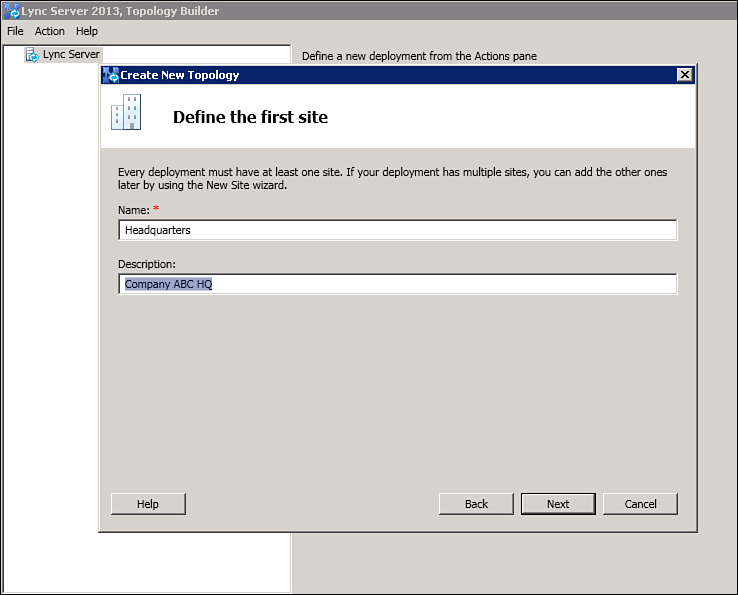
Figure 3. Define the site.
Note
Note that Lync Server sites have no relation to Active Directory sites. They are completely separate and unique to Lync Server.
4. In the right-hand Action pane, click Define Front End Pool and click the radio button for Standard Edition; then click Next.
5. Define the System FQDN as shown in Figure 4. For a Standard Edition deployment this will also be your pool name. When you are done, click Next.
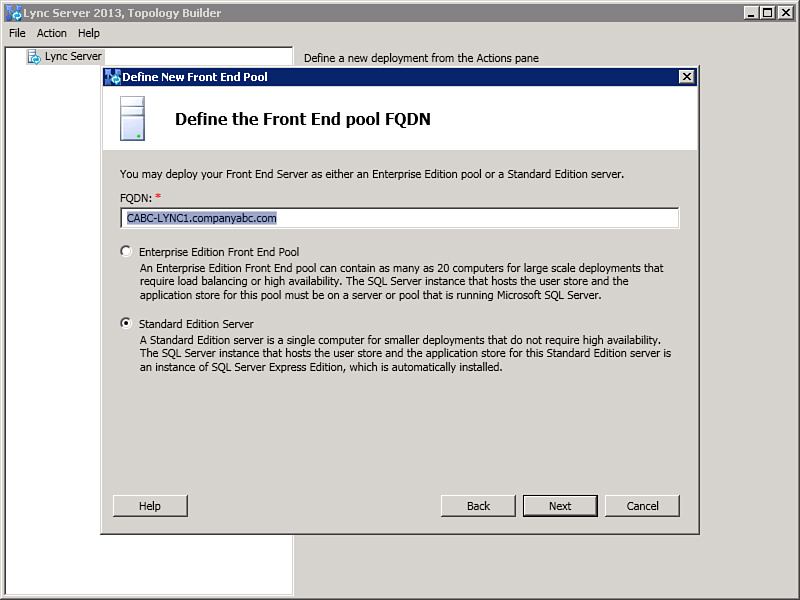
Figure 4. Define the front-end pool.
6. Choose the appropriate workloads for your deployment and click Next.
7. If you choose to enable archiving and/or monitoring, select the appropriate check box here. When complete, click Next.
8. If you are
deploying Enterprise Voice, click the check box to enable the Mediation
Server role collocated with the Front End Server.
9. Define the database and file share to be used by the pool, as shown in Figure 5.
For a Standard Edition deployment the SQL box is grayed out because a
local instance of SQL Express is always used. Note that you’ll need to
manually create the share on the front end before progressing past this
step. After the share is created, Lync Server assigns the appropriate
permissions. When you are ready, click Next.
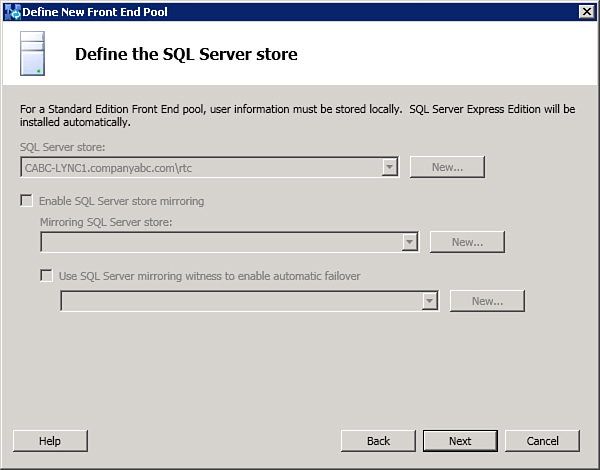
Figure 5. Define the SQL instance.
10. Define the file store as shown in Figure 6. In general, this is created on the Front End Server in a Standard Edition deployment.
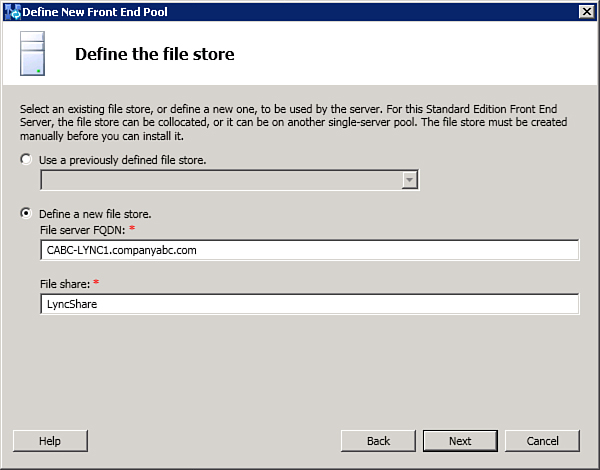
Figure 6. Define the file store.
11. Define the web services URLs for the pool. Often the internal and external URLs are different, as shown in Figure 7. They can be defined here. When complete, click Next.

Figure 7. Web services URLs.
12. Define an Office Web Apps Server. Note that this server must be deployed in advance and pre-existing to define it here.
This completes the initial topology
definition. However, there are additional steps to complete a fully
functional topology. The next step is to define easy-to-remember URLs
for common Lync Server 2013 functions:
1. From the main
Topology Builder page, where your site name is highlighted, right-click
and choose Properties. Select Simple URLs in the left pane, as shown in
Figure 8, and enter your preferred simple URLs.
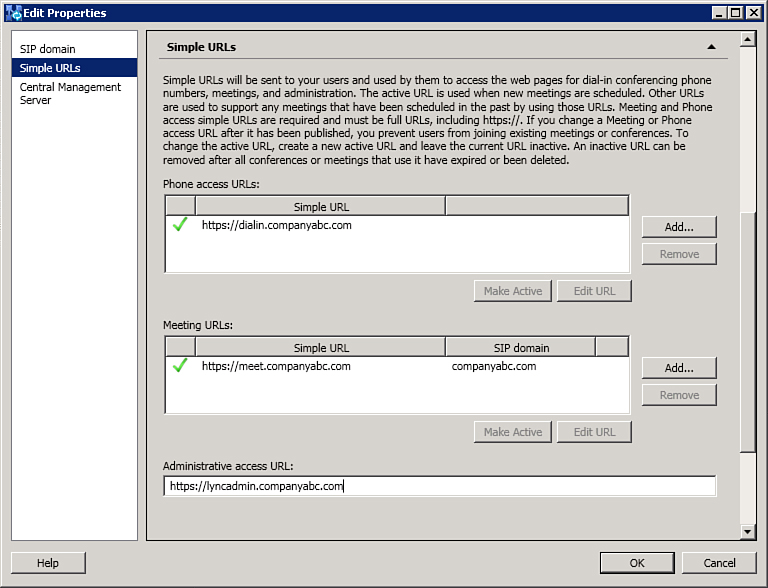
Figure 8. Expand the Simple URLs item.
Tip
It is recommended to leave the Phone Access
and Meeting URLs at their default values. For the Administrative Access
URL, define an easy-to-remember FQDN that is not already in use. Be
sure to create this record in DNS pointing to the same IP address as
the Web Services internal FQDN.
2. Enter easy-to-remember URLs for Phone Access Administrative Access, and Meeting services, as shown in Figure 9. Note that the following three examples are all valid for Lync Server Simple URLs:
• https://<function>.<domain_fqdn> - https://dialin.companyabc.com
• https://<sip_domain>/<function> - https://companyabc.com/dialin
• https://<External_WebPool_FQDN>/<function> - https://LyncWeb.companyabc.com/dialin
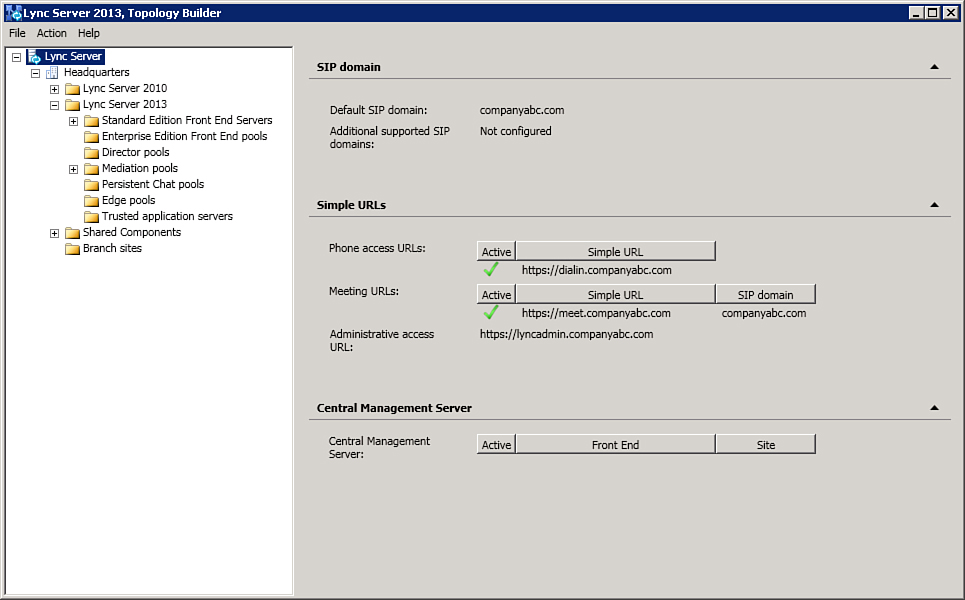
Figure 9. Configured Simple URLs.
Note that these are the only allowed
syntaxes. Port information, such as https://dialin.companyabc.com:443,
is invalid. If you choose the first option, all the FQDNs will need to
be included as SANs on your certificates. If you choose the second or
third option, note that the following virtual directory names are
reserved and cannot be used as part of a Simple URL:
• ABS
• Conf
• LocationInformation
• RequestHandler
• AutoUpdate
• cscp
• OCSPowerShell
• RGSClients
• CertProv
• GetHealth
• ReachWeb
• RGSConfig
• CollabContent
• GroupExpansion
• RequestHandlerExt
• WebTicket
The final step is to publish the topology to
the Central Management Store. In a Standard Edition deployment this is
the first front end you define. Perform the following steps to publish
your topology:
1. From the Topology Builder Tool, select the top-level menu item in the left-hand pane, Lync Server, as shown in Figure 10.
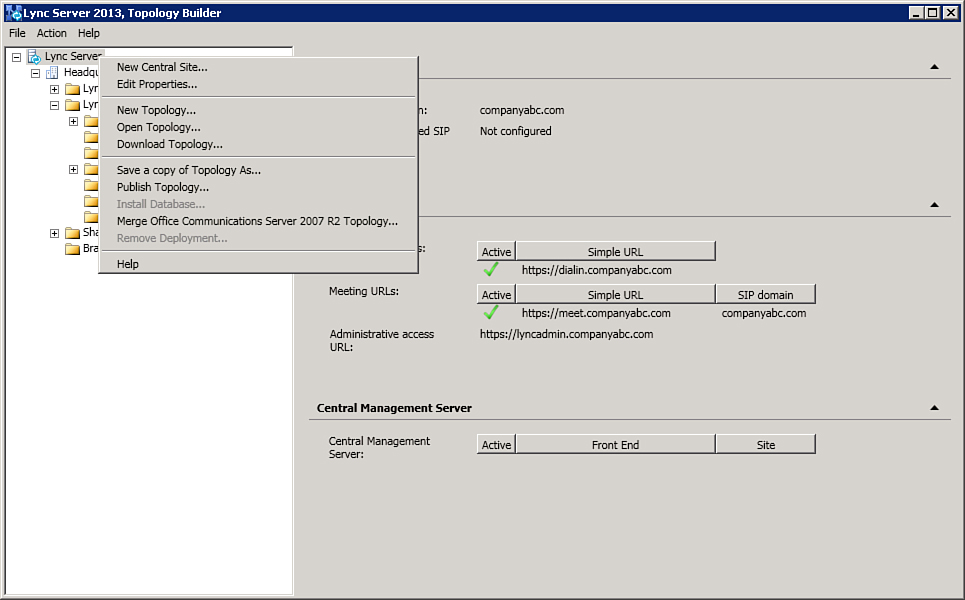
Figure 10. Publishing the Lync topology.
2. Expand the Central Management Server option in the main pane and click Edit.
3. Select Publish Topology, as shown in Figure 10.
4. At the opening screen, click Next.
5. Ensure that correct
Central Management Store is selected and click Next. This starts the
publishing process and overwrites any existing topologies.
6.
Check the Create Other Databases box. Ensure that the account being
used for installation has permission to perform this function. Click
Next.
7. The Publish
Topology window displays the actions being performed. Ensure that all
steps say “Success” when it is finished, as shown in Figure 11, and then click Finish.
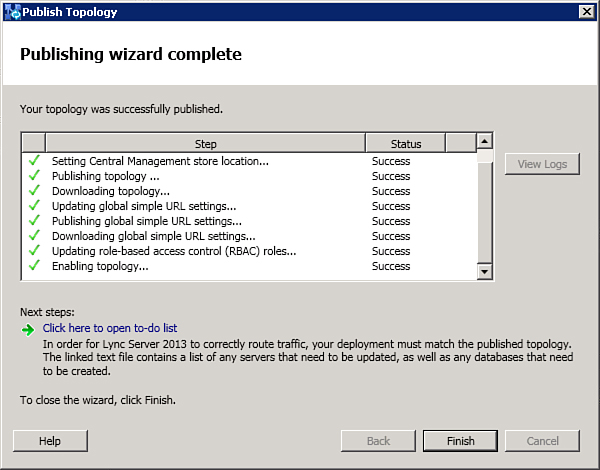
Figure 11. Successfully published topology.