|
1. Forefront Advertisement
Using an advertisement ties these concepts together. There are multiple ways to create an advertisement:
Navigate
to the Advertisement section of the ConfigMgr console (Site Database
-> Computer Management -> Software Distribution ->
Advertisements), right-click, and select New Advertisement. This
process starts the New Advertisement Wizard, where you need to specify
all the settings for the advertisement you create. Tip: Using the New Advertisement Wizard for More Control
This
section discusses using the Distribute Software to Collection Wizard to
deploy software. Several options are not available when using this
particular wizard, including setting priority, rerun behavior, how to
interact with distribution points, whether to allow manual interaction
with the advertisements, whether to use a custom countdown, and
configuring security. As a result, most advanced ConfigMgr users
recommend using the New Advertisement Wizard to provide more control
for these types of configurations. This chapter recommends the
Distribute Software to Collection Wizard to provide a solid starting
point for how to deploy software, but as you spend additional time
distributing software, you may decide the New Advertisement Wizard is
your preferred method to use.
Navigate
to the Packages section of the ConfigMgr console (Site Database ->
Computer Management -> Software Distribution -> Packages),
right-click, and select Distribute Software. This starts the Distribute
Package Wizard, which will pass the package information and thus
require less configuration information. Navigate
to the collection previously defined for the software distribution in
the ConfigMgr console (Site Database -> Computer Management ->
Collections -> Forefront
Client Deployment), right-click, and select Distribute Software. This
starts the Distribute Software to Collection Wizard, passing the
collection information, again saving you from inputting much of the
configuration information.
It is
really a personal preference as to which approach to use, but the
authors’ preference is to use the last method to create the
advertisement, as long as the collection that will be used for
targeting is already defined. To create the advertisement in this
manner, perform the following steps:
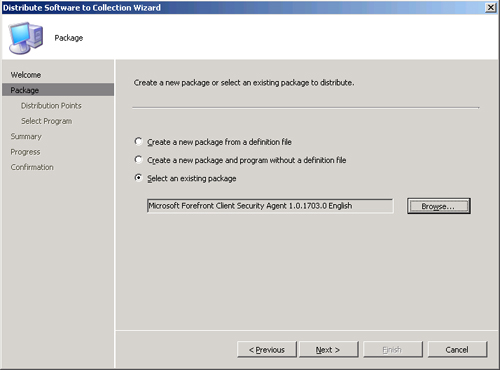
1. | The
Distribute Software to Collection Wizard starts with a Welcome screen
and then prompts for package information. Because this example will
distribute the Forefront Client Security Agent package already created,
choose Select an existing package. Then use the Browse button, as shown
in Figure 1.
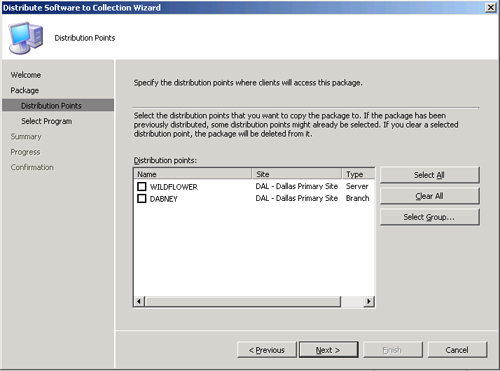
| 2. | The
next screen specifies the distribution points where clients will access
this package. Both distribution points are unchecked by default (see Figure 2). Check both and continue with the wizard.
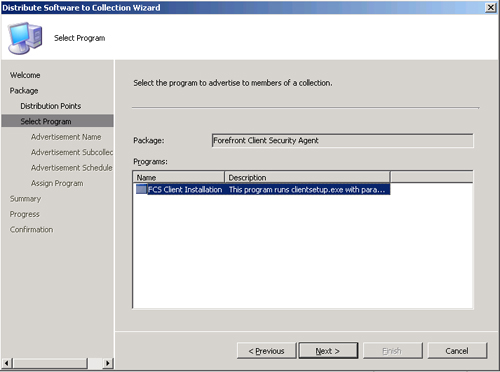
| 3. | The Select Program screen, shown in Figure 3,
displays the program created for the Forefront Client Security agent
(if multiple programs are available for this package, choose the
program to run from the list displayed with the package).
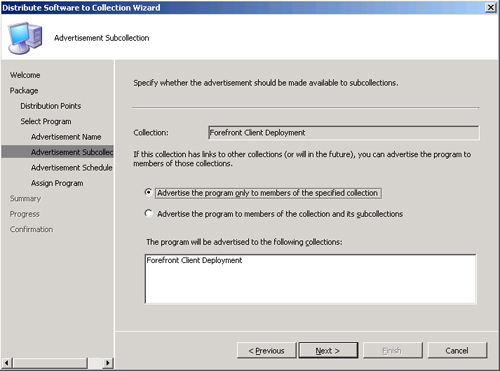
| 4. | The
following screen defines the Advertisement Name setting, which defaults
to a concatenation of the name of the package (Forefront Client
Security Agent) followed by “–” and then the name of the program (FCS
Client Installation). This is followed by “to” and the name of the
collection (Forefront Client Deployment). This makes the full name for
this advertisement Forefront Client Security Agent – FCS Client Installation to Forefront Client Deployment.
Next, on the Advertisement Subcollection screen, you choose whether the
advertisement will apply to subcollections or only to the specified
collection. Although no subcollections exist at this time, to avoid the
chance of distributing the software to unexpected systems, select the
option Advertise the program only to members of the specified
collection, as displayed in Figure 4.
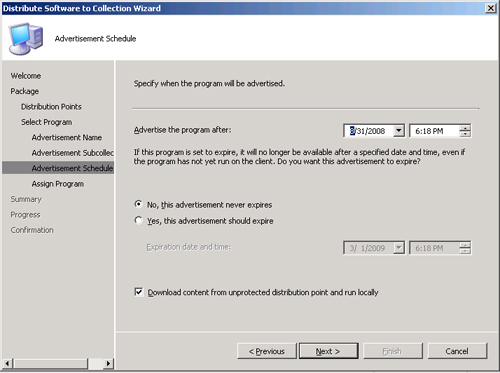
| 5. | The Advertisement Schedule screen (shown in Figure 5)
specifies when an advertisement becomes available, when or if it
expires, and whether content is downloaded and run locally. The fields
on this page include the following:
- Advertise the program after—
Use this field to make an advertisement available beginning at a future
point in time. The field defaults to the date and time the
advertisement was created. For most packages, the default configuration
is preferred; but this setting allows you to configure a specific time
to advertise those packages requiring a later time.
- Expiration— Two options are available: “No, the advertisement never expires” and “Yes, the advertisement should expire.”
The
default is No, and is the preferred situation unless there is a reason
why the program would no longer be viable after a certain date and
time. If you choose the expiration option of Yes, define the expiration
date and time here. - Download content from unprotected distribution point and run locally—
By default, this option is checked. When checked, this specifies that
when the program is advertised it will download to the client before
ConfigMgr attempts to run it. This option applies when the client and
distribution point are connected on a fast (LAN) network boundary.
Note: Client Cache Settings
Configuration
Manager 2007 uses the client cache if a program is configured to
download and run locally to the system. The cache folder is stored on
the same partition as the operating system, by default in the %windir%\System32\CCM\cache directory.
The
default size of the client cache has increased in ConfigMgr 2007. It is
now 5GB, and allocates space as required in the cache. If less than 5GB
of free space is available, ConfigMgr uses a percentage of the
available free space.
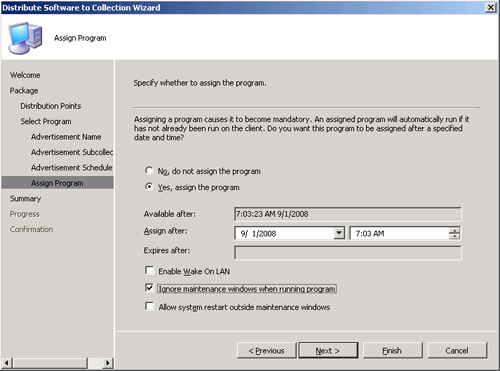
| 6. | The
Assign Program screen specifies whether a program is assigned and how
the assignment is configured. The fields on this page include the
following:
- Assignment—
The two options are “No, do not assign the program” and “Yes, assign
the program.” This defaults to the No option, making the advertisement
available for users to install, although it does not force installing
the software package. The unassigned approach is useful for programs
that are not mandatory and during package testing phases.
Depending on the configuration of the Advertised Programs Client agent , users may be notified that there is software available to
install. When connecting to remote systems via Remote Desktop Protocol
(RDP), you must be logged in to the console session to see these
notifications. - Assign after— Configures the date and time when the advertisement is assigned to the systems in the collection.
- Enable Wake On LAN— Specifies whether to send a Wake On LAN transmission to wake up the client computer before the advertisement occurs.
This option defaults to unchecked. - Ignore maintenance windows when running program— If this option is checked, the program will install regardless of any defined maintenance windows. If this option is unchecked, the software will not distribute until a maintenance window occurs.
Maintenance
windows are defined on the collection level. To configure a maintenance
window, right-click the collection and choose Modify Collection
Settings. This option defaults to unchecked. - Allow system restart outside of maintenance windows—
If this option is checked and the program requires a reboot, the system
will restart regardless of any defined maintenance windows.
This option defaults to unchecked.
The example in Figure 6
will deploy antivirus software as assigned, effective the time the
advertisement was created. ConfigMgr will ignore any maintenance
windows when running the program, although it is not using Wake On LAN
and system restarts outside of the maintenance window are not allowed.
|
After
completing the wizard process, you have distributed your first software
package using Configuration Manager 2007! The next logical step is to
track how the package and advertisement are functioning. You can
monitor the status in the ConfigMgr console by navigating to Site
Database -> System Status section. Perform the following steps:
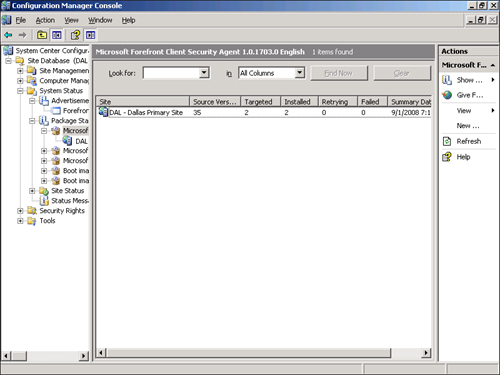
1. | The
first step is to check on the status of the package being distributed.
You will want to know whether the package was sent successfully to the
specified distribution points. In the System Status screen, open the
Package Status -> Microsoft Forefront Client Security Agent package.
Here, you can track the status of the package and whether it deploys
correctly to the distribution points. Figure 7
shows two targeted distribution points and two installed distribution
points, meaning the distribution points successfully received the
software package.
If issues are referenced on this screen (such as distribution points in
a retry or failed state), right-click and choose Show Messages to track
either information, warning, error, or all messages related to the push
of this software package to these distribution points.
| 2. | The
next step is to check on the status of the advertisement because the
package was verified as successfully sent to the distribution points.
Do this from the System Status section of the ConfigMgr console, this
time opening Advertisement Status -> Forefront Client Security
Agent. From here, you can see how many systems have received the
advertisement, how many have failed, how many have started, and how
many have program errors or successes.
|
|