Configuration
This section provides
the instructions for creating database and JMS resources that are
required by the tutorial. Start your database and WebLogic admin servers
and complete the following configuration steps.
Installing the database schema
First, create a table in the database owned by the soademo user:
1. Make sure your database is running.
2. Create the soademo user using the following script. It is OK to run this script even if the soademo user already exists. From a command line, cd to the directory and run the following replacing pw with your own system user's password: c:\po\sql
cd c:\po\sql sqlplus system/pw @create_soademo_user.sql
3.
Now, create the credit card info table. It is OK to run this script
again even if the table already exists. Make sure that you run it with
the soademo user for proper ownership:
cd c:\po\sql sqlplus soademo/soademo @create_creditrating_table.sql
Creating the JMS resources
Next you must create a JMS
resource. You create this by using the WebLogic Server console. First
you create the JMS queue and connection factory and then a connection
pool for that connection factory.
1. Make sure thatyour server has started using the instructions above. If it is not already open, open http://localhost:7001/console to start the Web Logic ServerWLS) console and log in using weblogic/welcome1. Replace the host and port and username/password to match your own configuration if necessary. (
First add the JMS Queue:
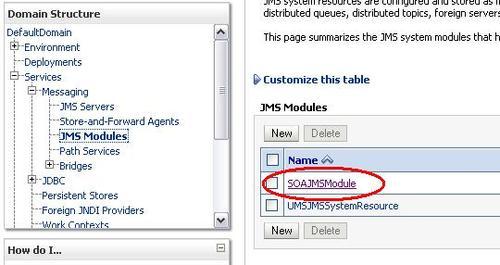
1. In the WLS console, on the left navigation bar, expand Services | Messaging and click on JMS Modules.
2. Click on SOAJMSModule (click on the name, not the checkbox).
3. In the Summary of Resources table, click on New.
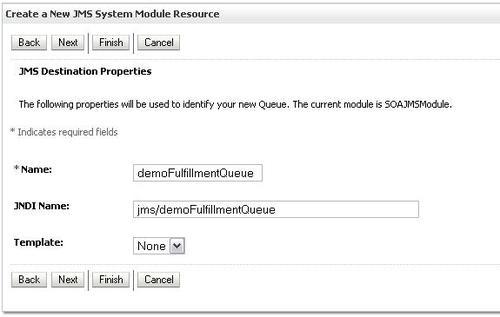
4. Select the resource type: Queue and click on Next.
5. Enter Name as demoFulfillmentQueue and JNDI Name as jms/demoFulfillmentQueue.
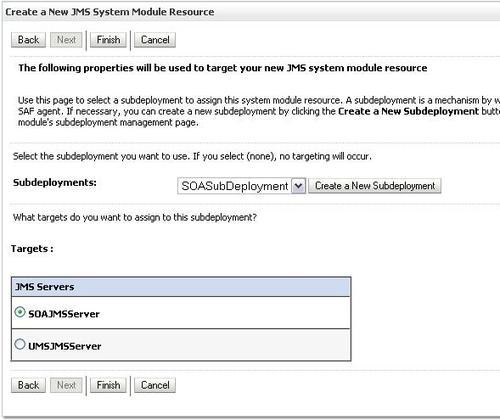
7. From the Subdeployments list, select SOASubDeployment.
8. From the JMS Servers list, select SOAJMSServer.
Now add the Connection Factory.
1. In the Summary of Resources table, click on New.
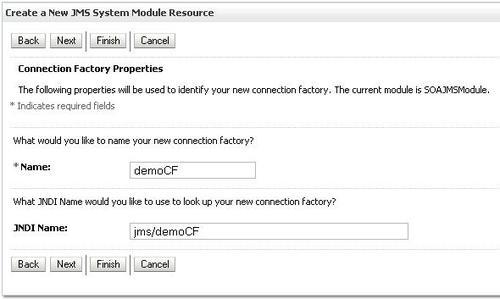
2. Select the resource type: Connection Factory and click on Next.
3. Enter Name as demoCF and JNDI name as jms/demoCF.
You should see both the queue and the connection factory listed in the Summary of Resources as shown here:

Now add the connection
pool. The connection pool is configured in the JMSAdapter application
and uses a Deployment Plan. First, create a directory to contain that
plan.
1. Create a directory here: C:\Oracle\Middleware\home_11gR1\Oracle_SOA1\soa\JMSPlan (adjust the path according to your installation).
2. In the left navigation bar of the WLS console, click on Deployments.
3. Click on JMSAdapter (click on the name, not the checkbox).
4. Click the Configuration tab and then the Outbound Connection Pools tab.
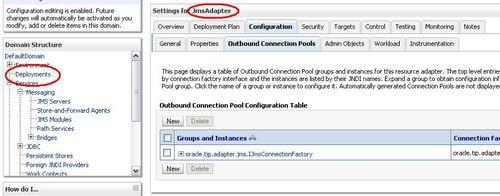
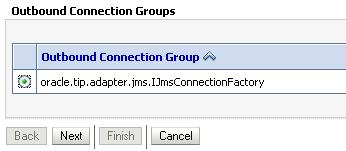
6. Select the oracle.tip.adapter.jms.IJmsConnectionFactory factory.
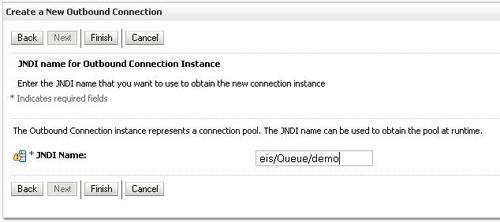
10.
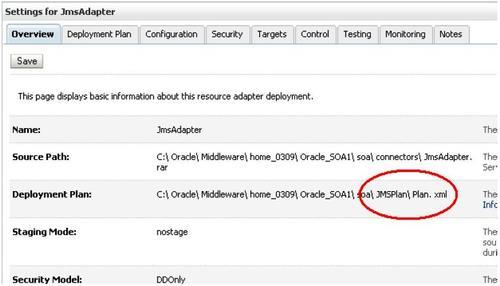
At this point, you are asked for the deployment plan location. Click on
the path to the directory you created earlier and enter Plan.xml for the plan name.
If you are not asked
for the plan location at this time, it means you already have a plan for
the JMS adapter from an existing configuration. That plan file will be
used for this configuration. You can skip ahead to the next step to hook
up the connection factory.
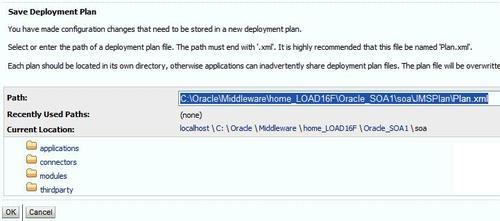
12. Verify the plan name is set to Plan.xml in the JMSPlan directory.
Go back to the new connection pool to hook up the connection factory:
1. Click on the Configuration tab.
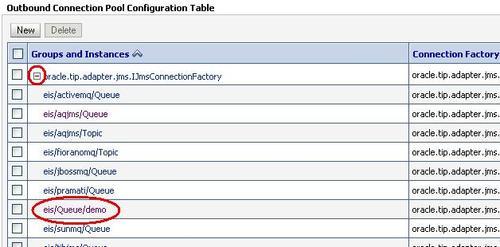
2. Expand the group: oracle.tip.adapter.jms.IJmsConnectionFactory.
3. Click on eis/Queue/demo.
4. To change a property value you must enter the value and then press the Enter key and then click on the Save button. Do not use the Tab key after entering the value. Follow these instructions exactly:
i. Select the cell on the far right for the property ConnectionFactoryLocation.
ii. An edit box appears. Type in the value jms/demoCF and press the Enter key.
iii. You must use the Enter key for the value to be entered in the field.

5. Click on Save. You must use the Save button to save the value.
6. Now the adapter must be redeployed. Click on Deployments in the left navigation bar.
7. Select the checkbox next to JMSAdapter.
8. Click on Update at the top of the Deployment table.
9. Verify that the correct deployment plan is selected.
Creating the database resource
The tutorial application
requires a database data source. You create this using the WebLogic
Server console. First you create the data source and then you create a
connection pool for that data source.
1. Make sure that your admin server is started using the instructions provided earlier. If it is not already open, open http://localhost:7001/console to open the Web Logic Server (WLS) console and log in using weblogic/welcome1. Replace the host and port and username/password to match your own configuration.
2. On the left navigation bar, click on Services | JDBC | Data Sources.
3. In the data source table, click on New.
4. Enter the data source information:
5. Click on Next, click on Next again.
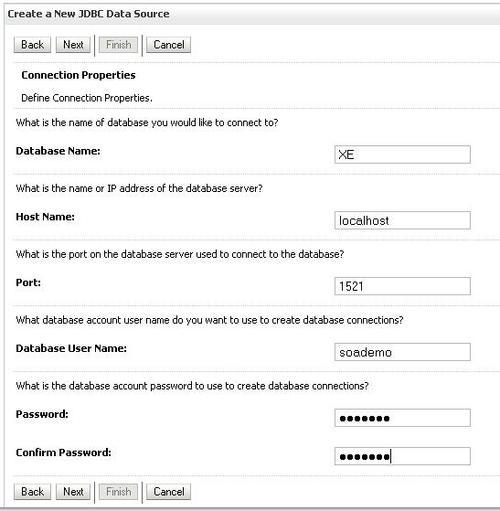
6. Enter the database information:
Database Name: XE (your database SID)
Host name: localhost (host where your database is running)
Port: 1521 (set according to your configuration)
Database user name: soademo (created in previous section)
Database user password: soademo
8. Click on Test Configuration. Confirm success message at the top of the page.
10. Select the Target server where your SOA component is running: soa_server1.
Now create the
connection pool. You have to edit the database adapter application and
it uses a Deployment Plan. First, create a directory to contain that
plan.
1. Create a directory here: C:\Oracle\Middleware\home_11gR1\Oracle_SOA1\soa\DBPlan (adjust the path according to your installation).
2. In the left navigation bar, click on Deployments.
3. Click on the DbAdapter application (click on the name, not the checkbox).
4. Click on the Configuration tab, and then click on the Outbound Connection Pools tab.
6. Select the radio button for javax.resource.cci.ConnectionFactory and click on Next.
7. Enter the JNDI Name as: eis/DB/soademoDatabase.
8.
This is not the same value as in the previous step. It matches the
value you enter in your database connection you create later when
building your application using JDeveloper. Click on Finish.
9.
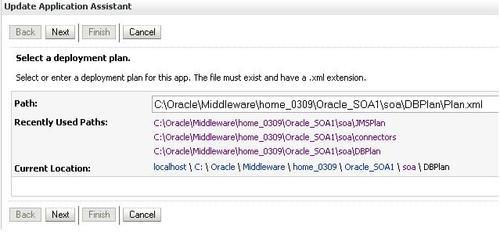
At this point, you are asked for the deployment plan location. Click on
the path to the directory you created earlier and enter the deployment
plan name Plan.xml.
If you are not asked for
the plan location at this time, it means you already have a plan for the
DB adapter from an existing configuration. That plan file will be used
for this configuration. You can skip ahead to the next step to hook up
the connection factory.
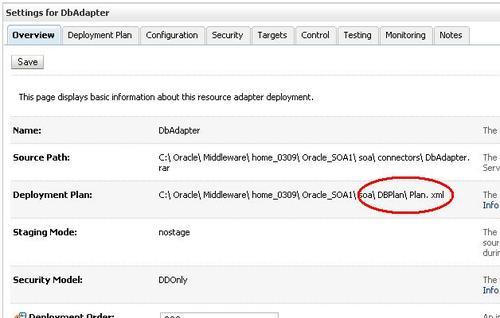
11. Confirm the name of the deployment plan.
12. Now, edit the connection pool to reference the data source. Click on the Configuration tab, expand the connection factory and click on your new connection pool, eis/DB/soademoDatabase (click on the name, not the checkbox).
13. To change a property value you must enter the value and then press the Enter key and then click on the Save button. Do not use the Tab key after entering the value. Follow these instructions exactly:
i. In the Properties table, select the box to the far right of xADataSource.
ii. The edit box appears. Type in your data source name that you created above: jdbc/soademoDatabase.
iii. Press the Enter key to apply the value. You must use the Enter key for the value to be entered in the field.
14. Select Save. You must use the Save button to save the value.
15. Go back to the main Deployments page to update the DbAdapter as follows. Click on Deployments in the left navigation bar.
16. Select the checkbox next to DbAdapter.
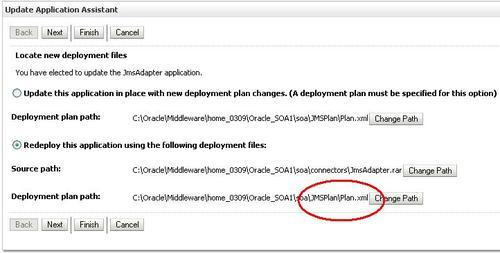
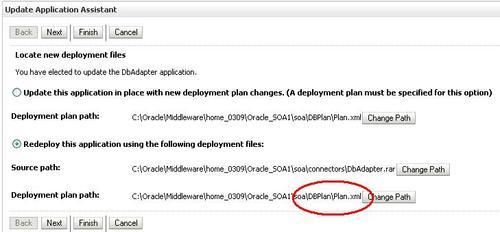
18. Select Redeploy this application and confirm the deployment plan location.
20. Confirm that the connection pool is added by going back to the DbAdapter | Configuration | Outbound Connection Pools and expanding the connection factory listed there.
21. Confirm the value of the xADataSource property that you entered previously. It should be jdbc/soademoDatabase. Look closely! This is the most common place where the configuration is in error.
22. Go back to the JMSAdapter Outbound Connection Pools tab and review the connection factory property value for the eis/Queue/demo connection pool that you entered previously. It should be jms/demoCF. Look closely! This is the most common place where the configuration is in error.
When the two resources are
added and confirmed, you are ready to start building the SOA composites.
Continue with the next step to test your installation.
Testing your installation
This section shows you how to verify your installation and configuration.
After installing SOA Suite and JDeveloper, confirm that you have the correct 11.1.1.1.0 version.
You have three things to check:
1. JDeveloper: Start J Developer and select from the toolbar, Help | About. You should see this build:. JDEVADF_11.1.1.1.0_GENERIC_090615.0017.5407
2. SOA Composite Editor: Select the Version tab on the JDeveloper Help | About dialog. You should see this value: 11.1.1.0.0.52.19. It is OK that this includes 11.1.1.0.0 instead of 11.1.1.1.0.
3. SOA Server: Run soaversion.cmd from C:\Oracle\Middleware\home_11gR1\Oracle_SOA1\bin and you should see this build:. PCBPEL_11.1.1.1.0_GENERIC_090618.1440.5219
Now verify the database table you created for the credit card information. This table was created in the Configuration section earlier.
1. Use SQLPlus to show the table. Be sure to connect using the soademo user.
sqlplus soademo/soademo
select * from creditcardinfo;
Next, verify your database and JMS resources. These resources were created in the Configuration section earlier.
2. In the WLS console, on the left navigation bar, expand Services | JDBC | Data Sources. It is OK if you have a newer version that matches the version from the Update Center.
3. Confirm that you see the resource soademoDatabase.
4. On the left navigation bar, expand Services | Messaging and click on JMS Modules.
5. Click on SOAJMSModule (click on the name, not the checkbox).
6. In the Summary of Resources, confirm you see the queue and the connection factory, demoFulfillmentQueue and demoCF.
7. Confirm that the database connection pool is added by going to Deployments in the left navigation bar and clicking on DbAdapter | Configuration | Outbound Connection Pools and expanding the eis/DB/soademoDatabase connection factory listed there.
8. Confirm the value of the xADataSource property that you entered previously. It should be jdbc/soademoDatabase.
9. From Deployments, click on JMSAdapter, then click the Outbound Connection Pools tab and review the connection factory property value for the eis/Queue/demo connection pool. It should be jms/demoCF.
Oracle Service Bus installation
This is one of the
independent labs . When you are
ready to do this lab, come back here and install OSB. You do not need to
install OSB until you are ready to do the OSB lab.
2. Execute the program osb1031_wls103_win32.exe to start the installer.
3. On the Welcome screen, click on Next.
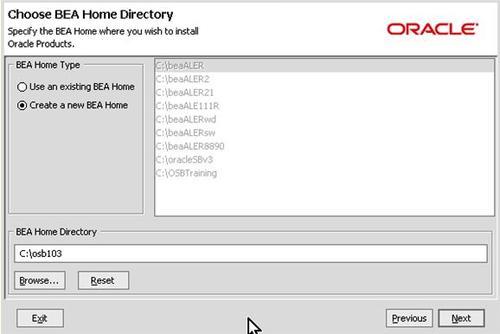
4. Select Create a new BEA Home.
5. Enter the location where you would like to install the product.
Make sure you do
not specify the Middleware home of the SOA Suite Install. OSB will run
on a different WebLogic domain than SOA Suite.
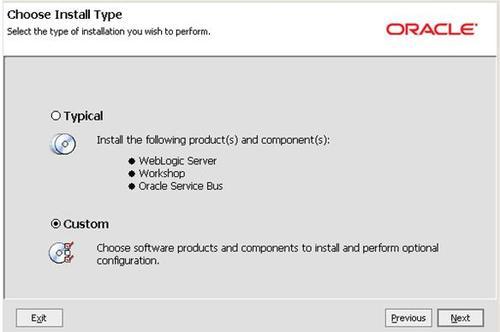
7. Choose Custom and click on Next.
8. There are two components unchecked, namely Server Examples and Service Bus Examples. Scroll down and check the Service Bus Examples. The lab requires the Service Bus Example server to be installed.

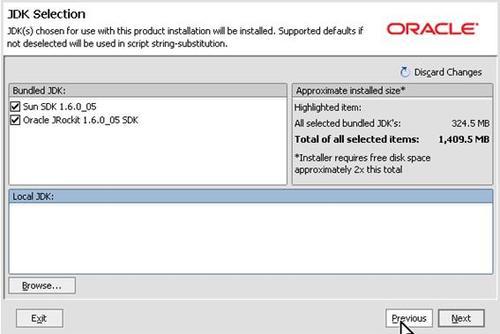
10. Accept the default selections for the JDK and click on Next.
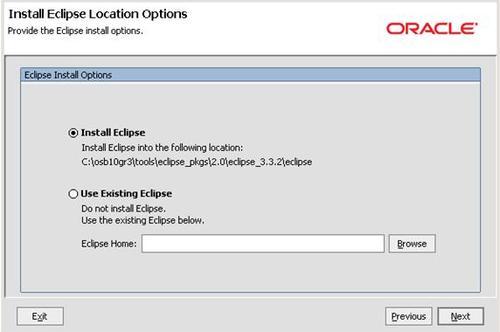
11. Accept the default to Install Eclipse and click on Next.
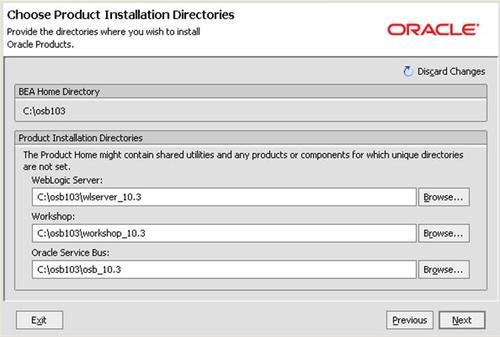
12. Accept the default directories for the installation and click on Next.
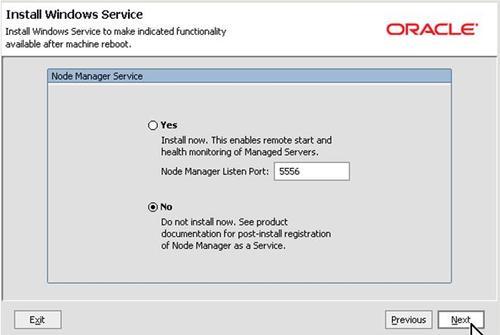
13. Accept the default to skip the Windows Service installation and click on Next.
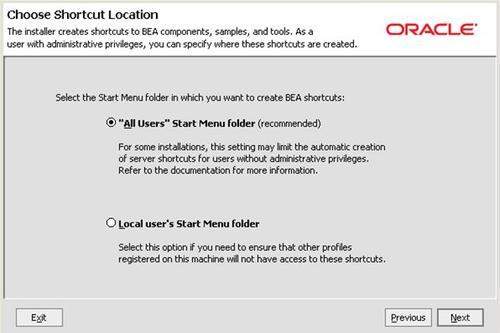
14. Choose All Users to give all accounts access to the product shortcuts, then click onNext.
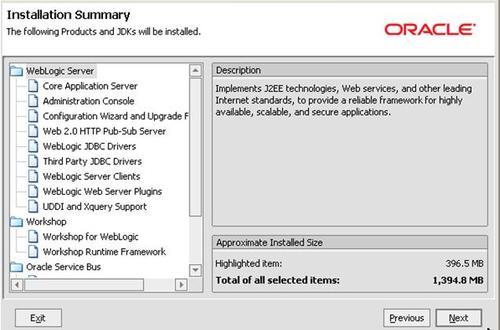
15. The Installation Summary page is displayed. Click on Next. Installation begins.
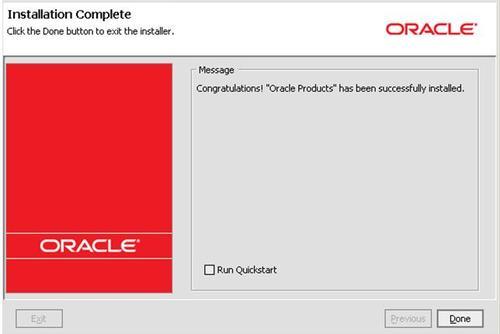
16. When installation is complete, uncheck Run Quickstart and click on Done.
Testing your OSB installation
Now verify that the
installation was successful. You use the Example Server created during
installation. This example server is the only server in an OSB Weblogic
domain and serves the function of both an admin server and an OSB
managed server.
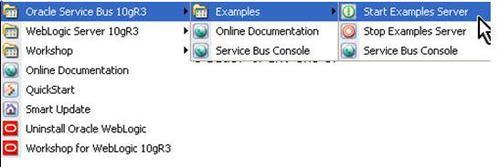
1.Launch the Oracle Service Bus Examples Server using the start menu that was created when you installed the product.
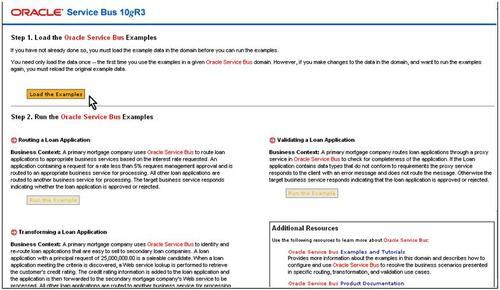
2.
The OSB web application automatically loads and displays a page similar
to the one shown here. Load the examples by clicking on the Load the Examples button.
3.
Test the example code by executing any one of the use scenarios shown
on the page. If any one of them is successful, the system has passed the
smoke test.
Removing samples (optional)
The lab uses the Examples Server but not the examples themselves. You can remove the examples if desired.
1. If the OSB examples server is not running, start it up by selecting the Start Examples Server menu choice.
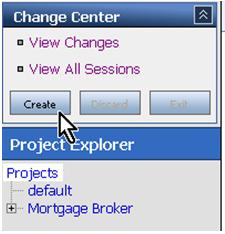
3. In the Change Center on the top left, click on the Create button to start a change session.
4. Scroll down and on the left navigation panel click on Project Explorer.
5. Delete the Mortgage Broker project by clicking the trash can.

6. Click on the Activate button to commit the OSB configuration change.
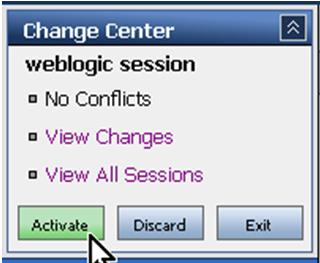
7. Then click on the Submit button.
Uninstalling OSB
To uninstall the Oracle Service Bus, select Uninstall Oracle WebLogic
from the start menu. Make sure that you are uninstalling WebLogic for
OSB and not WebLogic for SOA Suite. Move your mouse over a file in the
group menu to see the directories where the files are located to be sure
you have the correct one.