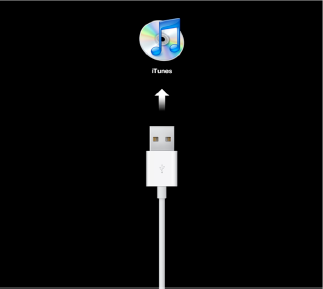
To activate your iPad and load up your music and
videos, you will need to connect it to iTunes on your computer. iTunes
is also required to backup your iPad and later restore it.
If you don't have iTunes, or are
not sure if you have the latest version, then you will have to upgrade.
Connecting your iPad to iTunes the first time will activate or tie your
iPad to your Apple ID. Once you do that, you can buy songs, movies,
books and just about anything else right from your iPad or in iTunes on
your computer.
1. Install or Upgrade iTunes on Your Computer
As you have seen from your iPad screen, you need to connect your iPad to iTunes (version 9.1 or higher) loaded on your computer Figure 1). This means you may need to upgrade to or install the latest version.
If you need to upgrade iTunes to 9.1 or higher, start iTunes. If you are a Windows user, select Help and then Check for Updates; If you are a Mac user, select iTunes, and then Check for Updates. Follow the instructions to update iTunes.
If you do not have iTunes loaded on your computer, then open a web browser and go to www.itunes.com/download. Download the software from the link provided.
2. Connecting Your iPad to iTunes the First Time
Once you have installed
or upgraded to iTunes version 9.1 or higher, you are ready to connect
your iPad to iTunes on your computer.
|
Using the iTunes Home Sharing
feature, you can share your purchased content from the same iTunes
account (music, apps, videos, iBooks, and more) across authorized
computers on your home network. Also, you can sync any of the same
content to any iPod/iPhone/iPad under the same iTunes account.
|
|
By connecting your iPad to
iTunes, you will register or associate your iPad (via the device serial
number) to a particular iTunes Account (Apple ID).
|
The bonus of this approach
is that if you have purchased apps for an iPhone or iPod touch and other
content (music, videos, and more), then you can run all those apps on
your iPad! Note that you can authorize an iPad on more than one iTunes
account; however, all content you sync to that iPad has to originate
from a single computer. So you need to select your "main" computer to
sync with your iPad.
|
|
3. Start up iTunes
If iTunes is not already running, double-click the iTunes icon on your desktop.
Mac users may have to click the Finder icon, select the Go menu, and then Applications to look for iTunes. (The Mac shortcut is Shift+Command+A)
Windows users, click on the Start menu or Windows logo in the lower left corner, select All Programs, then iTunes.
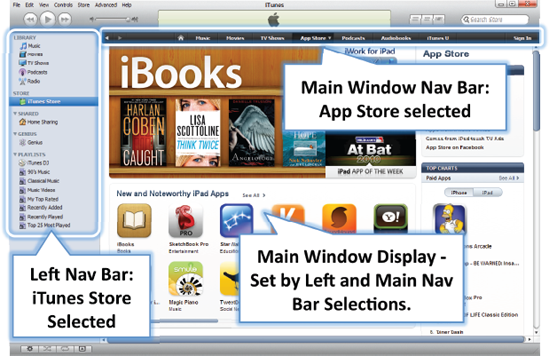
After you start iTunes, it should open and have the left and main window nav bars look similar to the image shown on Figure 2. The main window content may look quite different.
NOTE
What is shown in the main
window on your iTunes will look quite different depending on what you
select in the left nav bar and the top nav bar. In Figure 1-3,
the iTunes Store is selected in the left nav bar and the App Store is
selected in the main nav bar so we see App Store related content in the
main window.
4. Registering or Activating your iPad the First Time
Once you have iTunes
installed or updated and running on your computer, you are ready to
connect your iPad for the first time and get it registered or activated
so you can start using it.
NOTE
You know if your iPad is already registered if you see either Slide to Unlock at the bottom of the screen or a screen of icons when you tap the Home button on the bottom of your device.
Plug in the white USB connection cable that was supplied with your iPad to an available USB port on your computer.
NOTE
You need to use the USB cable instead of Bluetooth or Wi-Fi to connect your iPad to iTunes on your computer.
When you connect your iPad to
your computer the first time, your Windows computer should
automatically install the necessary drivers. If you are on a Mac
computer, Apple recommends that you upgrade to the latest version of the
operating system before using your iPad.
Then, iTunes will launch, if you have not already started it.
In order to see the Setup screen, you may need to click iPad under DEVICES in the left nav bar. Then you should see the new iPad setup screen, as shown in Figure 3.
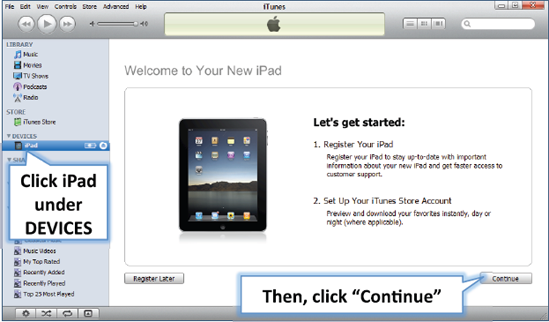
Click the Continue button to see the Apple iPad License Agreement, as shown in Figure 4.
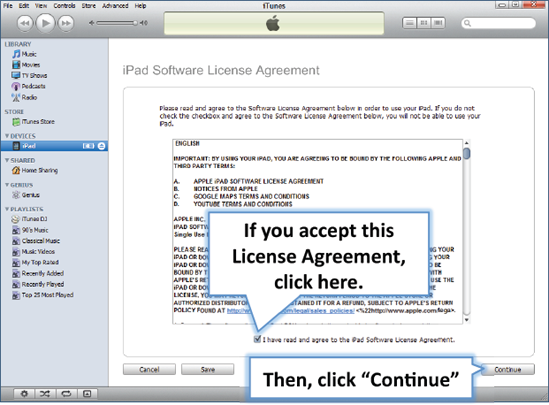
In order to continue, check the box under the License Agreement and click the Continue button.
You will then be given the opportunity to sign-in using your Apple ID or create a new Apple ID (Figure 5).

Enter your Apple ID and password or click I do not have an Apple ID and select your country.
Then click the Continue button And proceed as follows.
If
you tried to enter your Apple ID and password and received an error
message about "additional security information is required," .
If
you successfully logged in with your Apple ID, then you will see either
the main iTunes window or an ad promoting the MobileMe service.
If you do not have an Apple ID and need to create a new one, then read the next section.