Choosing Dialog Box Options
A dialog box is a window that opens when you click a Dialog Box Launcher. Dialog Box Launchers
are small icons that appear at the bottom corner of some groups. When
you point to a Dialog Box Launcher, a ScreenTip with a thumbnail of the
dialog box appears to show you which dialog box opens. A dialog box
allows you to supply more information before the program carries out the
command you selected. After you enter information or make selections in
a dialog box, click the OK button to complete the command. Click the
Cancel button to close the dialog box without issuing the command. In
many dialog boxes, you can also click an Apply button to apply your
changes without closing the dialog box.
Choose Dialog Box Options
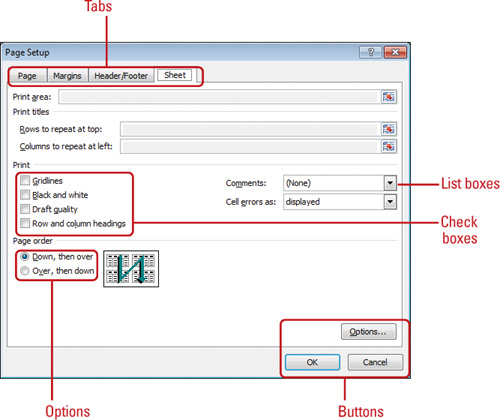
All dialog boxes contain the same types of options, including the following:
- Tabs. Click a tab to display its options. Each tab groups a related set of options.
- Option buttons. Click an option button to select it. You can usually select only one.
- Up and down arrows. Click the up or down arrow to increase or decrease the number, or type a number in the box.
- Check box. Click the box to turn on or off the option. A checked box means the option is selected; a cleared box means it’s not.
- List box. Click the list arrow to display a list of options, and then click the option you want.
- Text box. Click in the box and type the requested information.
- Button. Click a button to perform a specific action or command. A button name followed by an ellipsis (...) opens another dialog box.
- Preview box. Many dialog boxes show an image that reflects the options you select.
|
Rather than clicking to move
around a dialog box, you can press the Tab key to move from one box or
button to the next. You can also use Shift+Tab to move backward, or
Ctrl+Tab and Ctrl+Shift+Tab to move between dialog box tabs.
|
Using the Status Bar
The Status bar
appears across the bottom of your screen and displays workbook
information—such as cell mode, Office theme name, and current display
zoom percentage—and some Excel controls, such as view shortcut buttons,
zoom slider, and Fit To Window button. With the click of the mouse, you
can quickly customize exactly what you see on the Status bar. In
addition to displaying information, the Status bar also allows you to
check the on/off status of certain features, such as Signatures,
Permissions, Selection Mode, Page Number, Caps Lock, Num Lock, Macro
Recording and Playback, and much more.
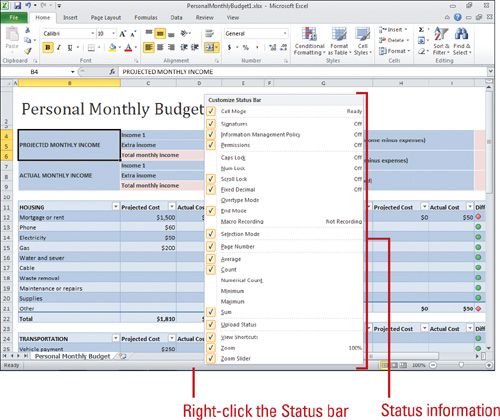
Add or Remove Items from the Status Bar
- Add Item. Right-click the Status bar, and then click an unchecked item.
- Remove Item. Right-click the Status bar, and then click a checked item.
Creating a Blank Workbook
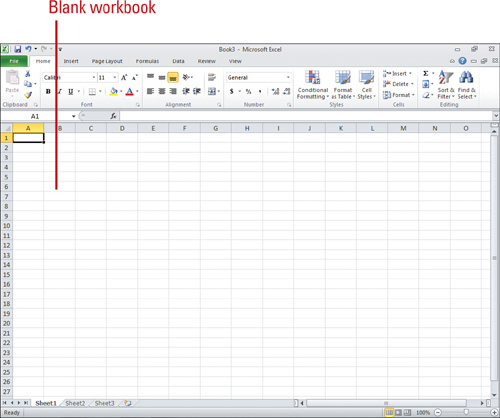
When
you start Excel, the program window opens with a new workbook so that
you can begin working in it. You can also start a new workbook whenever
Excel is running, and you can start as many new workbooks as you want.
Each new workbook displays a default name (“Book1,” “Book2,” and so on),
numbered according to how many new workbooks you have started during
the work session until you save it with a more meaningful name. The
workbook name appears on the title bar, and taskbar buttons.
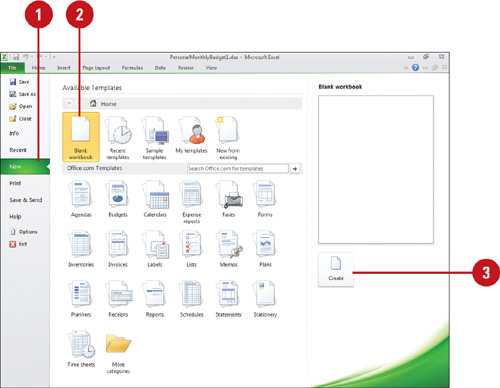
Start a Blank Workbook Within Excel
 Click the File tab, and then click New.
Timesaver
To create a blank Office document without the New screen, press Ctrl+N.
 Click Blank Workbook.
 Click Create.
A new blank workbook appears in the Excel window.