This section discusses using predefined filters and
highlights, which allow you to zero in on specific subsets of data for
more effective communication and reporting. Although Project comes
equipped with many predefined filters, you can also create your own.
This section also covers how to create custom filters.
1. Using Predefined Filters
Project comes with
predefined filters you can use as is. Filtering works by displaying only
a set of line items (phases, tasks, milestones) based on a specific
criterion or condition. When the specified condition is applied, Project
presents those items that satisfy the condition in the view in which
you apply the filter. For example, as shown in Figure 1,
if you want to view milestones only, you can apply the Milestones
filter, which is based on the condition of the Milestone field being
equal to Yes. To apply the Milestones filter, follow these steps:
In the Gantt Chart view, go to View tab => the Data group.
Beside the Filter button, click the drop-down list that says [No Filter].
From the drop-down list, select Milestones.
To clear a filter, you can select
Clear Filter or [No Filter] from the same filter list. At lower left in
the window, in the status bar area, Project displays Filter Applied if
you're running a filter.

Many useful filters appear in this list, such as the Using Resource filter. In Figure 2,
I've filtered by all the tasks David Blair is working on so I can meet
with him to review his workload on this project. When you apply the
Using Resource filter, you're prompted to select a resource from the
resource pool list.
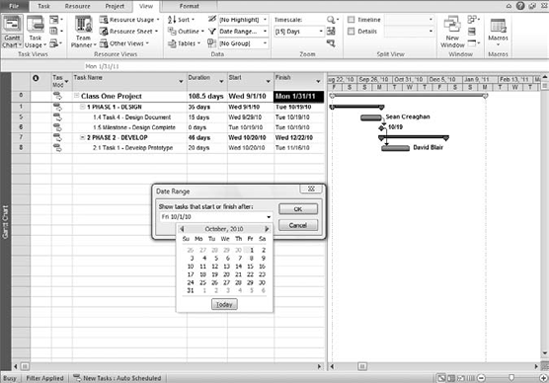
The Date Range filter lets you
focus on tasks over a specific period. For example, if you're getting
ready for a project-review meeting and you want to review the tasks that
are coming up for the next week or month, you can run the Date Range
filter. When you apply this filter, you're prompted for the following
two items:
Figure 3 is an example of a Date Range filter that displays only tasks for the month of October.
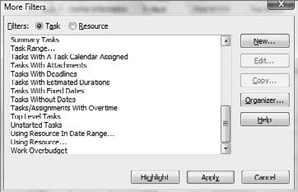
Project shows the most
commonly used filters in the initial drop-down list, but you can access
additional predefined filters, as shown in Figure 4. Follow these steps:
Select Task tab => Data group => Filter button drop-down list => More Filters.
In the More Filters dialog box, scroll down to review and select other filters.

The next section discusses how
to create custom filters. Take some time to review the predefined
filters, because they come in handy when you need to communicate in
various ways to project stakeholders.
2. Using Highlights
Highlights are similar to
filters in that they use the same criteria and conditions to focus on a
specific subset of data. However, instead of removing line items from
the project plan that don't match a condition, highlighting keeps all
the line items in view and highlights the items that meet the condition.
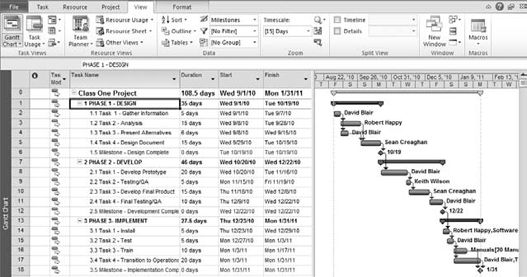
For example, you may want
to highlight milestones or the tasks that a specific resource is
working on. To do so, you use the highlight function, as shown in Figure 5. In this example, I've highlighted the milestones by following these steps:
Go to Task tab => Data group, and click the Highlight drop-down list.
The default color for
highlighted tasks is blue. You can change the font characteristics of
highlights by modifying the text styles. As shown in Figure 6, to change the font or color of the highlights, follow these steps:
Go to Format tab => Format group, and click the Text Styles button.
In the Text Styles dialog box, from the Item to Change drop-down list, select Highlighted Tasks.
Select the appropriate characteristics. You can apply different fonts, styles, sizes, and colors as desired.
