IT tutorials
 
Technology
 

Microsoft Lync Server 2010 : Windows, Browser, and Silverlight Clients - Installing the Client

11/16/2013 8:27:23 PM
- Free product key for windows 10
- Free Product Key for Microsoft office 365
- Malwarebytes Premium 3.7.1 Serial Keys (LifeTime) 2019

The Lync 2010 client for Windows comes in two installer flavors: 32-bit and 64-bit. The functionality is identical, so simply choose the version that matches the operating system you are running. To install the client, follow these steps:

1. Double-click LyncSetup.exe.

2. When prompted by User Account Control, click Yes.

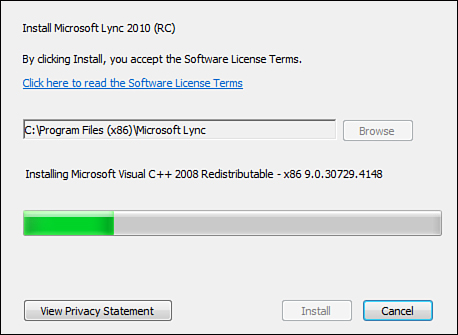
3. Browse to the location where you want to install the Lync client and choose whether to share information with Microsoft. Click Install, which will launch the installer as shown in Figure 1.

Figure 1 Installing the Lync 2010 Client

image

At this step, you might notice two items that seem slightly odd. First, the default installation path for the 64-bit installer is c:\Program Files (x86). Second, if the 32-bit version of Visual C++ redistributable isn’t already installed, it is installed as part of the Lync client installation. Although the installer is 64-bit, the client is actually 32-bit. Attempting to install through the 32-bit installer on a 64-bit operating system generates an error telling you it is the incorrect version.

4. When the installation is finished, click Close. If the box is checked, Lync begins.

When the Lync 2010 client launches, it will be at the sign-in prompt. Enter the SIP address of the user you want to log on as and click Sign In, as shown in Figure 2.

Figure 2 Signing in with Lync 2010 Client

image

If the DNS records are configured correctly to support Lync Server 2010, you are prompted for Active Director credentials. If the necessary SVR records are not present, manually override the logon setting with these steps:

1. Click the downward-pointing arrow located to the right of the gear icon in the upper right of the client.

2. Choose Tools and then choose Options.

3. Next to the Sign-in address, click Advanced.

4. Choose Manual configuration and enter the name of the Lync 2010 Server.

5. Click OK, and then click OK again.

6. Click Sign In.

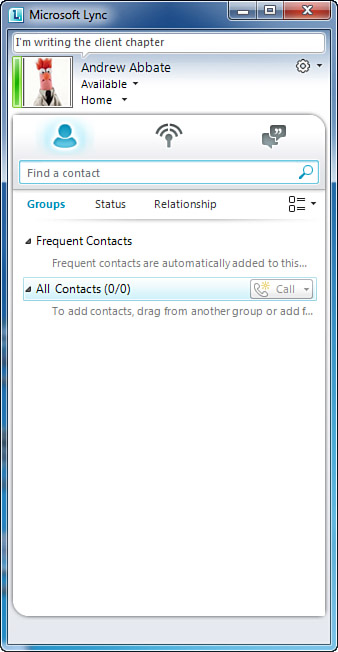
At this point, you should see the Lync client logged in successfully, as shown in Figure 3.

Figure 3 The Lync 2010 Client

image

 
Others
 
- Managing Windows Server 2012 Storage and File Systems : TPM and BitLocker Drive Encryption (part 13) - Managing and troubleshooting BitLocker
- Managing Windows Server 2012 Storage and File Systems : TPM and BitLocker Drive Encryption (part 12) - Enabling BitLocker on operating-system volumes
- Managing Windows Server 2012 Storage and File Systems : TPM and BitLocker Drive Encryption (part 11) - Enabling BitLocker on removable data drives
- Managing Windows Server 2012 Storage and File Systems : TPM and BitLocker Drive Encryption (part 10) - Enabling BitLocker on fixed data drives
- Managing Windows Server 2012 Storage and File Systems : TPM and BitLocker Drive Encryption (part 9) - Configuring and enabling BitLocker Drive Encryption
- Managing Windows Server 2012 Storage and File Systems : TPM and BitLocker Drive Encryption (part 8) - Deploying BitLocker Drive Encryption
- Managing Windows Server 2012 Storage and File Systems : TPM and BitLocker Drive Encryption (part 7) - Using Network Unlock
- Managing Windows Server 2012 Storage and File Systems : TPM and BitLocker Drive Encryption (part 6) - Setting permitted encryption types
- Managing Windows Server 2012 Storage and File Systems : TPM and BitLocker Drive Encryption (part 5) - Hardware encrypted drives, Optimizing encryption
- Managing Windows Server 2012 Storage and File Systems : TPM and BitLocker Drive Encryption (part 4) - Introducing BitLocker Drive Encryption
 
 
Top 10
 
- Microsoft Visio 2013 : Adding Structure to Your Diagrams - Finding containers and lists in Visio (part 2) - Wireframes,Legends
- Microsoft Visio 2013 : Adding Structure to Your Diagrams - Finding containers and lists in Visio (part 1) - Swimlanes
- Microsoft Visio 2013 : Adding Structure to Your Diagrams - Formatting and sizing lists
- Microsoft Visio 2013 : Adding Structure to Your Diagrams - Adding shapes to lists
- Microsoft Visio 2013 : Adding Structure to Your Diagrams - Sizing containers
- Microsoft Access 2010 : Control Properties and Why to Use Them (part 3) - The Other Properties of a Control
- Microsoft Access 2010 : Control Properties and Why to Use Them (part 2) - The Data Properties of a Control
- Microsoft Access 2010 : Control Properties and Why to Use Them (part 1) - The Format Properties of a Control
- Microsoft Access 2010 : Form Properties and Why Should You Use Them - Working with the Properties Window
- Microsoft Visio 2013 : Using the Organization Chart Wizard with new data
Technology FAQ
- Is possible to just to use a wireless router to extend wireless access to wireless access points?
- Ruby - Insert Struct to MySql
- how to find my Symantec pcAnywhere serial number
- About direct X / Open GL issue
- How to determine eclipse version?
- What SAN cert Exchange 2010 for UM, OA?
- How do I populate a SQL Express table from Excel file?
- code for express check out with Paypal.
- Problem with Templated User Control
- ShellExecute SW_HIDE
programming4us programming4us