Before you can install your new
certificate locally, you need to get the Symantec intermediate
certificates added to your machine. To do this, you should follow the
instructions from the Symantec site that are also linked in the email with your certificate.
The intermediate certificates are Symantec’s
own that ensure that the chain of certificates are trusted on your
machine. After you have followed those directions to install the
intermediate certificates, you can simply use the pickup link, as shown
in Figure 1.

FIGURE 1 The pickup link in the Symantec email
The last step here is to
export the newly installed certificate as a .pfx file. This file will
be used in the next step to create the Application Enrollment Token
(AET) that is used to enable the phones and sign your code.
To export the certificate, you should start the
Microsoft Management Console (MMC) by running “mmc.exe” from a console
window. This is the same tool you used to install the intermediate
certificates as explained in the Symantec email. After MMC is started,
you might need to add the certificate plug-in. You can do this by
selecting the File, Add/Remove Snap-in option in the menu. Simply
select Certificate Snap-in to add it to the console. You can see the
certificate snap-in installed in Figure 2.
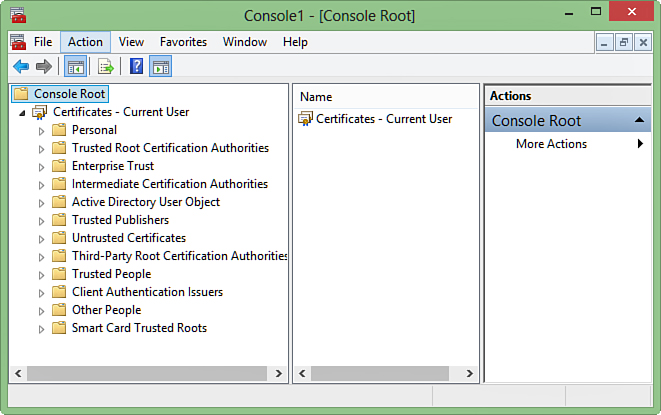
FIGURE 2 The MMC with the certificate snap-in installed
You’ll need to open the
Personal node of the Certificate folder and and find the Certificates
node under that. If you click that node, you’ll see a list of your
personal certificates including the new Symantec Mobile Code Signing
Certificate (it will have the company name displayed, as shown in Figure 3). Right-click the certificate and select All Tasks, Export to export the file to a .pfx file (also shown in Figure 3).
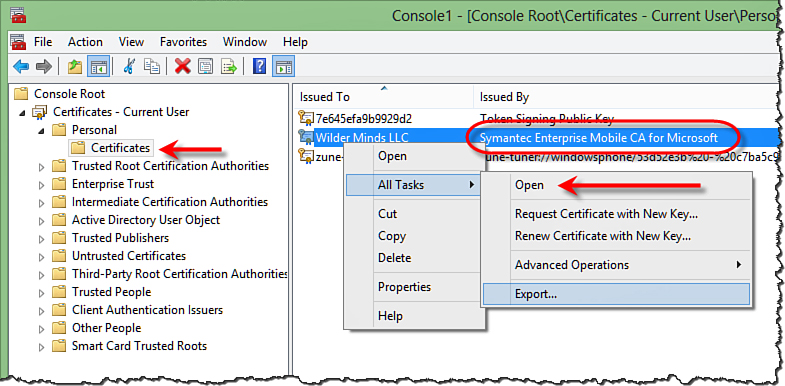
FIGURE 3 Exporting the new certificate
This will start a wizard that walks you through
the process. First, you’ll need to change the option to include the
private key in the exported .pfx file (as shown in Figure 4). This is used to create the AET file later.
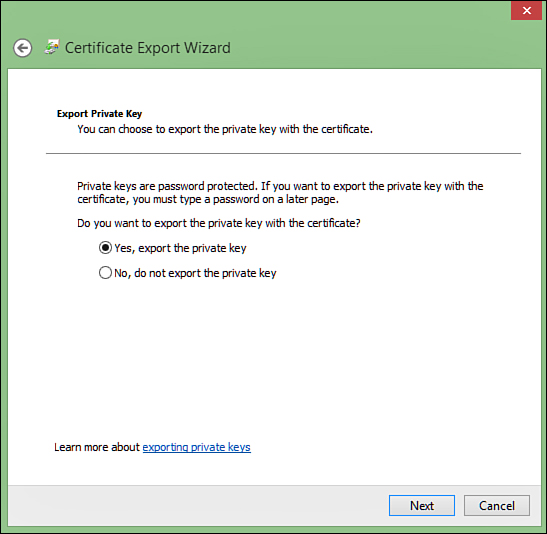
FIGURE 4 Including the private key in the .pfx file
Next, you need to specify that you want to
export the file as a Personal Information Exchange file (.pfx). Be sure
to enable Include All Certificates In The Certificate Path If Possible
to include all the intermediate certificates (as shown in Figure 5).
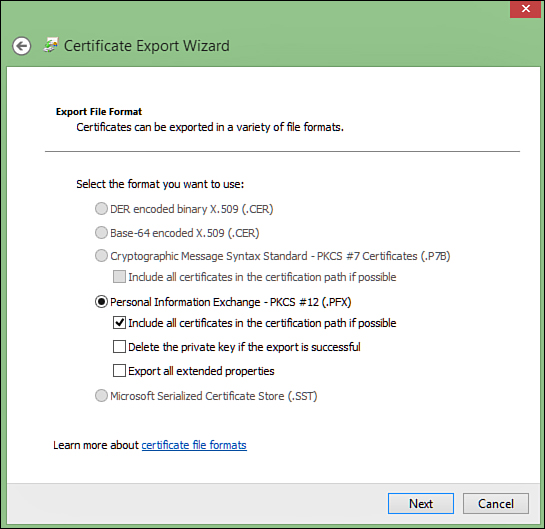
FIGURE 5. Specifying the .pfx file type
Because
including the private key was required, specifying a password is also
required. Be sure to remember this password because there is no way to
recover it except by re-exporting the .pfx file. This is shown in Figure 6.
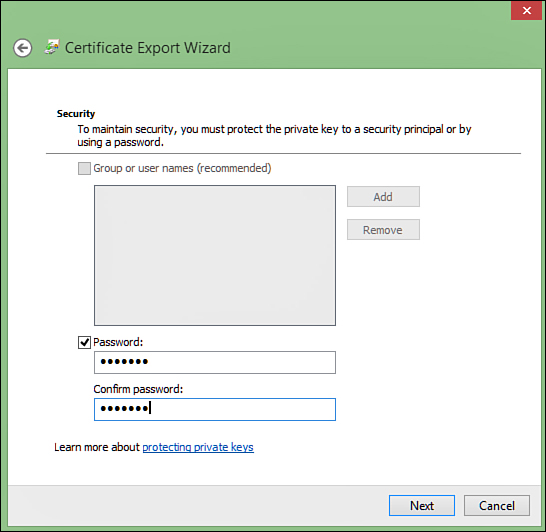
FIGURE 6 Including a password in the .pfx file (required)
Lastly, you’ll need to name the file (and location) for the .pfx file (as shown in Figure 7). After this is exported, you’ll be able to create the AET file and start deploying apps!
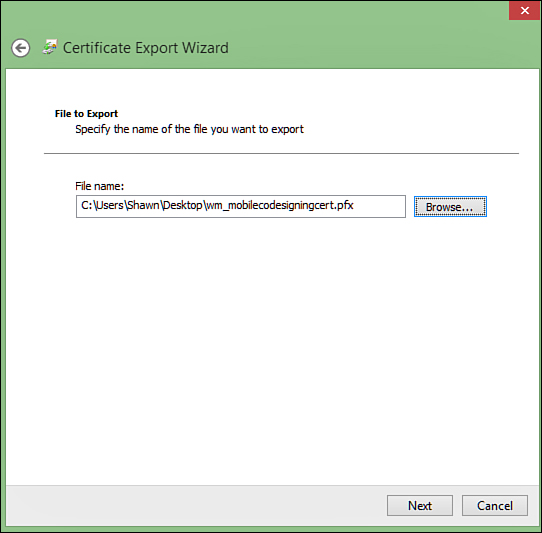
FIGURE 7 Naming the .pfx file