All these options require administrative privileges. We don’t go into great detail on what the various options mean because we assume you are working to comply with an existing policy.
Open Windows Firewall With Advanced Security
To get to the advanced configuration options for Windows Firewall, first open Windows Firewall from the System And Security item in the Control Panel. Then click the Advanced Settings link in the left pane. The firewall console, shown in Figure 1, opens.
FIGURE 1 Windows Firewall With Advanced Security console
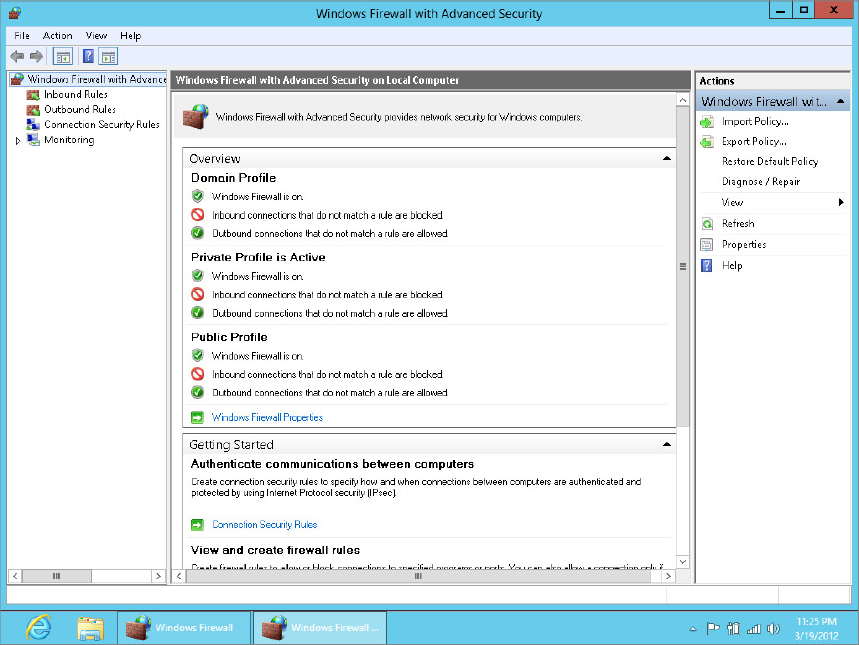
As you can see in the figure, you have three independently configurable profiles to work with:
- Domain Profile: This is active when the computer is logged in to a network domain, such as in a corporation or business setting.
- Private Profile: This applies to computers within a local, private network.
- Public Profile: This protects your computer from the public Internet.
Changing firewall profile properties
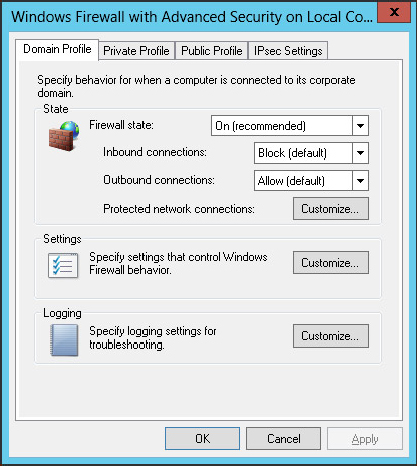
Clicking the Windows Firewall Properties link near the bottom of the console (or the Properties item in the Actions pane) takes you to the dialog box shown in Figure 2. Notice that you can use tabs at the top of the dialog box to configure the Domain, Private, and Public settings. The fourth option applies to IPsec (IP Security), commonly used with VPNs (Virtual Private Networks), which are described a little later in this section. By default, Inbound Connections are set to Block and Outbound Connections are set to Allow. You can change either setting by clicking the appropriate button.
FIGURE Windows Firewall advanced properties
Firewall alerts, unicast responses, local administrator control
Each profile tab has a Customize button in its Settings section. Clicking that button provides an option to turn off firewall notifications for that profile. Administrators can also use options on that tab to allow or prevent unicast responses to multicast and broadcast traffic. There’s also an option to merge local administrator rules with rules defined through group policy.
Security logging
Each profile tab also offers a Logging section with a Customize button. Click the Customize button to set a name and location for the log file and a maximum size, and to choose whether you want to log dropped packets, successful connections, or both. You can use that log file to review firewall activity and to troubleshoot connection problems caused by the firewall configuration.
Customizing IPsec settings
The IPsec Settings tab in the firewall properties provides a way to configure IPsec (IP Security). Clicking the Customize button under IPsec Defaults reveals the options shown in Figure 3. The Default settings in each case cause settings to be inherited from a higher-level GPO (Group Policy Object). To override the GPO, choose whichever options you want to apply to the current Windows Firewall instance. When you override the default, you can choose key exchange and data integrity algorithms. You can also fine-tune Kerberos V5 authentication through those settings.
FIGURE 3 Customize IPsec Defaults dialog box
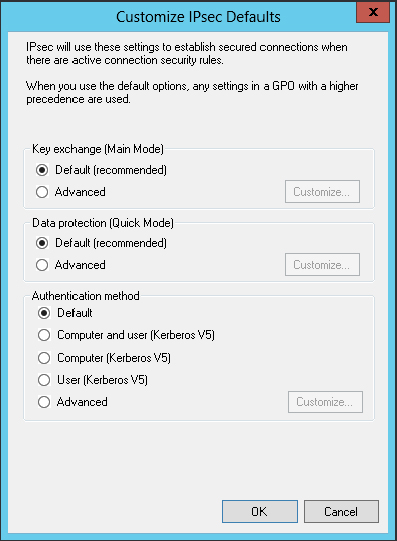
Clicking OK or Cancel in the Customize IPsec Defaults dialog box takes you back to the IPsec Settings tab. There you can use the IPsec Exemptions section to exempt ICMP from IPsec, which may help with connection problems caused by ICMP rules.
That covers the main firewall properties. You can configure plenty more outside the Properties dialog box. Again, most of these go far beyond anything the average home user needs to be concerned with, so we’re being brief here. Advanced users needing more information can find plenty of information in the Help section for the firewall.
Inbound and outbound rules
In the left column of the main Windows Firewall With Advanced Security window shown back in Figure 1, you see Inbound Rules and Outbound Rules links. These provide very granular control over Windows Firewall rules for incoming and outgoing connections. Figure 4 shows a small portion of the possibilities there. Use the scrollbars to see them all.
FIGURE 4 Advanced outbound exceptions control


