The Snipping Tool is an
application included in Windows 7, Windows Vista, and Experience Pack
for Windows XP Tablet PC Edition 2005. The first time it appeared was as
a Tablet PC powertoy back in 2002.
No Tablet PC (or any PC
for that matter) is complete without the Snipping Tool, which lets you
use your mouse or stylus to snip any object on your screen. This program
lets you capture portions of the screen (called snips), consisting of
an open window, a rectangular area you choose, a freeform area, or the
entire screen. You can then annotate snips using your mouse or a tablet
stylus, and save them to disk or email them. Files can be saved as
images (PNG, GIF, or JPEG image files) or as an HTML page.
To open the snipping tool, go to All Programs and choose Snipping Tool, or type snip into the Start Search field.
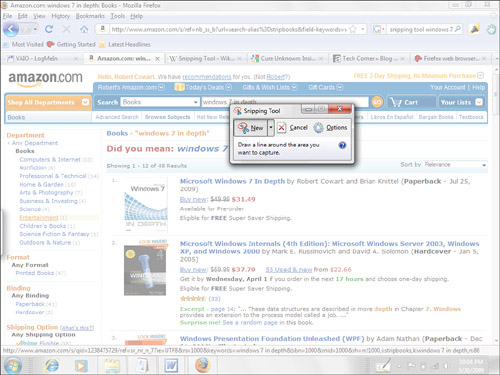
Using the Snipping Tool is easy and requires only
a few clicks of the mouse. When you open the Snipping Tool, your entire
screen will fade, a dialog box will appear (shown in Figure 1),
and your mouse will turn into a pair of scissors. The dialog box offers
a few options regarding snipping types that will become useful. Other,
smaller options do exist as well in the Options drop-down list. These
options refer to the cropping line color and other various tasks.
The different types of snips that you can do from the screen are as follows:
Rectangular Snip— This is the most common snip. You take your stylus and make a rectangular box on the screen.
Full-Screen Snip— A snip of the full screen is done quickly and with a tap of the pen or a click of the mouse.
Window Snip—
Snip any window that you have open on your screen. Simply select the
window that you want, and it will automatically be snipped.
Free-form Snip—
Using the pen makes this snip a lot easier to use. This snip gives you
any shape—for example, a circle—that you want to make into a snip.
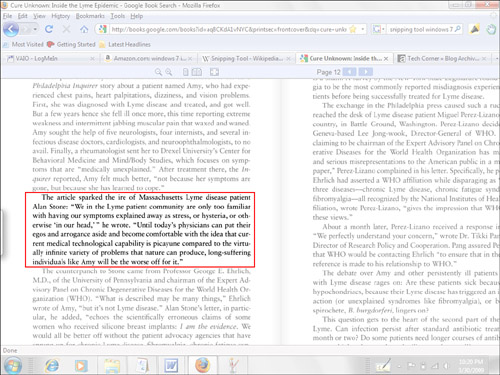
Each snip will be shown in a red frame by default
unless you change this setting in the options. This frame lets you see
exactly which section you are snipping. The Snipping Tools dialog box
will also disappear when selecting your snip. After you have decided how
you want to snip the current screen, simply click and hold the mouse
while dragging around the snipping areas. With the entire screen faded,
the selected snip on the screen will be unfaded and outlined in red (by
default), as shown in Figure 2.
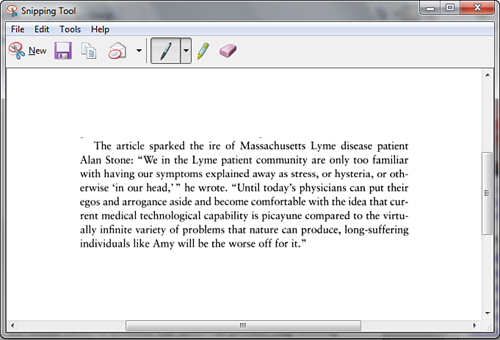
After you select the
area, the snipped area will automatically be sent to a separate window,
the Snipping Tool editing window, shown in Figure 3. This window will allow you to draw on, erase, highlight, and save the snipped area.
Tip
For quick access to the
Snipping Tool, assign a shortcut key to it, such as Shift+Ctrl+S. To do
this, right-click the shortcut in the Start menu and choose Properties.
Click the Shortcut Key box and press any combination. (Some combinations
will not register because they are assigned to other functions.) |
When saving the snip, you are offered a variety of file extensions. You can save the snip as an HTML, PNG, GIF, or JPEG file.
Choose Tools, Options for some goodies. For
example, if you choose Include URL Below Snips (HTML only), take a snip
of an Internet Explorer page, and save the snip as a Single HTML or MHT
file, the URL of the page will be displayed below the snip. This is an
excellent way of sending bits of a web page to people without requiring
that they view the web page in a browser. Simply paste the snip into an
email message. This only works on HTML-formatted web pages,
incidentally.
Tip
If you do a lot of partial
screen capturing, the Snipping Tool is quite handy. If you are always
capturing the whole screen, however, a quicker trick is to press
Alt+Print Screen, which will capture the current active window only and
send it to the Clipboard. Then switch to your target application and press Ctrl+V to paste
it in. |
Once a snip is saved, you
can reopen the snip with your browser (for HTML files) or your Paint
program (for files with picture extensions). You also can copy snips
directly from the Snipping Tool window and paste them anywhere as a
picture type. This is a great feature if you have to copy a few words
out of a document that is in a picture format or PDF. Snipping tools
really benefit tablet users because a stylus pen makes snips more
precise.