Windows 8 supports a number of
disk encryption technologies, which prevents thieves from accessing
sensitive data should your computer be physically stolen: If the thief
removes your hard drive and attaches it to a different computer, any
encrypted files cannot be read even if the thief figures out a way to
access the hard drive’s filesystem. There are two major technologies at
play here: the older Encrypting File System, or EFS, and BitLocker, a
more modern and easily managed system.
EFS
When files are copied or moved out of an
encrypted folder, the encryption is retained unless you move them to a
location where encryption is not supported, such as to another machine
on your home network.
EFS, while still available in Windows
8, has been somewhat deprecated. It was created as a way to encrypt
individual files or, more commonly, a folder. With the latter approach,
encryption works for both new files as well as those that were present
when the folder was encrypted. That is, as you add new files to the
encrypted folder, those files are automatically encrypted.
To encrypt a folder with EFS, right-click it and
choose Properties from the menu that appears. Then, in the Properties
window that appears, click the Advanced button. In the Advanced
Attributes window shown in Figure 1, select the option titled Encrypt contents to secure data.
When you click OK (or Apply), you’ll be asked to
make the change to the folder only (which includes all of its contained
files) or to the folder and any of its subfolders and their contents.
Windows will encrypt the appropriate items and immediately suggest that
you back up your encryption certificate and key, which is required for
recovery should you try to access the folder contents later via a
different PC or future reinstall of Windows. Microsoft recommends
backing these items up to removable media. But we’d go a step further
and make copies in multiple places, including cloud storage like
SkyDrive.
Encrypted folders are easily identified later:
When you open an encrypted folder, you’ll see that all of the enclosed
files have a green (rather than black) filename. This is a visual
indicator that they’re encrypted.
BitLocker and BitLocker To Go
EFS is good for what it is, but it has
a few limitations. First, it’s ponderous to encrypt an entire hard disk
with this technology since it only works with individual folders and
files; a set-it-and-forget-it whole-disk encryption makes more sense.
And second, EFS only provides software-based encryption services. A
technology that integrates with on-PC security chipsets would be far
more difficult, impossible really, to crack. And finally, EFS
encryption sticks with files as they travel around. It would be nice if
the encryption was automatically removed if a file was copied or moved
from an EFS-protected folder.
Enter BitLocker and its baby brother, BitLocker
To Go. They’re both managed from the same control panel, but use
slightly different technologies under the hood. From a usability
perspective, BitLocker is used with fixed disks—those disks mounted
inside your computer—while BitLocker To Go serves the needs of
external, removable disks.
Like EFS, BitLocker enables you to encrypt data
on your hard drive to protect it in the event of physical theft. But
BitLocker offers a few unique twists:
- BitLocker is full-disk encryption, not
per-file or folder encryption. If you enable BitLocker on a disk, it
encrypts the entire hard disk, and all future files that are added to
that drive are silently encrypted as well.
- BitLocker can also provide full-disk
encryption services to both system and non-system partitions, so in
addition to encrypting the entire hard disk on which Windows 8 is
installed, you can encrypt any other partitions, too.
- BitLocker protects vital Windows system
files during boot-up: If BitLocker discovers a security risk, such as a
change to any startup files (which might indicate that the hard drive
was stolen and placed in a different machine), it will lock the system
until you enter your BitLocker recovery key or password (discussed
shortly).
- BitLocker works in conjunction with
Trusted Platform Module (TPM) security hardware in some PCs to provide
a more secure solution than is possible with a software-only encryption
routine. No hacker will defeat a BitLocker-protected hard disk.
- Files copied or moved from a BitLocker-protected disk are automatically decrypted as part of the copy or move procedure.
There isn’t a heck of a lot to configure for
BitLocker. It’s either on or it’s not, and you either have TPM hardware
or you don’t: If your system does have TPM hardware, BitLocker will use
it.
To unlock a BitLocker-protected disk, you must
use a recovery key. This key can take different forms, including a
password or smartcard PIN. BitLocker-protected disks can be configured
to auto-unlock when you sign in to Windows, which is the recommended
approach for day-to-day use.
BitLocker is generally a seamless experience,
with one exception: Some software installs are blocked when BitLocker
is enabled on your disk. For this reason, you can temporarily suspend
BitLocker, install the software, and then re-enable BitLocker.
WARNING If
you lose your recovery key—forget the password or smartcard PIN, for
example—it’s game over. There is literally no other recovery option
available. Microsoft Support can’t help you.
Not scared off?
To enable BitLocker, launch the BitLocker Drive Encryption control panel (as always, Start Search is your friend). Shown in Figure 2, BitLocker is straightforward.
You can’t use any old password: It must
meet certain minimum length and complexity requirements, which could be
set by corporate policy.
To enable BitLocker (or BitLocker To Go), simply
click the Turn on BitLocker option next to the appropriate disk. The
BitLocker Drive Encryption wizard will step you through the process of
encrypting the disk and creating a recovery key, which can be a
standard password or smartcard with PIN.
We recommend you do all three. (Be sure to keep the printed copy secure, in a safe perhaps.)
The wizard will also ask whether you’d like to back up the recovery key, which is certainly desirable. You can save to SkyDrive, to a file, or print the recovery key.
Once this is complete, the wizard will present
two options, new to Windows 8, for encrypting the disk: It can encrypt
the entire disk, including the empty space, which is slower, or just
encrypt the used disk space, which is faster and perfectly acceptable
for unused disks.
Encrypting an entire fixed disk can be a very
time-consuming process. In fact, you may want to do this overnight,
though the process doesn’t impact your ability to use the disk.
When the encryption is complete, you’ll see that the disk appears different in both Explorer, as shown in Figure 3, and in the BitLocker Drive Encryption control panel.
They also have some new options in the control panel. These include the following:
- Back up recovery key: While the
BitLocker Drive Encryption wizard won’t complete without ensuring that
you back up your recovery key in some fashion, you can back it up again
at any time.
- Add or Change password: If
you’re using a password, you can change the password at any time. Or,
if you’re using a smartcard PIN, you can add a password as a second way
to enter the recovery key.
- Remove password: You can remove the password if you’ve separately configured a smartcard PIN.
- Add or Change smartcard: If
you’re using a smartcard PIN, you can change the PIN at any time. Or,
if you’re using a password, you can add a smartcard PIN as a second way
to enter the recovery key.
- Turn on (or off) auto-unlock:
By default, BitLocker-protected disks will prompt you for a password
(or PIN) each time you sign in to Windows or, in the case of an
external, removable disk, when you plug the drive into the PC. The
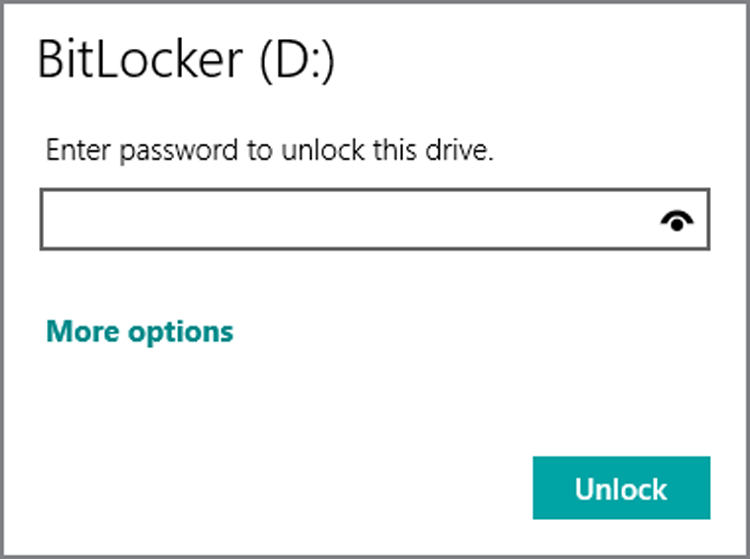
password entry interface can be seen in Figure 4. You can use the Automatically unlock on this PC option, found under More options, to disable this tiresome requirement.
- Turn off BitLocker: If you’d like to remove BitLocker encryption from a disk, this option will reverse the process.
Figure 4: By default, BitLocker-protected disks require you to enter a password or PIN each time they’re first accessed.
Encryption in Windows RT
BitLocker and BitLocker To Go are
available only in Windows 8 Pro. But Windows RT, the ARM-based version
of Windows 8 that’s included with Windows devices, includes a feature
called drive encryption, which is on by default and functions somewhat
similarly to BitLocker. Why include this feature in Windows RT? These
devices are managed with a technology called Exchange ActiveSync (EAS),
which uses policies to ensure that compatible devices—which include
iPhones, iPads, Android devices, Windows Phones, and now Windows RT
devices—meet the basic security rules of your organization. And one of
the policies it can set includes device encryption. Without this
security feature, many corporations wouldn’t allow users to access
corporate resources.