7. Setting Up a Printer Pool
A printer pool consists of multiple printers sharing a single
driver and appears as a single printer to users. The advantage of
using a printer pool is that clients don’t need to look for an
available printer; they simply print to the single logical printer on the print server, which then sends
the print job to the first available printer. Administration of the
printers is also simplified because all printers in the printer pool
are consolidated under one driver. If you modify the properties for
the single logical printer, all physical printers in the printer pool
use the same settings.
To set up a printer pool, complete the following steps:
Select Control Panel from the Start menu. Under Hardware,
select View Printers And Devices.
Right-click the first printer to be part of the pool and
select Printer Properties.
Select the Enable Printer Pooling check box.
To add printers to the printer pool, select the ports to
which the additional printers are connected.
Warning:
IMPORTANT All printers in a
printer pool must be able to use the same printer driver. If they
are not identical printer models, you can sometimes achieve this by
careful selection of a printer driver that will support an
acceptable level of functionality for several different but related
printers.
8. Configuring Print Spooling
Print spooling, or storing a print job on
disk before printing, affects the actual printing speed as well as how
clients perceive printing performance. You can change the way print
spooling works to correct printing problems or to hold printed
documents in the printer queue for repeated printing. To change the
spool settings for a printer, right-click the printer you want to
modify and select Printer Properties.
Click the Advanced tab to modify the spool settings. The
following list describes the print spool settings on the Advanced
tab:
Spool Print Documents So Program
Finishes Printing Faster Spools the print documents to
the print server, freeing the client to perform other tasks more
quickly.
Start Printing After Last Page Is
Spooled Ensures that the entire document is available to
the printer when printing begins. This step might correct some
printing problems, and it also helps high-priority documents print
before low-priority documents.
Start Printing Immediately
Select this option to reduce the time it takes to print a
document.
Print Directly To The Printer
Turns off spooling, causing a performance hit on the server
(though it might fix some printing problems).
Hold Mismatched Documents
Holds documents in the queue that don’t match the current printer
settings (for example, documents that require legal-size paper
when letter paper is currently in the printer). Other documents in
the print queue are unaffected by held documents.
Print Spooled Documents
First Prints the highest-priority document that is
already spooled first, ahead of higher-priority documents that are
still spooling. This step speeds overall printer throughput by
keeping the printer from waiting for documents.
Keep Printed Documents Keeps
a copy of print jobs in the printer queue in case users need to
print the document again. In this circumstance, the user can
resubmit the document directly from the queue rather than printing
from her application a second time.
Enable Advanced Printing
Features Enables metafile spooling and printer options
such as page order, booklet printing, and pages per sheet (if
available on the printer). Disable this when you’re experiencing
printer problems.
9. Using the Fax Service
As long as you have an email address and a scanner, you have no
need for a fax machine or a fax modem. Ninety percent of faxes are documents generated
by your computer and can therefore be sent by email. Other types of
documents can be easily scanned, saved as a file and…sent by
email.
If you must send faxes to recipients with fax numbers but no
email, you can use an Internet-based fax service for a few dollars per
month.
If you do need to send and receive faxes,
Windows 2011 offers a way to send, receive, and manage them. This
section describes how to use the fax tools.
9.1. Adding a Fax Modem
To start and configure the fax service, you must first install
a fax modem. Attach the fax modem to the computer and to the phone
line and then follow these steps:
Open Control Panel, and select Phone And Modem
Options.
Note:
If Phone And Modem Options is not visible, click View By
and select Large Icons.
In the Phone And Modem Options dialog box, click the
Modems tab and then click Add to start the Add Hardware
Wizard.
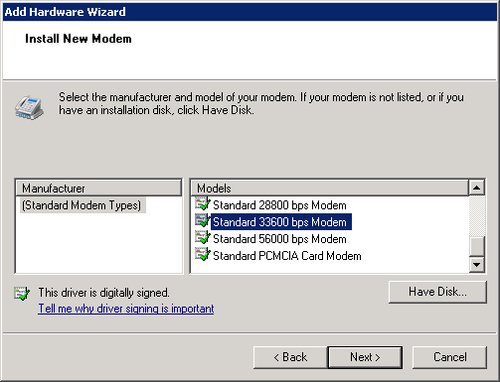
Follow the instructions on the Install New Modem page.
Windows will automatically detect the modem you have attached
unless you select the Don’t Detect My Modem check box. Click
Next.
If Windows does not detect your modem, select the type of
modem from the Install New Modem dialog box (shown in Figure 10). Click
Next.
Select the port(s) for the modem. Click Next.
Windows installs the modem and notifies you of the
successful installation. Click Finish.
9.2. Starting and Configuring the Fax Service
When a fax modem has been installed, you can start and
configure the fax service. Open the Windows SBS Console, click
Network, click Devices, and then follow these steps:
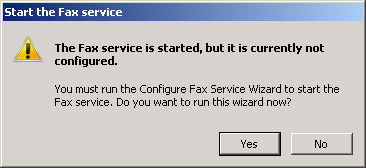
In the Tasks pane, click Start The Fax Service.
In the next dialog box (shown in Figure 11), you’re
advised that the fax service is started but not configured.
Click Yes to start the configuration process.
Enter your Organization’s Name, Phone Number, Fax Number, and Address for the fax cover page.
Click Next.
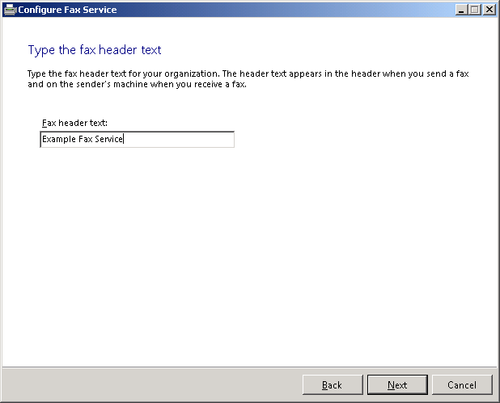
Enter the Fax Header Text that will print on faxes you
send. (See Figure 12.) Click
Next.
Select the modem to use for sending faxes. (If you install
multiple modems, you can dedicate some to sending and others to
receiving, if needed.) Click Next.
Select the modem to use for receiving faxes. In the case
of multiple modems, you can configure different delivery options
for different modems. Click Next.
The following four options are available for routing
incoming faxes. (See Figure 13.) You can
use any or all of them.
Route Through E-mail
Deliver faxes to the email address or addresses
specified.
Store In A Document
Library Deliver faxes to a document storage area of
your internal website.
Print Route all faxes
to a specified printer.
Store In A Folder
Deliver all faxes to a specified folder.
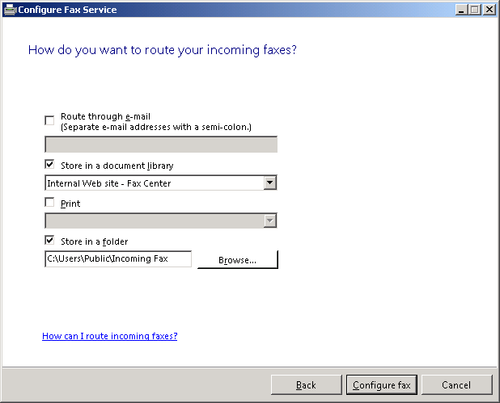
Click Configure Fax when you’ve made your
selections.
9.3. Managing Fax Users and Administrators
By default, all users are added to the Windows SBS Fax users
group. To change membership in this group, open the Windows SBS
Console, select Network, and then select Devices. In the Tasks pane,
select Configure The Windows SBS Fax Users Group.
Select Add Or Remove to change the membership. Click E-mail to
add an email address specifically for this group.
Similarly, you can click Configure The Windows SBS Fax
Administrator Group. By default, all administrators are members of
this group. Click Add or Remove to change the membership of this
group. Click E-mail to add an email address specifically for this
group.