Saltwatercolor
We’ll
choose brushes from the Digital Watercolor category, and then plunge in
a bit deeper than we did with the Spring Flowers project in the
previous lesson. Applying the Watercolor Color Scheme from the
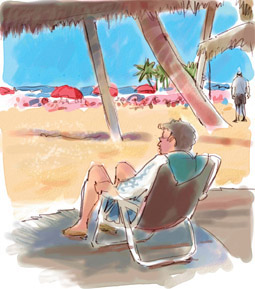
Underpainting Palette produces the effect in Figure 4.
Use Window > Custom Palette > Organizer to
import the Watercolor Sketch custom palette for this project. Click on
the paper swatch in the custom palette to establish French Watercolor
Paper for your texture, or choose a different texture from the Paper
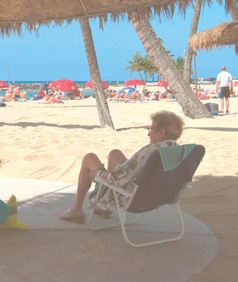
Selector. Make a Quick Clone of the prepared photo so you can use
tracing paper as a guide. On a new layer, make a rough sketch of the
major lines and shapes in the scene using the Flattened Pencil with a
dark brown from the color set.
Choose
Pointed Simple Water from the custom palette. But first, make a
“scratch” canvas to experiment with some of the Property Bar settings
for this brush. Increase the Wet Fringe value to get the effect of
pigment pooling at the edges of a stroke, a distinctive feature of
traditional watercolor. Move the Diffusion slider a few points to the
right and get a completely different effect: the edges of the stroke
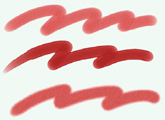
feather into the background, revealing paper texture. Figure 5
has a stroke made with the default settings, followed by increased Wet
Fringe, then a stroke with higher diffusion. Notice that increasing
diffusion eliminates the Wet Fringe look. Use any brush settings you
prefer for the next step, roughly laying down the color areas on another
new layer. See this stage combined with the pencil line layer in Figure 6.
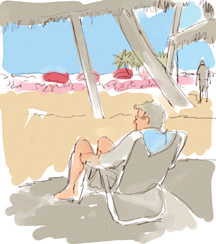
My watercolor strokes don’t extend to the edges
of the canvas, making an irregular vignette edge that is more pleasing
than a geometric rectangular shape. Sunbathers in the distance are just
scribbles, and that’s enough for now. You won’t need tracing paper any
more, but keep the photo source open as a reference.
Let’s
develop richer shadows, color variation, and a few details with some of
the other Digital Watercolor brushes. The following suggested variants
should help you navigate through the long list of possibilities in that
category:
Wash Brush
Fine Tip Water
Gentle Wet Eraser
Coarse Dry Brush
Salt
|
Painter’s Digital Watercolor takes some
experimentation to find the right combination of variants and technique
to fool the eye. Close observation of traditional watercolor paintings
will help you create the digital equivalent. Notice, for example, areas
of exposed white paper and the vibrant “accidents” of overlapping
transparent colors.
|
The Wash Brush is fine for painting broad areas
of color and works nicely as a transparent wash over other colors, even
on the same layer. If you want to remove watercolor pixels, you’ll need
to use a “wet” eraser rather than a variant from the Erasers category. I
applied some Gentle Wet Eraser strokes near the bottom left of the
color layer for more pleasing edges. To create the fringed shadow, I
switched to Fine Tip Water, which functions as an eraser when white is
the current color. The Salt variant creates a good imitation of
real-life effects. When you sprinkle coarse salt granules on wet
watercolor, they soak up the pigment, leaving a distinctive pattern
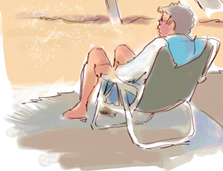
behind. Notice the effect of Salt on sand in a detail of the current
state in Figure 7.
Fine Tip Water works
well for adding details. You may want to add another layer for details
or richer color overlays. I used Coarse Dry Brush to paint contour
strokes on the trees and for texture on the shaggy roof. When your
watercolor layers are well developed, consider erasing some of the lines
in the original pencil sketch. My finished painting is shown in Figure 8.
Notice how I handled the far off sunbathers, with little dabs of color.
