Creating More Writing Space in the Middle of a Page
Ever take notes in a paper notebook during a class or
a meeting, only to find the presenter jumping back to a previous topic,
erasing part of the whiteboard, and writing down more important things?
Now you have to scribble little subnotes on your paper pages to later
remind you of the order in which the information was talked about.
With OneNote, you can not only move existing notes
around, you can also create more writing space wherever you need it—even
in the middle of a page that’s already full of notes.
To create more writing space, follow these steps:
1. | Open
a notebook page that contains a bunch of notes, such as a long
paragraph of text. (If you don’t yet have a page with a lot of notes on
it but you want to try this example, you can copy and paste some text
from a web page.)
|
2. | On
the ribbon, click the Insert tab, and then click Insert Space. The
button will turn orange to let you know that you’re in the Insert Space
mode.
|
3. | Slowly
move the mouse pointer back over your page containing the notes. You
will see a thick horizontal line moving up and down with your mouse
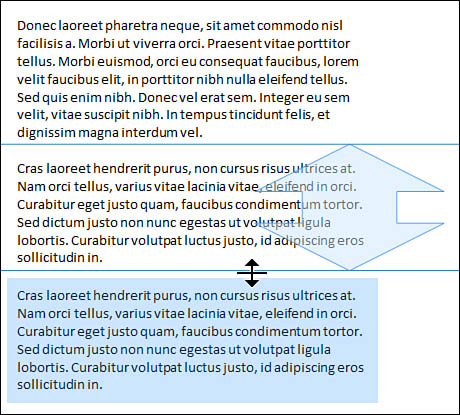
pointer (see Figure 5). Position the line where you want to create space and then click and drag the mouse downward in the direction of the arrow.

|
4. | As you drag the arrow, OneNote shows you where displaced text and objects will move below the space you’re creating (see Figure 6). Release the mouse when you have created as much space as you want or need.
|
If
you have any trouble the first time and you create too much or too
little space, remember to use the Undo command on the Quick Access
Toolbar (or press Ctrl+Z) and then start over.
Creating More Writing Space at the End of a Page
If you’re taking or pasting a large amount of notes
on a page and you don’t want to keep writing near the bottom edge of the
OneNote program window, you can quickly create about half a page of
space at the end of your notes.
To create more writing space at the end of the page, follow these steps:
1. | Open
a notebook page that contains a bunch of notes, such as a long
paragraph of text. (If you don’t yet have a page with a lot of notes on
it but you want to try this example, you can copy and paste some text
from a web page.)
|
2. | Look
for the vertical scrollbar that appears near the right side of the
OneNote program window and just to the left of the page tabs. If there
is not enough text to fill the page, type or paste some more text to
extend its note container past the current page display.
|
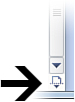
3. | Under
the vertical scrollbar, look for a small page icon just below the
scrollbar arrow. This is the Scroll Down by Half Page button (see Figure 7).
|
4. | When
you click this button, OneNote scrolls to the very end of the current
page and then creates about half a page of blank space so you can
continue typing in the middle of the screen.
|
You
can click this button as often as you like to keep creating more space
at the end of the current page. Using this button is a bit faster than
repeatedly pressing the Enter key to create several blank lines of
writing space at the end of a notes page.
Checking the Spelling of Your Notes
Like the other programs in the Microsoft Office
suite, OneNote lets you verify the spelling of words in your notes. This
is most useful when you plan to share your notes with other people and
grammatical accuracy is important.
To check the spelling of your notes, follow these steps:
1. | Open the page for which you want to check the spelling.
|
2. | If
you want to only check the spelling of a particular paragraph of text,
select the text you want to check. Otherwise, if you do not make a text
selection, OneNote will check the entire page.
|
3. | On the ribbon, click the Review tab, and then click Spelling.
|
4. | If
OneNote detects any words that are possibly misspelled, they will be
displayed in the Spelling task pane near the right side of the screen.
There, you can change a misspelled word to its correct form, ignore a
suggested correction, or add any particular word to your custom
dictionary, so that OneNote will not question it again in the future.
|
5. | When OneNote tells you that the spell check is complete, click OK to dismiss the Spelling task pane.
|
By default, OneNote checks
the spelling of text as you type. You might be used to this feature from
other Microsoft Office applications, such as Microsoft Word. When
OneNote senses a possibly misspelled word, a red squiggly line appears
underneath it. You can right-click such words and then acknowledge (or
ignore) the suggested correction for that word. If you find this to be
too distracting, you can turn this feature off and later perform a
manual spell check whenever your notes are finished. To disable
automatic spelling, click the File tab, click Options, and then click
Proofing. Under When Correcting Spelling in OneNote, clear the Check
Spelling As You Type check box, and then click OK.