2. Fine-tuning Layout
The
Re-layout button gives you quick access to several preconfigured layout
styles. However, you can fine-tune the results by digging into three
different dialogs, full of layout and connector settings just waiting
to bewilder you.
Improving Layout
1. | Open Ch05 Layout.vsd.
|
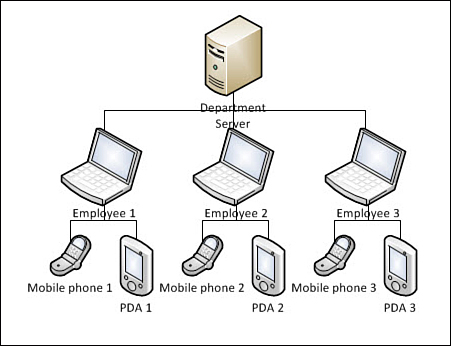
2. | Apply
the Flowchart, Top to Bottom layout style to the diagram. This layout
looks like an org chart and is fairly orderly, but it could be
improved. As Figure 8 shows, text is hard to read because of interference with connectors, and the spacing feels a bit cramped.
|
3. | Give the text an opaque background so that it obscures the connectors.
- a. Select all the shapes in the diagram.
- b. On
the Home tab, click the dialog box launcher for the Font or Paragraph
group and then click the Text Block tab in the pop-up dialog.
- c. Click Solid Color and select white from the drop-down color list.
These settings might already be set, depending on the primary
selection, because connectors already have opaque text backgrounds.
Regardless, be sure to click them both so that Visio knows you intend
to make a change.
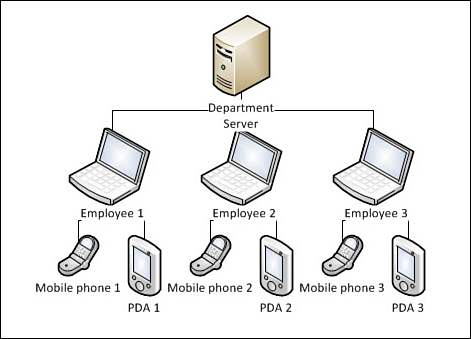
- d. Click OK. The text blocks now have white backgrounds that obscure the connectors, as shown in Figure 9. If all connectors haven’t been sent to back, they might be on top of the shape’s text and still be in the way.
|
4. | Increase
the spacing between shapes. The diagram is still cramped, and the
opaque text makes connectors hard to see in some cases.
- a. Click the dialog box launcher for the Layout group
(on the Design tab). The Page Setup dialog appears, showing the Layout
and Routing tab. Take a moment to become utterly confused by all the
settings!
- b. Click the Spacing button near the
lower-right corner of the dialog. The Layout and Routing Spacing dialog
appears, showing four pairs of horizontal and vertical spacing options.
- c. Because you want more space between the shapes, change the values under Space Between Shapes. Enter 0.75 in. for the Horizontal value and 0.5 in. for the Vertical.
- d. Click
OK twice to get back to the diagram. Notice that nothing happens. You
have to use Re-layout to get the changes to take effect.
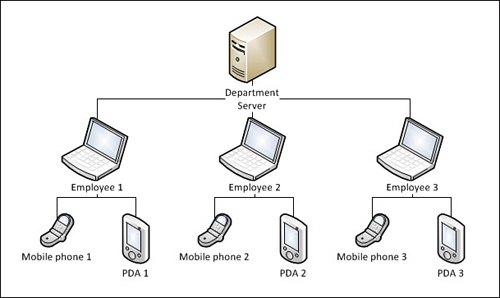
- e. Click
the Re-layout Page drop-down and notice that the current layout setting
is highlighted in orange. Click it again to tell Visio to lay out the
diagram using the new settings. The shapes are arranged in the same
style, but with more space between them, as shown in Figure 10. You see that text is more readable, connectors are clearer, and the diagram is easier on the eyes in general.
|
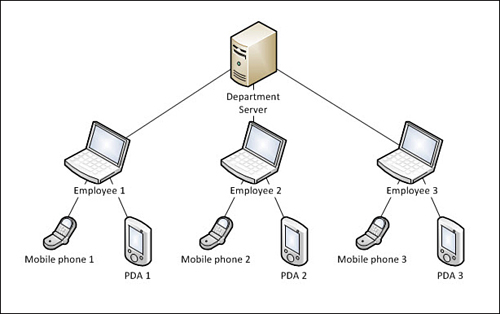
5. | To
give the diagram a more network-ish feel, make the connectors straight.
In the Layout group (Design tab), click the Connectors drop-down button
and choose Straight Lines. All connectors on the page change from
right-angled to straight, as shown in Figure 11.
|
6. | Experiment further with layout. Move shapes around on the page manually and then click Re-layout to see what happens.
|
Visio has a plethora of ways to fine-tune and tweak
layout and connector style settings. Describing all of the options and
settings would take many pages and bore you to tears. My best advice is
to know where the options are, watch the following Show Me video, and
take some time yourself to experiment with how layout settings affect
the look of your diagrams.
Here are the places you will find layout and routing settings:
Layout & Routing tab in the Page Setup dialog
Spacing dialog, accessed via the Layout & Routing tab in the Page Setup dialog
Configure
Layout dialog, which you get to by clicking “More Layout Options...” at
the bottom of the Re-layout Page drop-down gallery
Re-layout Page and Connectors drop-down buttons in the Layout group on the Design tab