3. Display Properties
The
launching point for altering your GUI display settings is the
Personalization window. From there you can reach a multitude of GUI
settings, mostly affecting visual effects rather than GUI functionality:
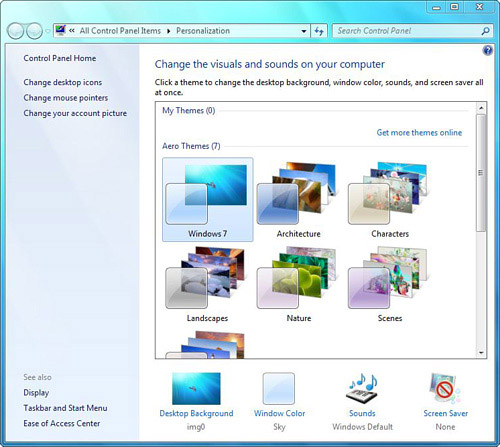
You can most easily reach the display properties by right-clicking the desktop and choosing Personalize. Figure 2
shows the resulting Personalization window. This is a greatly
redesigned window compared to the Windows Vista and XP counterparts.

Notice
that the Tasks list includes Change Desktop Icons, Change Mouse
Pointers, and Change Your Account Picture for easy, one-click access to
the related dialog boxes. Clicking the Display link near the bottom of
the Tasks list lets you modify advanced properties such as resolution,
color calibration, hardware acceleration, refresh rates, and relative
and custom text sizes.
Note
You
also can get to the display properties from Control Panel. Click Start,
Control Panel, Appearance and Personalization, Personalization. |
The
following sections briefly describe various primary options, which are
in order of appearance in the Personalization window, starting with the
main pane.
3.1 Themes
A
theme is a background plus a set of sounds, icons, and other elements
to help you personalize your computer with one click. Windows 7
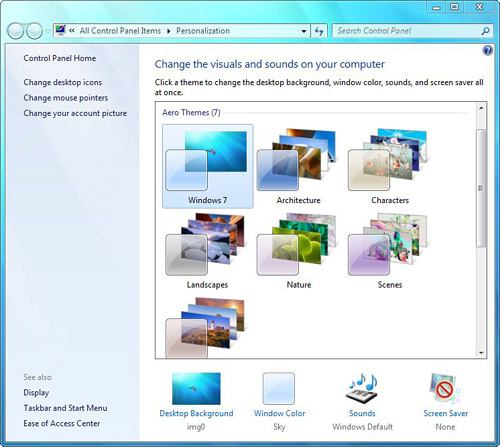
includes several themes in the Personalization window (see Figure 3),
such as the default Windows 7 (Aero) theme and a handful of other Aero
themes for your choosing, all of which offer bold, stunning images and
pleasing color palettes.

Scrolling
through the list of themes, you’ll find the Basic and High Contrast
Themes section. If you prefer the look of Windows 2000 and older
versions, you can go retro by selecting the Windows Classic theme. High
Contrast themes are helpful for the visually challenged.
Tip
Click
the Get More Themes Online link to go to a Microsoft Windows website
where you can download and safely install extra themes. You should
exercise caution when downloading themes from non-Microsoft sources on
the Web because these files modify critical system settings and could
wreak havoc on a machine if they are not designed properly. Also, you
face significant virus risks. |
3.2 Desktop Background
The
desktop is used to express your inner personality. It’s one of the few
places where you can actually customize the otherwise impersonal
personal computer. Hanging some wallpaper (such as a picture of your
kids, your car, a sunset, and so forth) on your desktop gives the
environment a more custom feeling. Microsoft includes dozens of options
for you to goof around with. These include
some stunning photographs, small tiles repeated across and down your
screen, or solid colors. You can choose from a few supplied photos or
supply your own, such as from your digital camera. Gone are the old
desktop patterns, such as bricks and bamboo, that were available in
previous Windows versions.
To personalize your desktop, follow these steps:
1. | Right-click on an empty spot on the desktop and choose Personalize.
|
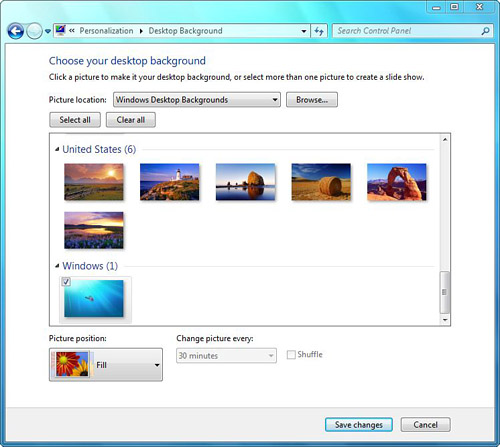
2. | Click Desktop Background. You see the window shown in Figure 4.

|
3. | Click
one of the images you like or search for another one. From the Picture
Location drop-down list, choose Windows Desktop Backgrounds, Pictures
Library, Top Rated Photos, or Solid Colors.
|
Tip
By
the way, if you don’t want a pretty picture (or you need to hide the
image of the sultry pin-up before your spouse returns), you can select
Solid Colors in the Picture Location drop-down list. Then, choose a
solid color of your liking from the resulting palette. |
Windows
Desktop Backgrounds are high-quality images designed to scale well and
look good on any screen. Pictures Library lets you choose from photos
in the Public Pictures folder on your computer, which is a shared
folder that anyone using your computer (locally or on the LAN) can see.
Top Rated Photos points to a folder supplied with Windows 7 that
includes some additional photos for you to play with.
You
can also use a personal photo. If you keep your stockpile of photos
organized elsewhere, just click the Browse button, locate the correct
folder, and choose your image. Acceptable photo formats are JPG, JPEG,
BMP, DIB, TIF, and PNG images.
Caution
Remember,
most images on the Web are copyrighted by the owner of the site. Using
an image without permission is stealing. We recommend that you only use
images provided expressly for desktop background use, or that you
obtain permission first before using images not specifically offered as
desktop backgrounds. |
In
addition to files already on your local system (or accessible over your
LAN), you can grab any image from a website by right-clicking it and
selecting Set as Background from the pop-up menu.
If
you want to add some variety to your desktop, configure your desktop
background as a slideshow. Just select more than one image for your
desktop background, and then select a number of seconds, minutes, or
hours in the Change Picture Every drop-down list.
|
If
an image is too small to fill up your desktop, you can always set the
Picture Position control to Stretch. Other options in the Picture
Position control list include Fill (default), Fit, Tile, and Center.
Fit takes a picture smaller than your screen resolution and enlarges it
so that it fills the screen lengthwise. Conversely, it takes a picture
larger than the screen and shrinks it. Stretching can distort the
picture or cause it to pixelate, so if you want it to look good, make
sure to shoot the picture at, or convert it to, a size roughly matching
the resolution setting of your display and then choose the Center
option. If the image is larger than the screen’s resolution, stretching
actually shrinks the image to fully fit on the desktop.
If
you choose Center and the image is larger than the screen, you can see
only the center portion of the image that fits within your display. The
Tile choice repeats the photo in its full size, numerous times on the
screen. This works only with small images because, just as with the
Center command, large images will not even fully fit on the screen
once. So shrink the image’s size using an image or photo program. For
example, right-click the image in question, choose Open With, and then
choose a graphics program such as Paint (use the Resize command in the
Image group on the Ribbon). Experiment with resizing the picture to,
say, 300×400 pixels. Always save the file under a different name first
so that you don’t mess up the original, which is in a higher resolution
that you may want to keep.
|
If
a desktop image looks blocky, either use a larger image or turn off the
Fit setting. See the Control Panel, Appearance and Personalization,
Personalization, Desktop Background, Picture Position option. |