Instead of retyping data in a table that you
have in another document, such as Microsoft Excel, you can import it
into a table in Dreamweaver. The tabular data needs to be saved in a
delimited text format with items separated by tabs, commas, colons, or
semicolons. If you want to use data from a table in Dreamweaver in
another document, you can export table data into a text file. When you
export a table, the entire table is exported. You cannot export parts of
a table. However, you can copy parts of a table and paste it into
another document.
Export Table Data
1. Open the Web page with the table you want to format.
|
2. Click to place the insertion point in any cell of the table.
|
3. Click the File menu, point to Export, and then click Table.
|
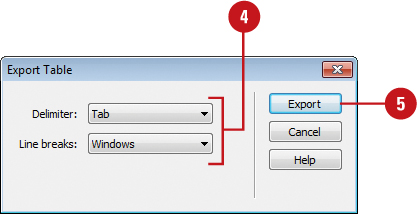
4. Specify the following options:

|
5. Click Export.
|
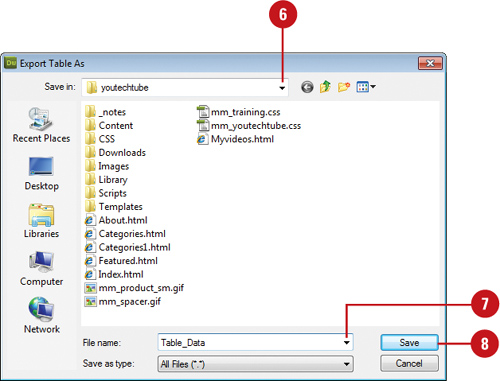
6. Navigate to the location where you want to save the file.
 |
7. Enter a name for the file.
|
8. Click Save.
|
Import Tabular Data into a Table
1.Open the Web page with the table you want to use.
|
2. Click to place the insertion point in any cell of the table.
If you click in an existing table, you’ll create a nested table.
|
3. Click the File menu, point to Import, and then click Tabular Data.
|
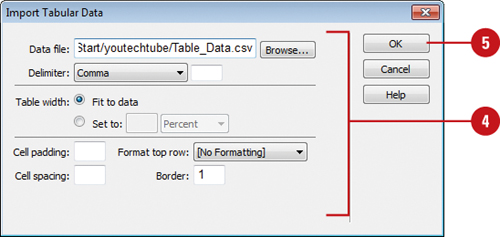
4. Specify the following options:
- Data File. Enter the name of the file, or click Browse to select it.
- Delimiter. Specify the character used to separate items in the imported file. Select Other to enter a delimiter character.
- Table Width. Specifies the width of the table. Select Fit to Data to make each column wide enough to fit the data. Select Set to specify an exact width.
- Cell Padding. Specifies the number of pixels between a cell’s content and the cell boundaries.
- Cell Spacing. Specifies the number of pixels between adjacent table cells.
- Format Top Row. Specifies the formatting applied to the top row.
- Border. Specifies the width in pixels of the table’s border.
 |
5. Click OK.
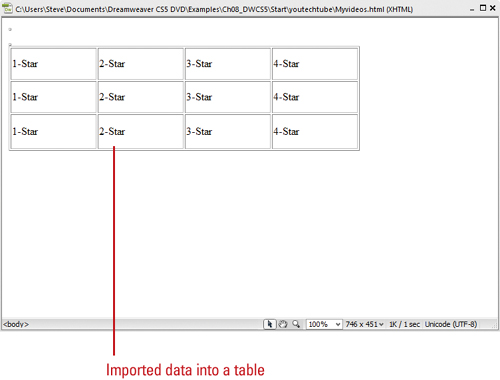
Dreamweaver creates a new table with the tabular data from the imported file.
 |
|