IT tutorials
 
Mobile
 

Android : Getting Fancy with Lists - Getting to First Base

2/8/2013 11:07:42 AM
- Free product key for windows 10
- Free Product Key for Microsoft office 365
- Malwarebytes Premium 3.7.1 Serial Keys (LifeTime) 2019

The classic Android ListView is a plain list of text—solid but uninspiring. Basically, we hand the ListView a bunch of words in an array and tell Android to use a simple built-in layout for pouring those words into a list.

However, we can have a list whose rows are made up of icons, icons and text, check boxes and text, or whatever we want. It is merely a matter of supplying enough data to the adapter and helping the adapter to create a richer set of View objects for each row.

For example, suppose we want a ListView whose entries are made up of an icon, followed by some text. We could construct a layout for the row that looks like this, found in res/layout/row.xml in the FancyLists/Static sample project:

<?xml version="1.0" encoding="utf-8"?>
<LinearLayout
        xmlns:android="http://schemas.android.com/apk/res/android"
        android:orientation="vertical"
        android:layout_width="fill_parent"
        android:layout_height="fill_parent" >
        <TextView
                android:id="@+id/selection"
                android:layout_width="fill_parent"
                android:layout_height="wrap_content"/>
        <ListView
                android:id="@android:id/list"
                android:layout_width="fill_parent"

android:layout_height="fill_parent"
                android:drawSelectorOnTop="false"
                />
</LinearLayout>

This layout uses a LinearLayout to set up a row, with the icon on the left and the text (in a nice big font) on the right.

However, by default, Android has no idea that we want to use this layout with our ListView. To make the connection, we need to supply our Adapter with the resource ID of the custom layout shown previously:

public class StaticDemo extends ListActivity {
  private TextView selection;
  private static final String[] items={"lorem", "ipsum", "dolor",
          "sit", "amet",
          "consectetuer", "adipiscing", "elit", "morbi", "vel",
          "ligula", "vitae", "arcu", "aliquet", "mollis",
          "etiam", "vel", "erat", "placerat", "ante",
          "porttitor", "sodales", "pellentesque", "augue", "purus"};

  @Override
  public void onCreate(Bundle icicle) {
    super.onCreate(icicle);
    setContentView(R.layout.main);
    setListAdapter(new ArrayAdapter<String>(this,
                       R.layout.row, R.id.label,
                       items));
    selection=(TextView)findViewById(R.id.selection);
  }

  public void onListItemClick(ListView parent, View v,
                              int position,  long id) {
  selection.setText(items[position]);
  }
}


This follows the general structure for the previous ListView sample. The key difference here is that we have told ArrayAdapter that we want to use our custom layout (R.layout.row) and that the TextView where the word should go is known as R.id.label within that custom layout.

NOTE

Remember that to reference a layout (row.xml), use R.layout as a prefix on the base name of the layout XML file (R.layout.row).

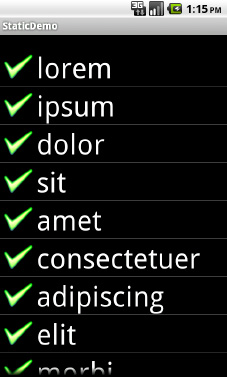
The result is a ListView with icons down the left side; in this example, all the icons are the same, as shown in Figure 1.

Figure 1. The StaticDemo application
 
Others
 
- Windows Phone 7 : Getting Started with XNA - Displaying Text
- Windows Phone 7 : Getting Started with XNA - Useful Sprite Effects
- iphone Programming : Integrating Your Application - Using the Address Book
- iphone Programming : Integrating Your Application - Media Playback
- Windows Phone 8 : Controls in XAML (part 2) - RichTextBox Control, Content Controls, List Controls
- Windows Phone 8 : Controls in XAML (part 1) - Using Keyboards
- Windows Phone 8 : XAML Overview - XAML Styling
- Enter Java ME on Symbian OS : Crossing to the Native Land of Symbian OS
- iphone Programming : Handling Data - Storing Data
- iphone Programming : Handling Data - Regular Expressions
 
 
Top 10
 
- Microsoft Visio 2013 : Adding Structure to Your Diagrams - Finding containers and lists in Visio (part 2) - Wireframes,Legends
- Microsoft Visio 2013 : Adding Structure to Your Diagrams - Finding containers and lists in Visio (part 1) - Swimlanes
- Microsoft Visio 2013 : Adding Structure to Your Diagrams - Formatting and sizing lists
- Microsoft Visio 2013 : Adding Structure to Your Diagrams - Adding shapes to lists
- Microsoft Visio 2013 : Adding Structure to Your Diagrams - Sizing containers
- Microsoft Access 2010 : Control Properties and Why to Use Them (part 3) - The Other Properties of a Control
- Microsoft Access 2010 : Control Properties and Why to Use Them (part 2) - The Data Properties of a Control
- Microsoft Access 2010 : Control Properties and Why to Use Them (part 1) - The Format Properties of a Control
- Microsoft Access 2010 : Form Properties and Why Should You Use Them - Working with the Properties Window
- Microsoft Visio 2013 : Using the Organization Chart Wizard with new data
Technology FAQ
- Is possible to just to use a wireless router to extend wireless access to wireless access points?
- Ruby - Insert Struct to MySql
- how to find my Symantec pcAnywhere serial number
- About direct X / Open GL issue
- How to determine eclipse version?
- What SAN cert Exchange 2010 for UM, OA?
- How do I populate a SQL Express table from Excel file?
- code for express check out with Paypal.
- Problem with Templated User Control
- ShellExecute SW_HIDE
programming4us programming4us