The iPhone 3GS was the first
iOS device to include a magnetic compass. Since its introduction, the
compass has been added to the iPad and the iPhone 4. It is used in
Apple’s Compass application and in the Maps application (to orient the
map to the direction you are facing). The compass can also be accessed
programmatically within iOS, which is what we’ll take a look at now.
Location Manager Headings
The location manager includes a headingAvailable property that indicates whether the device is equipped with a magnetic compass. If the value is YES,
you can use Core Location to retrieve heading information. Receiving
heading events works similarly to receiving location update events. To
start receiving heading events, assign a location manager delegate,
assign a filter for how frequently you want to receive updates (measured
in degrees of change in heading), and call the startUpdatingHeading method on the location manager.
Watch Out!
There isn’t one true north. Geographic north is fixed
at the North Pole, and magnetic north is located hundreds of miles away
and moves every day. A magnetic compass always points to magnetic
north, but some electronic compasses, like the one in the iPhone, can be
programmed to point to geographic north instead. Usually, when we deal
with maps and compasses together, geographic north is more useful. Make
sure you understand the difference between geographic and magnetic north
and know which one you need for your application. If you are going to
use the heading relative to geographic north (the trueHeading property), request location updates as well as heading updates from the location manager or the trueHeading property won’t be properly set.
The location manager delegate protocol defines the
methods for receiving heading updates. There are two methods in the
delegate relating to headings: locationManager:didUpdateHeading and locationManager:ShouldDisplayHeadingCalibration.
The locationManager:didUpdateHeading method’s argument is a CLHeading object. The CLHeading object makes the heading reading available with a set of properties: the magneticHeading, the trueHeading (see the Watch Out above), a headingAccuracy confidence measure, a timestamp of when the reading occurred, and an English language description that is more suitable for logging than showing to a user.
The locationManager:ShouldDisplayHeadingCalibration has the delegate return a YES or NO
indicating if the location manager can display a calibration prompt to
the user. The prompt asks the user to step away from any source of
interference and to rotate the phone 360 degrees. The compass is always
self-calibrating, and this prompt is just to help that process along
after the compass receives wildly fluctuating readings. It’s reasonable
to implement this method to return NO if the calibration prompt
would be annoying or distracting to the user at that point in the
application, in the middle of data entry or game play for example.
By the Way
The iPhone Simulator reports that headings are available and it provides just one heading update.
Implementing Compass Headings
As an example of using the compass, we are going to
enhance the Cupertino application and provide the users with a left,
right, or straight-ahead arrow to get them pointed toward Cupertino. As
with the distance indicator, this is a limited look at the potential
applications for the digital compass. As you work through these steps, keep in mind that the compass provides information far more accurate that what we’re indicating with three arrows!
Setting Up the Project
Depending on your comfort level with the project
steps we’ve already completed this hour, you can continue building this
directly off the existing Cupertino application or create a copy. You’ll
find a copy of Cupertino Compass in this hour’s projects folder that
includes the additional compass functionality for comparison.
Open the Cupertino application project, and let’s begin by making some additions to support the use of the compass.
Adding the Direction Image Resources
The Images folder in the Cupertino project contains
three arrow images: arrow_up.png, arrow_right.png, and arrow_left.png.
Drag these three images into the Resources group and be sure to check
the Copy Items into Destination Group’s Folder check box in the Copy
dialog.
Adding Outlets and Properties
To implement our new visual direction indicator, the CupertinoViewController needs an outlet to a UIImageView
to show the appropriate arrow and needs a property to store the most
recent location. We need to store the most recent location because we’ll
be doing a calculation on each heading update that uses the current
location. During a header update, the location manager delegate receives
only the new CLHeading and not a CLLocation. Click the CupertinoViewController.h file in the Classes group and add an IBOutlet to a UIImageView (directionArrow), a property for the most recent CLLocation the controller received from location updates (recentLocation), and the method prototype we will implement to calculate the heading to Cupertino called headingToLocation:current. Listing 1 indicates the additions to the CupertinoViewController.h file.
Listing 1.
#import <UIKit/UIKit.h>
#import <CoreLocation/CoreLocation.h>

@interface CupertinoViewController : UIViewController
    <CLLocationManagerDelegate> {

        CLLocationManager *locMan;
        CLLocation *recentLocation;
        IBOutlet UILabel *distanceLabel;
        IBOutlet UIView *distanceView;
        IBOutlet UIView *waitView;
        IBOutlet UIImageView *directionArrow;

}

@property (assign, nonatomic) CLLocationManager *locMan;
@property (retain, nonatomic) CLLocation *recentLocation;
@property (retain, nonatomic) UILabel *distanceLabel;
@property (retain, nonatomic) UIView *distanceView;
@property (retain, nonatomic) UIView *waitView;
@property (retain, nonatomic) UIView *directionArrow;

-(double)headingToLocation:(CLLocationCoordinate2D)desired
                   current:(CLLocationCoordinate2D)current;

@end
|
Open the CupertinoViewController.m file in the Classes group, and synthesize the two new properties:
@synthesize recentLocation;
@synthesize directionArrow;
Release them in the dealloc method:
- (void)dealloc {
    [locMan release];
    [distanceLabel release];
    [distanceView release];
    [waitView release];
    [recentLocation release];
    [directionArrow release];
    [super dealloc];
}
Updating the User Interface
To update our application for the compass, we need to
add a new image view to the interface. Open the
CupertinoViewController.xib file in Interface Builder, and then complete
the following steps:
1. | Open the Library (Shift+Command+L) and search for “image.” Drag a UIImageView onto the view.
|
2. | Click
the image view and open the Size Inspector (Command+3). Set the width
(W) attribute to 150 points and the height (H) attribute to 150 points.
|
3. | Open the Attributes Inspector (Command+1). Hide the image view by clicking the check box for the Hidden attribute.
|
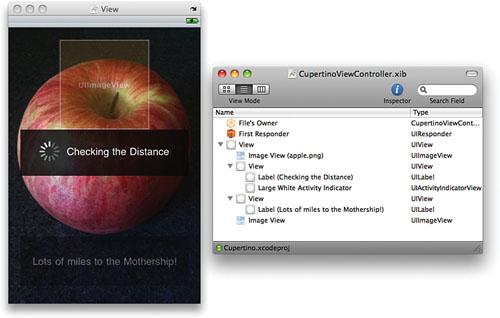
4. | Click
the image view in the view, drag it to the top sizing guide, and then
center it horizontally. The image view should now be just above the view
that contains the activity indicator. If these two views overlap, drag
the view with the activity indicator down. The UI should now look like Figure 1.
|
5. | Open the Document window. Control-drag from the File’s Owner icon to the image view, choosing the directionArrow outlet when prompted.
|
When satisfied with your interface, save the XIB file and return to Xcode.