The MonoTouch platform
from Novell allows you to build C#- and .NET-based applications
on the iPhone and iPod touch. It comes in two editions: Professional and
Enterprise.
A license for the Professional Edition, intended for individual use,
costs $399 per year. The Enterprise Edition, intended for corporate use,
costs $999 per year (although you can buy a five-developer pack for $3,999
per year). Alternatively, you can download an evaluation version that
enables development and testing against iPhone Simulator only.
1. Download and Installation
Before downloading and installing MonoTouch, you must download the
latest release of Mono, the open source development platform based on
the .NET Framework that allows developers to build cross-platform
applications in C#. You can obtain it from http://www.mono-project.com/.
The Mono framework downloads as a disk image file containing a package
installer file. Double-click on this package file to start the Mono
installer, as shown in Figure 1.

After installing the Mono framework, you need to install the
MonoDevelop environment before you can install MonoTouch
itself. MonoDevelop is an IDE primarily designed for C# and other .NET languages
and you can download it from http://monodevelop.com/; it comes as a disk image, and
installation is simply a matter of dragging and dropping the
MonoDevelop.app application from the disk image to
your Applications folder.
Warning:
You need to use the latest MonoTouch version of MonoDevelop for
Mac OS X, as it contains several fixes that are not in the mainstream
version of the application. This version is linked from the MonoTouch
website.
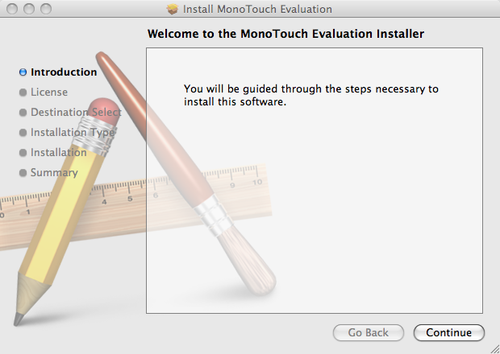
After installing Mono and MonoDevelop, you can download the trial
version of the MonoTouch SDK from http://monotouch.net/DownloadTrial. MonoTouch is
distributed as a package file that will automatically start the
Installer when it downloads, as shown in Figure 2.
2. Building a MonoTouch Project
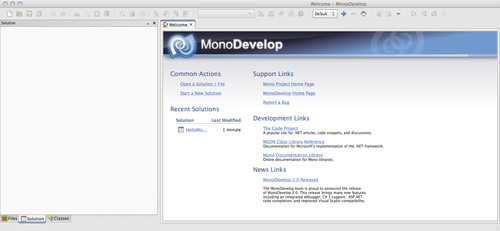
Double-click on the MonoDevelop application that you installed in
your Applications folder, and you will be presented with something
similar to Figure 3. Select
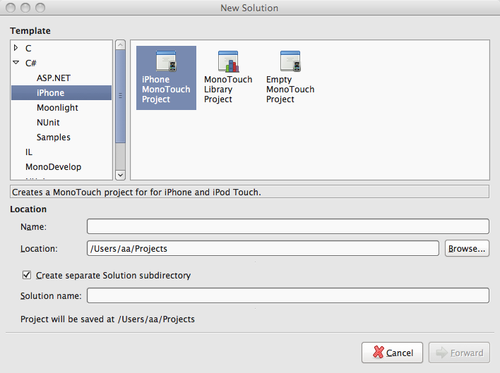
File→New Solution from the MonoDevelop
menu to open the New Solution window (Figure 4). From there, choose a new
C#→iPhone→iPhone MonoTouch Project.
After entering the solution name, click the Forward button and
then the Okay button to complete the setup process. You do not need to
choose any of the optional project features (e.g., Packaging or Unix
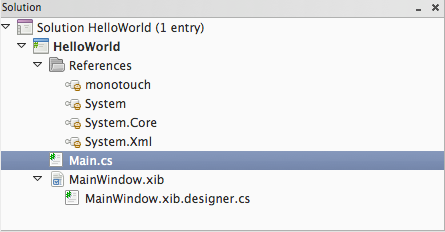
Integration). In the Solution pane, click the disclosure triangle next
to the solution name to expand it, and then expand each subfolder in the
same way, and you’ll be presented with something that looks a lot like
Figure 5.
The default template generated by the MonoTouch SDK produces a
Main.cs file that is used to start your application
event loop:
using System;
using System.Collections.Generic;
using System.Linq;
using MonoTouch.Foundation;
using MonoTouch.UIKit;

namespace HelloWorld
{
    public class Application
    {
        static void Main (string[] args)
        {
            UIApplication.Main (args);
        }
    }

    // The name AppDelegate is referenced in the MainWindow.xib file.
    public partial class AppDelegate : UIApplicationDelegate
    {
        // This method is invoked when the application has loaded its UI
        // and its ready to run public override bool FinishedLaunching
        // (UIApplication app, NSDictionary options)
        {
            // If you have defined a view, add it here:
            // window.AddSubview (navigationController.View);

            window.MakeKeyAndVisible ();

            return true;
        }

        // This method is required in iPhoneOS 3.0
        public override void OnActivated (UIApplication application)
        {
        }
    }
}
The default template also creates a
MainWindow.xib.designer.cs file that MonoTouch will
update each time you edit the MainWindow.xib file
inside Interface Builder. This file will mirror all of the views,
controllers, outlets, and actions that you add to your UI and then map
those elements to C# properties that you can access from your own code.
Here’s the default
MainWindow.xib.designer.cs:
namespace HelloWorld
{
    // Base type probably should be MonoTouch.Foundation.NSObject or subclass
    [MonoTouch.Foundation.Register("AppDelegate")]
    public partial class AppDelegate
    {

        [MonoTouch.Foundation.Connect("window")]
        private MonoTouch.UIKit.UIWindow window {
         get {
           return ((MonoTouch.UIKit.UIWindow)(this.GetNativeField ("window")));
         }
         set { this.SetNativeField ("window", value); }
        }
    }
}
If you select Run→Run from the
MonoDevelop menu bar at this point, the application will be built,
compiled to native code, and started inside iPhone Simulator. You should
see something very similar to Figure 6.

Quit from iPhone Simulator and return to the MonoDevelop
environment. Double-click on the MainWindow.xib
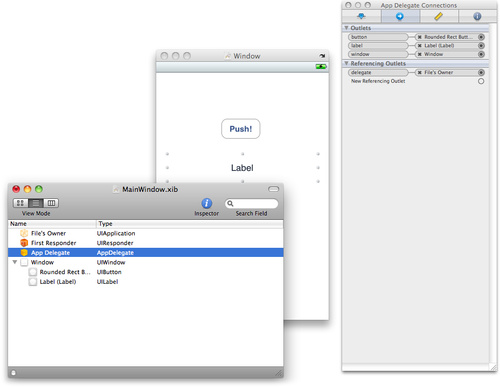
file to open the NIB file in Interface Builder. Drag a button (UIButton) and a label (UILabel) into the main view window.
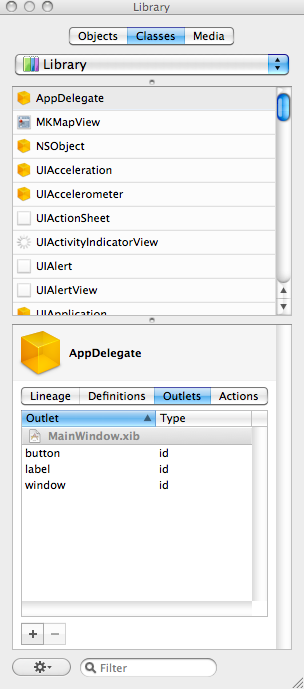
Next, click on the app delegate in the
MainWindow.xib file and go to the Classes segment
of the multisegmented control at the top of the Library window. Click on
AppDelegate in the list of
objects, and then click on the Outlets segment of the multisegmented
control underneath the AppDelegate object. Click on the plus sign button
below the outlets list to add a
new outlet. Add two new outlets, calling them “button” and “label”,
respectively; see Figure 7.
In the Connections Inspector (⌘-2), connect the button and label
outlets to the button and label elements as you’ve done in other
projects. Figure 8
shows what the finished NIB should look like (you can use the Attributes
Inspector to change the appearance of the button and label).
Save your changes and return to the MonoDevelop environment. If
you look again at the MainWindow.xib.designer.cs
file, you should see that it reflects the changes you made to the view
inside Interface Builder. The changes that MonoDevelop made are shown in
bold:
namespace HelloWorld {


    // Base type probably should be MonoTouch.Foundation.NSObject or subclass
    [MonoTouch.Foundation.Register("AppDelegate")]
    public partial class AppDelegate {

        #pragma warning disable 0169
        [MonoTouch.Foundation.Connect("window")]
        private MonoTouch.UIKit.UIWindow window {
         get {
          return ((MonoTouch.UIKit.UIWindow)(this.GetNativeField("window")));
         }
         set {
          this.SetNativeField("window", value);
         }
        }

        [MonoTouch.Foundation.Connect("button")]
					private MonoTouch.UIKit.UIButton button {
					get {
					return ((MonoTouch.UIKit.UIButton)(this.GetNativeField("button")));
					}
					set {
					this.SetNativeField("button", value);
					}
					}
					[MonoTouch.Foundation.Connect("label")]
					private MonoTouch.UIKit.UILabel label {
					get {
					return ((MonoTouch.UIKit.UILabel)(this.GetNativeField("label")));
					}
					set {
					this.SetNativeField("label", value);
					}
					}
    }
}
Warning:
You should not make any changes to the
MainWindow.xib.designer.cs file, as the MonoTouch
framework updates it automatically each time you edit your NIB file in
Interface Builder.
Double-click on the Main.cs file to open it
in the MonoTouch editor and add the following code directly before the
line where the window is made visible (window.MakeKeyAndVisible ();):
button.TouchDown += delegate {
     label.Text = "Pushed Button";
};
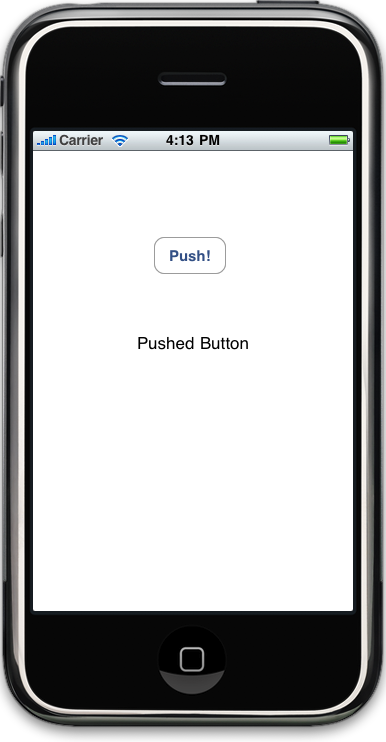
Save your modifications and select Run→Run from the MonoDevelop menu bar. Once the
application has been built and been deployed into iPhone Simulator, tap
the Push! button. You should see something like Figure 9.
You’ve just built your first iPhone application with
MonoTouch.