XNA's Game class
already provides a flexible engine for initializing and driving the
game. What it doesn't offer is any built-in mechanism for managing the game objects that we want to display and manipulate inside the game.
The examples that we have been looking at have
provided mechanisms for moving small numbers of sprites, but any real
game needs to track significantly more objects than this. Instead of
building all the objects into the game on an ad hoc basis, we will build
the framework inside which the objects can be managed.
These objects will be used for all elements of the game that we need to draw: they will be the falling tiles in a game of Tetris; the ghosts, dots, and player in Pac Man; and all the spaceships and bullets in Space Invaders.
Objects will know various things about themselves (such as where they
are on the screen) and will allow us to manage a consistent and simple
mechanism for moving and rendering efficiently. Providing a simple and
flexible implementation for game objects is the primary area that we
will address in the design and construction of the game framework.
We will take advantage of the .NET object orientation
features in the design of the framework. We will create an abstract
base class that supports a core set of functions that will be generally
useful in any of our game objects.
All these classes will be placed into a separate Game Library project named GameFramework,
which will allow us to reuse them between projects without having to
reimplement them or share source files. Instead, we will just add a
reference to the framework library, and its classes will be immediately
available.
1. The GameObjectBase Class
The first class is the GameObjectBase class, an abstract class from which all our game object classes will ultimately be derived. The functionality within GameObjectBase
is limited, but we can declare collections of game objects by using
this class without initially needing to know any more details about
which types of objects we are going to store.
The actual functionality within the class is very limited. In the class constructor, we take a Game object as a parameter. You might recall that the XNA games that we write all have their main class derived from the Game class, so storing it provides a mechanism that allows code within this class and any derived class to access the main Game object. The constructor is shown in Listing 1.
Example 1. The GameObjectBase class constructor
/// <summary>
    /// Constructor for the object
    /// </summary>
    /// <param name="game">A reference to the XNA Game class inside which the object
    /// resides</param>
    public GameObjectBase(Microsoft.Xna.Framework.Game game)
    {
        Game = game;
    }
|
In addition to the constructor, we define a single method, Update, which will be used to update the state of the object. It accepts a GameTime object as a parameter so that timing information can be extracted, just like the Update method in the main Game class. The function does nothing more than increment a variable, UpdateCount, so that we can tell how many updates have taken place; its code can be seen in Listing 2.
Our derived classes will override this function, however, so that they
can perform the actual updates of their corresponding game objects.
Example 2. The Update function
/// <summary>
    /// Update the object state
    /// </summary>
    /// <param name="gameTime"></param>
    public virtual void Update(GameTime gameTime)
    {
        // Increment the UpdateCount
        UpdateCount += 1;
    }
|
2. The SpriteObject Class
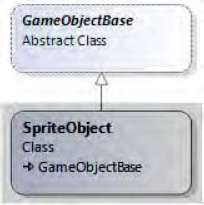
Derived from GameObjectBase is the SpriteObject class (see Figure 1).
This is a concrete class (not abstract) in which we will add all the
basic functionality that we might want to use to position and draw our
sprites. In its basic form, the class is capable of maintaining a
sprite's position, scaling, rotation, and origin, a texture for it to
render with, a color to tint with, a source rectangle for partial
texture rendering (if required), and a layer depth to help define the
order in which the sprites should be rendered.
It doesn't contain any object logic, however: it
knows nothing about how to move or change any of its properties. This
logic will be added by deriving further classes from SpriteObject,
as we will see shortly. Such derived classes are generally what we will
use when we build our games, but if a simple static sprite is all that
is required, instances of SpriteObject can be created and added to the game.
Various different constructor overloads are provided
to allow the calling code to easily set some of the common properties of
the class. The signatures for each of these are shown in Listing 3
(the bodies of the functions are omitted for brevity because they are
simply setting the provided parameter values into the class properties).
Example 3. The available constructors for the SpriteObject class
public SpriteObject(Game game)

    public SpriteObject(Game game, Vector2 position)

    public SpriteObject(Game game, Vector2 position, Texture2D texture)
|
The class offers a lot of additional properties to
allow us to control the position and appearance of the sprite, however,
as follows:
SpriteTexture stores a reference to a texture that can be used to render the sprite. The default implementation of the Draw
method (which we will discuss in a moment) will use this texture to
draw the sprite, though this behavior can be overridden if required.
PositionX and PositionY store the sprite's position as float variables, whereas the Position property represents the same position as a Vector2. Any of them can be set or retrieved, though they update the same internal variables so setting PositionX or PositionY will have an immediate effect on the return value from Position, and vice versa. The reason they are stored as floats as well as a Vector2 is that Vector2 is a structure rather than a class, so when we read the Position
property we are actually given a copy of the underlying structure. This
copy's properties cannot be modified, and Visual Studio will give an
error if, for example, you attempted to assign a value to Property.X. So instead we expose the individual coordinates for modification and interrogation, and the Vector2 structure for passing into functions that expect a value of this type.
OriginX, OriginY, and Origin store the sprite's origin coordinate, using a pair of floats and a Vector2 structure just as for the Position properties in the previous paragraph. The default origin is the coordinate (0, 0).
Angle stores the angle of rotation in radians, defaulting to 0.
ScaleX and ScaleY are float values that allow for uniform or non-uniform scaling to be applied to the sprite. In addition to this, the Scale property represents the same values as a Vector2 structure.
SourceRect is a Rectangle
structure with which we can define a subregion of the sprite's texture
that is to be rendered. If the structure is "empty" (its values are all
zero), this feature will be ignored, and the whole texture will be
rendered. Its default state is to be empty.
SpriteColor allows tinting and alpha levels to be applied to the sprite. It defaults to Color.White, with full intensity alpha.
LayerDepth stores a float value that will be used for setting the rendering order of the sprite if the appropriate mode is set when calling the SpriteBatch.
As you can see, the object allows virtually all the
basic sprite state to be stored and maintained. Creating an instance of
this class (or a class derived from it) allows a good deal of
flexibility for displaying the sprite without needing any further
variables to be defined. That greatly simplifies the repetitive code
that we would otherwise need to write to store all this information.
In addition to storing the sprite state, we also add a virtual function called Draw. Just like the Draw method in the XNA main Game class, we expect a GameTime object as a parameter, but we also require a SpriteBatch object to be passed in. Because this class is dedicated entirely to drawing sprites, it makes sense to expect a SpriteBatch, and we need access to one so that we can call its Draw method to display our sprite to the screen.
The default behavior of the SpriteObject.Draw method is to draw the configured sprite to the screen. It can do this only if it has a valid SpriteTexture, so this is checked first. After that, one of two different calls is made to SpriteBatch.Draw, depending on whether a SourceRect has been specified. The code for the Draw function is shown in Listing 4.
Example 4. The SpriteObject class Draw function
public virtual void Draw(GameTime gameTime, SpriteBatch spriteBatch)
    {
        // Do we have a texture? If not then there is nothing to draw...
        if (SpriteTexture != null)
        {
// Has a source rectangle been set?
            if (SourceRect.IsEmpty)
            {
                // No, so draw the entire sprite texture
                spriteBatch.Draw(SpriteTexture, Position, null, SpriteColor, Angle,
                                        Origin, Scale, SpriteEffects.None, LayerDepth);
            }
            else
            {
                // Yes, so just draw the specified SourceRect
                spriteBatch.Draw(SpriteTexture, Position, SourceRect, SpriteColor, Angle,
                                        Origin, Scale, SpriteEffects.None, LayerDepth);
            }
        }
    }
|
Other classes that derive from SpriteObject can, of course, override the Draw method and supplement or entirely replace the default functionality as needed.
A final property present within the class can be used
to help determine the area on the screen in which the sprite is being
drawn. BoundingBox calculates this by looking at the sprite's
position, its origin, the texture size, and the current scale. These are
factored into a Rectangle structure that can then be used for simple collision checks, for example. The code for this function is shown in Listing 5.
Example 5. Calculating the sprite's bounding box
public virtual Rectangle BoundingBox
    {
        get
        {
            Rectangle result;
            Vector2 spritesize;

            if (SourceRect.IsEmpty)
            {
                // The size is that of the whole texture
                spritesize = new Vector2(SpriteTexture.Width, SpriteTexture.Height);
            }
            else
            {
                // The size is that of the rectangle
                spritesize = new Vector2(SourceRect.Width, SourceRect.Height);
            }

            // Build a rectangle whose position and size matches that of the sprite
            // (taking scaling into account for the size)
            result = new Rectangle((int)PositionX, (int)PositionY,
                                (int)(spritesize.X * ScaleX), (int)(spritesize.Y * ScaleY));

            // Offset the sprite by the origin
            result.Offset((int)(-OriginX * ScaleX), (int)(-OriginY * ScaleY));

            // Return the finished rectangle
            return result;
        }
    }
|
The code first determines the size of the texture
being displayed, which is the width and height of the whole texture, or
the size defined by the SourceRect property if it has been set. It then creates its Rectangle structure by using the sprite position for the Left and Top values and the calculated texture size for its Width and Height.
The texture size is scaled as appropriate to ensure that the resulting
rectangle matches the size of the texture displayed on the screen.
The rectangle is then offset by the origin position.
The further the origin moves toward the right, the further the sprite
itself moves to the left, and so we subtract the origin position from
the rectangle's top-left corner. Once again, this is scaled as
appropriate.
The finished rectangle is then returned.
|
This function works well for
many sprites, but those that have been rotated will not produce the
expected results. The code does not take rotation into account, and so
rotated sprites—and particularly those that are not square in shape—will
protrude outside of the bounding box. If your sprites need more
sophisticated bounding box calculation, this will need to be implemented
in your derived game object classes. |