IIS Settings
The web servers containing
the web applications (Dynamics CRM, Reporting Services, and SharePoint)
will all need to be set up to enable Kerberos. However, you might find
that this is not necessary if the web server is the same machine as the
domain controller (such as in a small business deployment).
The IIS Metabase needs to
be configured for “enabling editing” to ensure that the Metabase
attempts to pass credentials using Kerberos. To enable editing in the
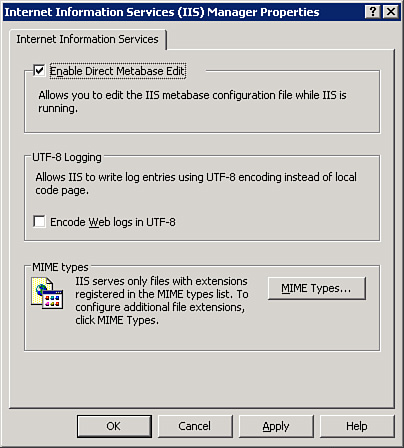
IIS v6.0 Metabase, right-click the server name and select Properties.
Check the Enable Direct Metabase Edit check box.
This will enable you to configure the Metabase without stopping IIS. This can be done in a few ways.
Before performing
either, you need to determine the identifier of the site. This can be
found by navigating to IIS and viewing the Identifier column. (If you
don’t see the column, select View from the Management Console and be
sure that the Identifier column is shown.) Figure 9 shows the identifiers of two websites.

The first method is by updating the Metabase using admin scripts:
At the command prompt, navigate to C:\Inetpub\Adminscripts.
Type the following command (Where xx is the identifier of the website you want to change authentication type):
cscript adsutil.vbs set w3svc/xx/NTAuthenticationProviders "Negotiate,NTLM"
Figure 10 shows the output of the adstuil.

For more advanced users, you can modify Metabase.xml directly, as follows:
Navigate to the Metabase.xml file. This is typically found at the following location: <root drive name>\System32\Inetsrv.
Set all existing instances of NTAuthenticationProviders="NTLM" to NTAuthenticationProviders="Negotiate,NTLM".
Before you can make changes to that file, you will have to enable the changes in the inetmgr, as shown in Figure 11.

You can use PowerShell to make changes to the WMI. Use set-wmiobject for IISWebService.
Note
After making these changes, you must restart IIS.
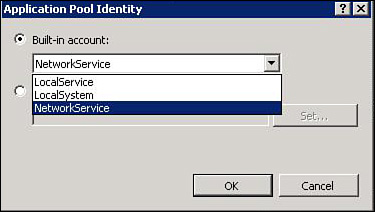
In IIS 6.0, the
application pools under which the relevant websites/applications run
should be set to run as either a system account (Network Service or
Local System) or as a user account configured correctly in Active
Directory (as shown in Figure 12).

AD Configuration
All SPNs must be defined in Active Directory.
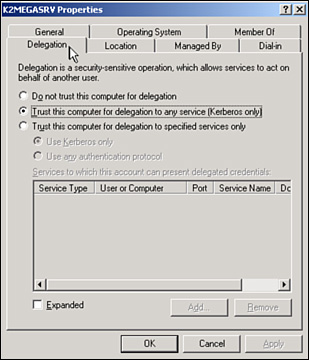
All relevant
computers accessing data from a different machine need to be set to
Trusted for Delegation. To access this setting, follow these steps:
1. | Open Active Directory Users and Computers.
|
2. | Search for the relevant account (computer/user) that needs to be trusted for delegation.
|
3. | Right-click each object, and then check the Trusted for Delegation option on the Properties dialog box (as shown in Figure 13).

|
If the Microsoft CRM
website is in the application pool that is running under a specific user
account (that is, not Network Service/Local System), that account will
require an SPN.
To acquire an SPN, perform the following steps:
1. | Download and install the setspn tool on any machine on the domain. For Windows 2003 SP2, you can find this tool at http://go.microsoft.com/fwlink/?LinkId=100114. For Windows 2008, this tool is built in to the operating system.
|
2. | Open a command prompt window. For Windows 2003, navigate to the directory in which this tool has been installed.
|
3. | Enter
the following command for each account on each web server. You must use
the name that the users will be using to access the system:
setspn -A HTTP/computer Domain\User
setspn -A HTTP/computer.domain.local Domain\User
setspn -A HTTP/CRMalias Domain\User
setspn -A HTTP/CRMalias.domain.local Domain\User
|
Note
The
Delegation tab will not appear in the Active Directory Computer/User
property screen. To enable the Delegation tab, enable the SPN settings
as described earlier.