2. MSI Export/Import/Install
You have seen in the previous
section how to import and install a BizTalk application manually. Soon
you will realize, if you have not already, that deploying an application
manually is a long and error-prone process. In order to simplify the
process of exporting, importing, and installing a BizTalk application,
Microsoft provides BizTalk 2009 with a way to do all the preceding using
MSI packages.
Exporting a BizTalk
application consists of taking all BizTalk artifacts for a particular
application and packaging them into an MSI file. Exercise 2
walks you through the process. You do not have to export all the
different BizTalk artifacts into a single MSI. You can also decide to
split your BizTalk artifacts into multiple MSI packages. This is
convenient for BizTalk applications that contain too many artifacts.
|
This exercise shows how to export an MSI application. To perform this exercise, please ensure that you completed Exercise 1 successfully. Then follow these steps:
Open the BizTalk Administration Console: Select Start => All Programs => Microsoft BizTalk Server 2009 => BizTalk Server, and then click the Administration icon. In the BizTalk Server 2009 Administration Console, expand BizTalk Server 2009 => BizTalk Group => Applications => PROBIZTALK Deploy Sample Application.
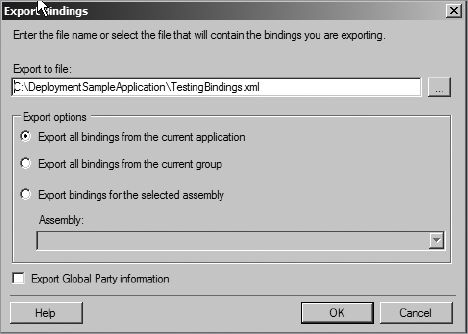
Add the testing binding file to the PROBIZTALK Deploy Sample Application: Right-click PROBIZTALK Deploy Sample Application, point to Export, and then click Bindings. In the Export Bindings window shown in Figure 5, type C:\DeploymentSampleApplication\TestingBindings.xml in the Export to file field, and select "Export all bindings from the current application."
Open C:\PROBIZTALK\DeploymentSampleApplication\TestingBindings.xml with Notepad. Replace all occurrences of the text "\Documents\" with "\TestDocuments\". Save the file, and close Notepad. In the BizTalk Server 2009 Administration Console, expand BizTalk Server 2009 => BizTalk Group => Applications => PROBIZTALK Deploy Sample Application. Right-click the PROBIZTALK Deploy Sample Application, point to Add, and then click Resources. In
the Add Resources window, click the Add button, and select the
C:\PROBIZTALK\Deployment SampleApplication\TestingBindings.xml file. In the Add Resources window, type Testing
in the Target Environment text box. This text box allows you to specify
which environment a binding file is applied to upon installation of the
BizTalk MSI application. In the Add Resources window, click the OK button.
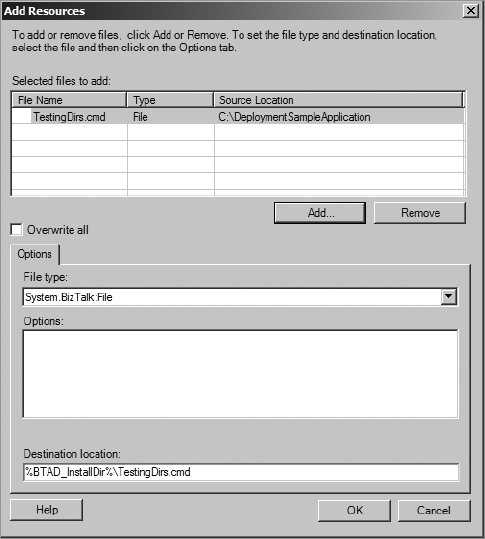
Add a pre-processing script to the PROBIZTALK Deploy Sample Application: In Notepad, create a new file, and insert content of the command file presented in Listing 2. Save the file as C:\PROBIZTALK\DeploymentSampleApplication\TestingDirs.cmd. In the BizTalk Server 2009 Administration Console, expand BizTalk Server 2009 => BizTalk Group => Applications => PROBIZTALK Deploy Sample Application. Right-click the PROBIZTALK Deploy Sample Application, point to Add, and then click Pre-processing scripts. In the Add Resources window shown in Figure 6, click the Add button, and select the C:\PROBIZTALK\DeploymentSampleApplication\TestingDirs.cmd file. In the Add Resources window, click the OK button.
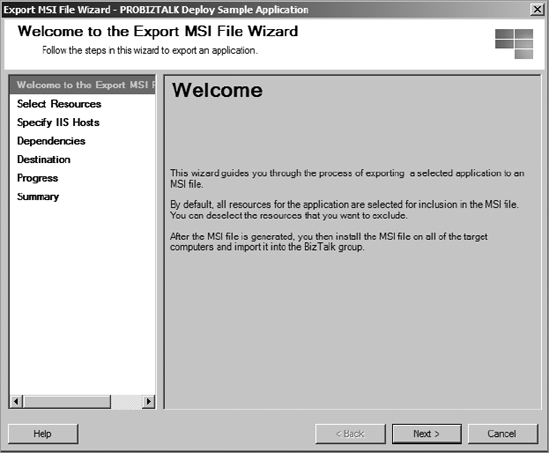
Export the PROBIZTALK Deploy Sample Application to an MSI file: In the BizTalk Server 2006 Administration Console, expand BizTalk Server 2009 => BizTalk Group => Applications => PROBIZTALK Deploy Sample Application. Right-click the PROBIZTALK Deploy Sample Application, point to Export, and then click MSI. When the Welcome window appears as shown on Figure 7, click the Next button.
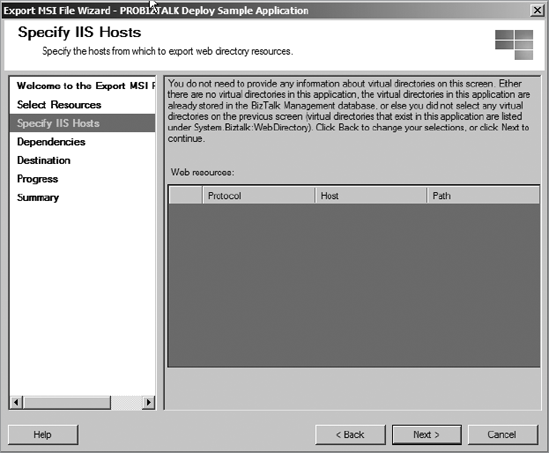
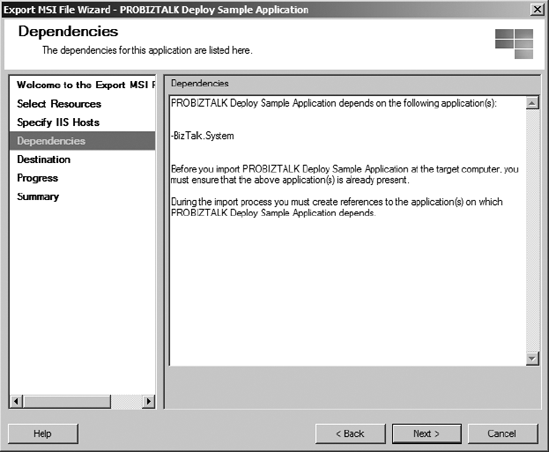
In the Select Resources window shown on Figure 8, ensure that all BizTalk artifacts are checked, and then click the Next button. Since the application does not have any virtual directories, click the Next button in the Specify IIS Hosts window, as shown in Figure 9. The Dependencies window shown in Figure 10
enumerates all the dependencies for the application. As you can see in
this particular case, this application depends only on the
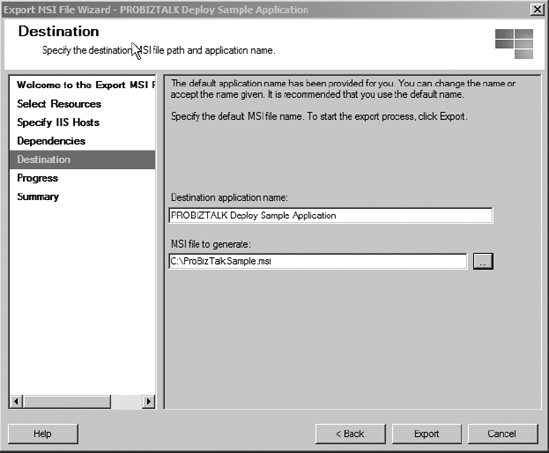
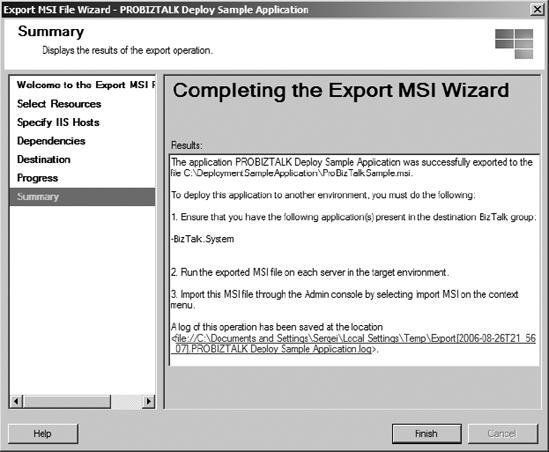
BizTalk.System application. Click the Next button. Type C:\proBizTalkSample.msi, and then click the Export button in the Destination window, as shown in Figure 11. In the Summary window shown in the Figure 12, click the Finish button.
|

Once you have exported your
BizTalk application to an MSI package, you can import or install it onto
a new BizTalk Server Group. When importing or installing an MSI BizTalk
application, you can specify the following parameters:
Application name:
The name of the application used to import or install the MSI package.
If the application name is not provided, the default BizTalk application
name will be used. If this happens, remember that you can move the
artifacts to the application manually. Environment:
The target environment where the MSI package is being imported or
installed. This parameter allows all binding files for the specified
environment to be applied to the BizTalk server. If the environment
parameter is not specified, all the binding files that do not specify a
target environment will be applied. The benefit of this is that you can
create a bindings file for your receive ports and another bindings file
for your send ports. By having the environment setting the same, they
will both be applied, which gives you the ability to segment your
binding files. This will allow you to create a bindings file that can
contain information that needs to be deployed in each and every
environment. This is done by keeping the port binding target empty,
which sets the default to ENV:ALL. This
becomes important when you want to do incremental updates in that you
don't need to worry about unnecessarily overwriting unchanged items. Overwrite: This flag specifies whether to overwrite the existing artifacts.
Table 1 displays what operations are executed when a BizTalk application is imported or installed.
Table 1. Operations Executed When Importing or Installing a BizTalk Application| Operation | Occurs While Importing | Occurs While Installing |
|---|
| Add references in the BizTalk Management Database. | X | | | Copy BizTalk artifacts to the BizTalk server. | X | X | | Apply binding files for the specified target environment. | X | X | | Execute pre- or post-processing scripts. | X
The scripts will perform only those actions that will run when the BTAD_InstallMode is equal to Import. | X
The scripts will perform only those actions that will run when the BTAD_InstallMode is equal to Install. | | Store
file-based artifact (assemblies, virtual directories, files, scripts,
certificates, BAM artifacts, and BAS artifacts) data in the BizTalk
Management Database. | X | | | Store policies in the Rule Engine database. | X | | | Store BAM artifacts in the BAM. | Primary Import database.
Deploy BAM definitions. | X | | Add BizTalk assemblies to the Global Assembly Cache. | Only if BizTalk assemblies were added to the BizTalk application with the "Add to global assembly cache on MSI import" option. | Only if BizTalk assemblies were added to the BizTalk application with the "Add to global assembly cache on MSI install" option. |
|