It is important to note that if you
jumped to this section before completing the preceding steps, you need
to go back. Preparing the server for the first Standard Edition Server
and building a valid topology in the Topology Builder tool are both
prerequisites to installing the Front End role. It should be familiar
if you’ve already installed Lync Server 2010. Administrators new to
Lync Server 2013 are advised to review the new features, requirements,
and prequisites before beginning the installation process. The
following prerequisites are required to install the Standard Edition
Front End role:
• IIS with the following options:
• Static Content
• Default Document
• Directory Browsing
• HTTP Errors
• HTTP Redirection
• ASP.NET (all)
• .NET Extensibility (all)
• Internet Server API (ISAPI) Extensions
• ISAPI Filters
• HTTP Logging
• Logging Tools
• Request Monitor
• Tracing
• Basic Authentication
• Windows Authentication
• Request Filtering
• Static Content Compression
• IIS Management Console
• IIS Management Scripts and Tools
• Message Queueing with Directory Service Integration
Note that this can also be done in PowerShell using the following commands. The first command, Import-Module, is not needed in Windows Server 2012.
Import-Module ServerManager
Add-WindowsFeature Web-Dyn-Compression,desktop-experience,RSAT-ADDS,Web-Server,Web-
Scripting-Tools,Web-Windows-Auth,Web-Asp-Net,Web-Log-Libraries,Web-Http-Tracing,
Web-Stat-Compression,Web-Default-Doc,Web-ISAPI-Ext,Web-ISAPI-Filter,Web-Http-
Errors,Web-Http-Logging,Web-Net-Ext,Web-Client-Auth, Web-Filtering,Web-Mgmt-
Console,Msmq-Server,Msmq-Directory
After you’ve completed the steps previously
outlined, the server is ready to install the Front End role. From the
main Lync Server 2013 Deployment Wizard screen click Install or Update
Lync Server System from the main pane.
First click Install Local Configuration
Store. Note that the local configuration store holds significantly more
data in Lync 2013 than it did in Lync 2010. Follow these steps to
complete the installation process:
1. For Step 2: Setup or Remove Lync Server Components, click Run.
2. At the screen that pops up, click Next.
3. The next screen shows the actions being performed, as shown in Figure 1. This process takes a few minutes to complete.
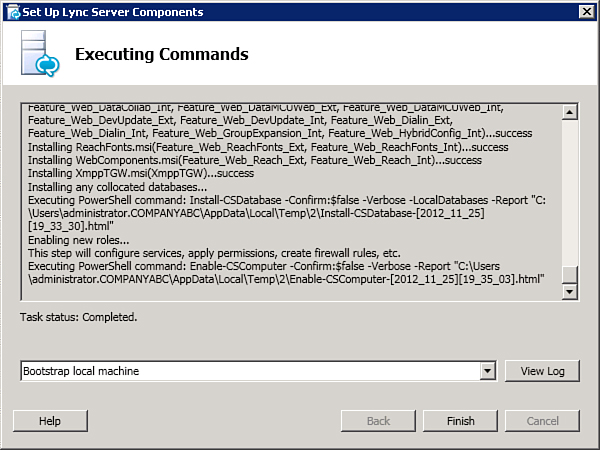
Figure 1. Installing the Front End role.
4. After the task completes, click Finish and you are brought back to the Deployment Wizard.
5. Review Step 3: Request, Install or Assign Certificates, and click Run.
6. At the next screen choose Default.
7. Click Request, as shown in Figure 2.
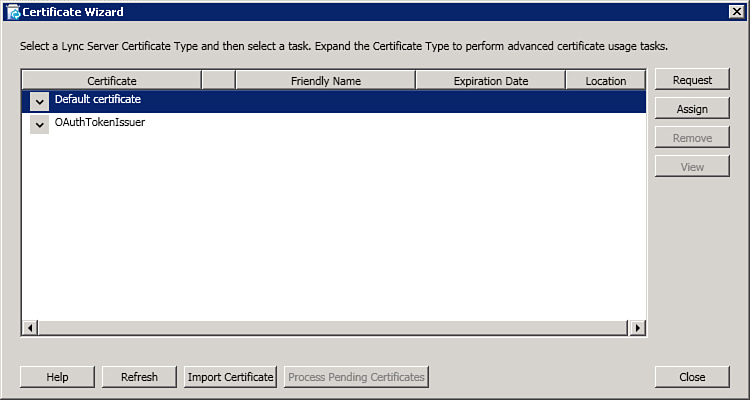
Figure 2. Request the default certificate.
8. Assuming you are
using an internal certificate authority (CA), choose Send the Request
Immediately to an Online Certificate Authority, and click Next. This is
the default option.
9.
Select the appropriate certificate authority for your environment from
the drop-down list, choose a friendly name and key length, and check
the box for Mark the Certificate’s Private Key as Exportable, as shown
in Figure 3, and click Next.
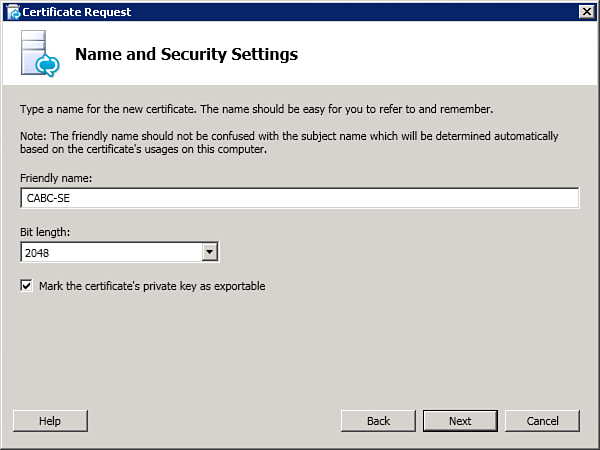
Figure 3. Certificate request settings.
10. Enter your Organization Name and Organizational Unit and then click Next.
11. Select your
country from the drop-down menu and then enter your state/province and
city/locality. Remember that full names must be entered; abbreviations
are not considered valid for certificate requests. When complete, click
Next.
12. The Deployment
Wizard automatically adds the SANs required based on the published
topology. Unless you have special requirements, select the option to
Skip and click Next.
13. Review the
information to ensure that it is correct and click Next. The following
screen shows the commands to be executed, as shown in Figure 4.
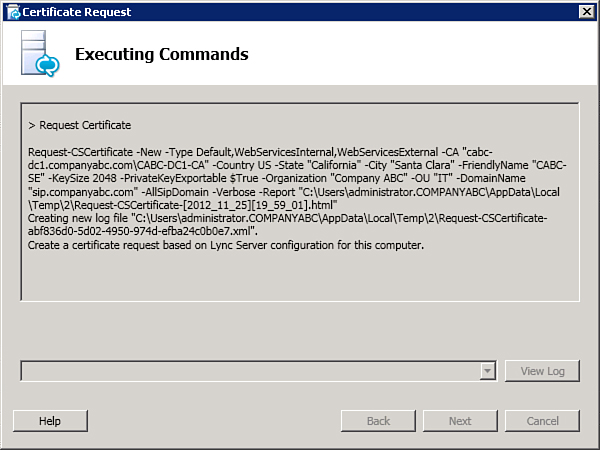
Figure 4. Certificate request process.
14. Perform the same steps to request the OAuthTokenIssuer certificate.
15. Click Finish to go back to the Deployment Wizard screen.
16. Click Run again for Step 3 to assign the Default certificate.
17. On the first screen highlight Default Certificate and choose the option to assign.
18. Click Next.
19. Select the certificate you created earlier based on the friendly name assigned, as shown in Figure 5, and click Next.
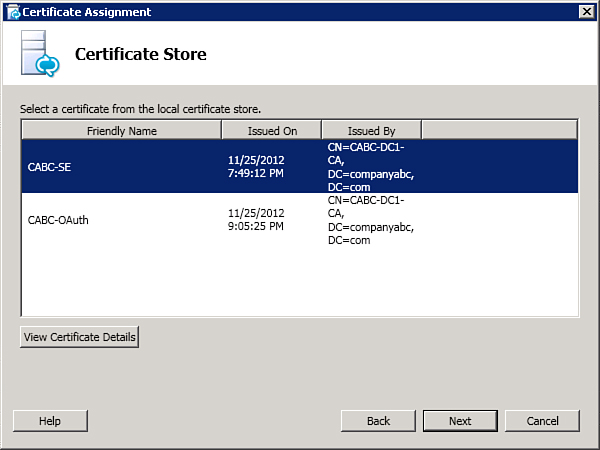
Figure 5. Choose the default certificate.
20. Ensure that the process completes successfully and click Finish.
21. Perform the same assign process for the OAuthTokenIssuer certificate.
22. After all the certificates have been assigned, there will be a green check mark by Step 3, as shown in Figure 6. If there is not a check mark, recheck your process because it’s likely you skipped a step.
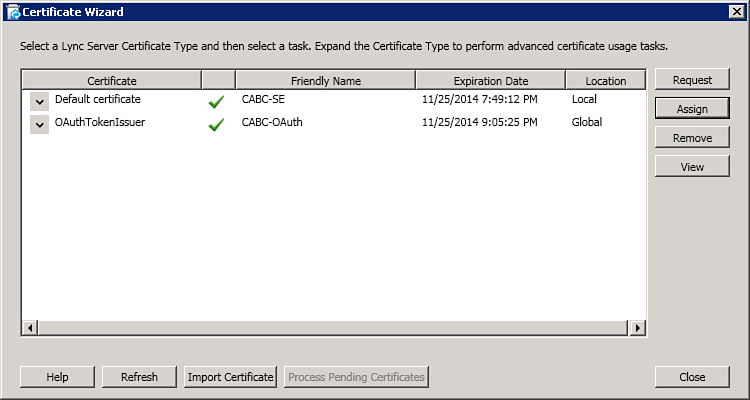
Figure 6. Certificate process completed.
23. If the file store
for the pool is located on this system, you’ll need to reboot before
continuing. After the reboot, restart the Deployment Wizard by
launching Setup.exe.
24. Click Install or Update Lync Server System and then click Run for Step 4: Start Services.
25. Click Next.
26. Ensure the command finished successfully, as shown in Figure 7. You can also check the status of services in the Services MMC console found in the server administrative tools.
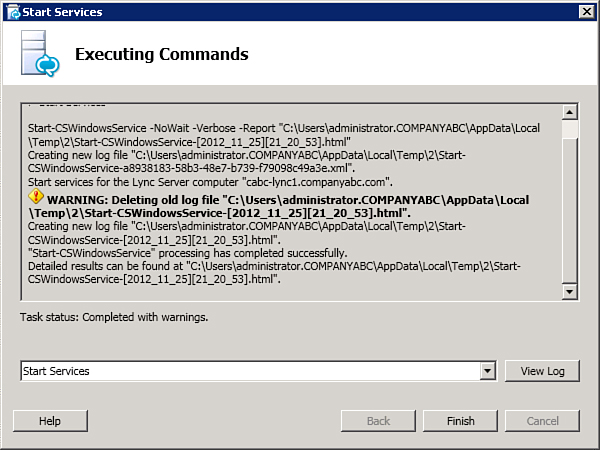
Figure 7. All services started.
27. Click Exit to leave the Deployment Wizard.
The Standard Edition front end is now installed and ready for further configuration using the Lync Server Control Panel.
Note that the client autoconfiguration
requirements are still the same. The following DNS records are required
for client autoconfiguration:
• SRV record of _sipinternaltls._tcp.<sip_Domain> for port 5061 pointing to the FQDN of your front-end pool or Director.
• sipinternal.<sip_Domain> pointing to the IP address assigned to your front-end pool or Director.
• sip.<sip_Domain> pointing to the IP address assigned to your front-end pool or Director.