After you finishing creating the table
layout and cells, you can insert content. You can add text, images, and
other data in Standard or Expanded Table modes. Simply click in the cell
where you want to add material, and then type, paste, or insert the
content you want. If you have content available in the Assets or Files
panel, you can drag it into the table; releasing your mouse when you’re
hovering over the right cell. You can only add content to layout cells;
the empty grey area in a layout table is not available for content. When
you add content to a cell, it automatically expands to accommodate the
incoming content, which changes the size of the column and table.
Add Text or an Image to a Table
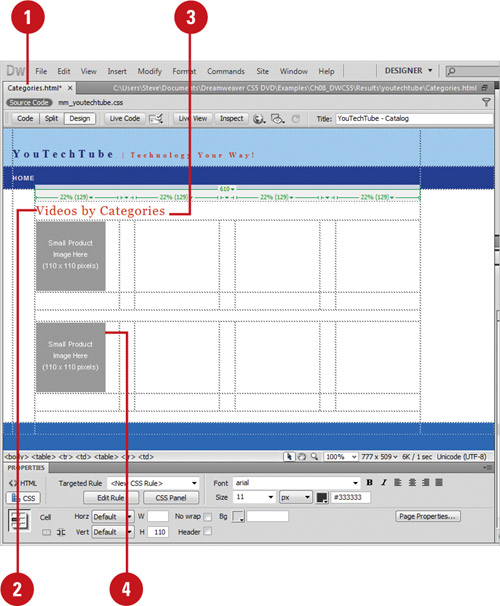
1. Open the Web page that contains the table you want to add content.
 |
2. Click to place the insertion point in the layout cell where you want to add content.
|
3. To add text, type or paste the text you want.
- Press Enter (Win) or Return (Mac) to add a paragraph return.
- Press Shift+Enter (Win) or Shift+Return (Mac) to add a soft return.
Note
By default, the text is left justified and centered within the cell, and soft wraps at the end of the table cell.
|
4. To add an image, click the Insert menu, click Image, select the image file you want, and then click OK.
The table expands to accommodate the text or image content.
|
Modify Table Text
1.
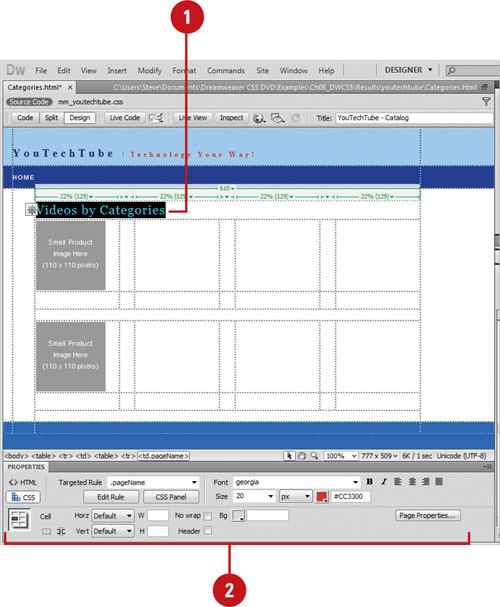
Select the table text you want to modify.
 |
2. In the Properties panel, modify the text using the following options:
- Format. Click to change the basic HTML format of the text (heading and paragraph styles).
- Style. Click to work with CSS style sheets.
- Alignment. Click to change the justification of the text (Align Left, Align Center, Align Right, or Justify).
- Bold/Italic. Click to bold or italicize the selected text.
- Font. Click to change the default font of the selected table text.
- Size. Click to change the default size of the selected table text.
- Color. Click to change the color of the selected table text (black, default).
Did You Know?
You can sort rows in a table. If
you don’t have any merged cells in a table, you can sort the table.
Select the table or click in any cell, click the Commands menu, and then
click Sort Table. In the Sort dialog box, set the options you want, and
then click OK. Some of the sort options include Sort By, Order, Sort
Includes The First Row, Sort Header Rows, Sort Footer Rows, and Keep All
Row Colors The Same After The Sort Has Been Completed. |
|