2. A Simple Photo Upload Share Application
This section looks at building a photo Share
application that takes an image and uploads it as a byte array to a WCF
service. The example app is located in the WPUnleashed.ShareExample
project in the downloadable sample code. The WCF service that the app
communicates with is located in the WPUnleashed.Web project.
When your app is selected from the Share menu
in the built-in picture viewer, your app is launched and the main page
of your app has its query string populated with a string identifier
named FileId. Extras applications use Token as their identifier; Share
applications use FileId.
The FileId value is used to retrieve the
image from the Pictures Hub in the same manner as an Extras application
retrieves the image.
In the following excerpt from
MainPage.xaml.cs, the code to detect whether the app is executing
within the emulator has been abstracted to a custom class called EnvironmentValues, which provides for greater flexibility during testing and potentially increases the portability of your code.
If the code is executing within the emulator,
we rely on a dummy image, or else the image is retrieved using the file
ID provided in the page query string. If no file ID is present, the PhotoChooserTask is used to allow the user to select an image from the Pictures Hub:
protected override void OnNavigatedTo(NavigationEventArgs e)
{
base.OnNavigatedTo(e);
/* Equivalent to: Environment.DeviceType == DeviceType.Emulator */
if (EnvironmentValues.UsingEmulator)
{
ProcessShareTestImage();
}
else
{
string fileId;
if (NavigationContext.QueryString.TryGetValue("FileId", out fileId))
{
imageName = fileId;
ProcessShareImage(fileId);
}
else
{
photoChooserTask.Show();
}
}
}
Note
It is a Windows Phone Marketplace
certification requirement that if your Share application is launched
from the application list (not from the Share menu), it must invoke the
PhotoChooser task to allow the user to select an image or take a photo.
Conversely, it is also a requirement that if your app is launched from
the Share menu, no further image selection steps should be required.
To determine whether your app has been
launched from the Share menu in the Picture Viewer, you can either test
for the presence of the FileId query string parameter, as demonstrated
in the previous example, or test whether the query string contains an Action parameter set to ShareContent, as shown in the following example:
string action;
NavigationContext.QueryString.TryGetValue("action", out action);
if (action == "ShareContent")
{
/* Launched from Share menu. */
}
As with the Extras application in the previous section, Share applications rely on the XNA MediaLibrary class for retrieving the selected image. The following using statements should be included at the top of your page:
using System.IO;
using System.Windows.Media.Imaging;
using Microsoft.Phone.Tasks;
using Microsoft.Xna.Framework.Media;
The custom ProcessShareImage method uses the token provided in the query string to retrieve the image from the phone’s media library, as shown:
void ProcessShareImage(string token)
{
MediaLibrary mediaLibrary = new MediaLibrary();
Picture picture = mediaLibrary.GetPictureFromToken(token);
SetImageStream(picture.GetImage());
}
The SetImageStream method takes the Stream returned from the Picture.GetImage method and creates a new BitmapImage, which is then assigned to an Image control on the page:
void SetImageStream(Stream imageStream)
{
BitmapSource bitmapSource = new BitmapImage();
bitmapSource.SetSource(imageStream);
image.Source = bitmapSource;
}
When executing within the emulator, the ProcessShareTestImage
takes a different approach and uses an image stored as a resource
within the project. As stated previously, this facilitates development
by removing the reliance on the Pictures Hub and is useful for testing
purposes. See the following excerpt:
string testImageUrl = @"/DanielVaughan.WPUnleashed" +
".ShareExample;component/Images/TestImage.jpg";
string imageName = "WPUnleashedTestImage";
void ProcessShareTestImage()
{
var imageUri = new Uri(testImageUrl, UriKind.Relative);
using (Stream stream = Application.GetResourceStream(imageUri).Stream)
{
SetImageStream(stream);
}
}
So far, you have seen how the image is retrieved from the image library and displayed using an Image
control. However, the real value of a photo Share application lies in
its ability to send the image somewhere. In the sample, the image is
sent to a web service located in the WPUnleashed.Web project.
An ICommand named UploadCommand is used to begin the upload and is initialized within the class constructor, like so:
public MainPage()
{
InitializeComponent();
uploadCommand = new DelegateCommand(obj => UploadImage());
DataContext = this;
client.UploadImageCompleted += HandleUploadImageCompleted;
photoChooserTask.Completed += HandlePhotoChooserTaskCompleted;
}
The uploadCommand field is a DelegateCommand that calls the UploadImage method when the command is executed.
The DataContext
of the page is set to the page itself. This enables you to easily bind
to any commands within the page and acts as a quasi viewmodel.
After the command is executed and you have
the image, you need to upload it somewhere.
The ImageUploadService with its single UploadImage method is shown in Listing 1.
LISTING 1. ImageUploadService Class
[ServiceContract(Namespace = "WPUnleashed")]
[AspNetCompatibilityRequirements(RequirementsMode
= AspNetCompatibilityRequirementsMode.Allowed)]
public class ImageUploadService
{
[OperationContract]
public void UploadImage(byte[] imageBytes, string name)
{
Debug.WriteLine(string.Format("Saving image {0}.", name));
/* TODO: Save the image to a database or directory. */
}
}
Ordinarily, the generated XML configuration
for the WCF service would be adequate to send most objects over the
wire. However, sending an image as a large byte array to the WCF
service fails if the configuration is not modified. Specifically, the maxArrayLength and maxReceivedMessageSize need to be explicitly defined, as shown in the following excerpt:
<binding name="ImageUploadService.customBinding0">
<binaryMessageEncoding>
<readerQuotas
maxArrayLength="2147483647" />
</binaryMessageEncoding>
<httpTransport
maxReceivedMessageSize="2147483647" />
</binding>
To consume the WCF service from the Windows
Phone app, a service reference is created by right-clicking the project
node and selecting Add Service Reference (see Figure 2).
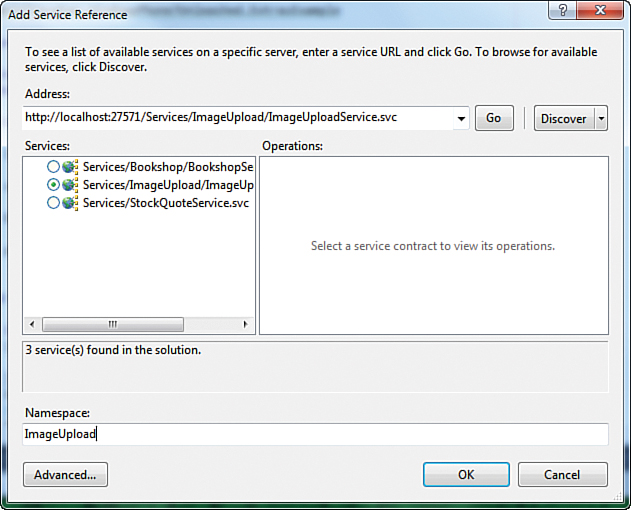
FIGURE 2 Adding a service reference for the custom ImageUploadService.
The app is then able to use the service via the generated service client, which is called ImageUploadServiceClient. UploadCommand calls UploadImage when it is executed. The UploadImage method retrieves the BitmapImage from the Source property of the Image control and then uses it to create a WriteableBitmap. A WriteableBitmap is used because it provides access to the image’s pixels, whereas a BitmapImage does not.
After the image has been converted to a byte
array using a custom extension method, the bytes are sent to the WCF
service, as shown:
void UploadImage()
{
BitmapImage bitmapImage = (BitmapImage)image.Source;
if (bitmapImage == null)
{
return;
}
WriteableBitmap writeableBitmap = new WriteableBitmap(bitmapImage);
byte[] imageBytes = writeableBitmap.ToByteArray();
try
{
SetProgressBarVisibility(true);
client.UploadImageAsync(imageBytes, imageName);
}
catch (Exception)
{
SetProgressBarVisibility(false);
throw;
}
}
To convert the WriteableBitmap to a byte array, we use a custom BitmapExtensions class that contains the ToByteArray method, shown in the next excerpt. The WriteableBitmap
represents each pixel using an integer value. An integer contains four
bytes, representing the red, green, blue, and alpha components of a
pixel. The ToByteArray method splits the integer values into its consecutive bytes using the static Buffer.BlockCopy method, as shown:
public static byte[] ToByteArray(this WriteeableBitmap writeableBitmap)
{
ArgumentValidator.AssertNotNull(writeableBitmap, "writeableBitmap");
int[] pixels = writeableBitmap.Pixels;
int arrayLength = pixels.Length * 4;
byte[] result = new byte[arrayLength];
Buffer.BlockCopy(pixels, 0, result, 0, arrayLength);
return result;
}
The MainPage XAML file contains an AppBarIconButton, which, when tapped by the user, executes the UploadCommand in the code-beside. The image is displayed in an Image control. During the upload process, a ProgressBar is made visible to indicate that the image is being uploaded (see Listing 2).
LISTING 2. MainPage.xaml (excerpt)
<Grid x:Name="LayoutRoot" Background="Transparent">
<Grid.RowDefinitions>
<RowDefinition Height="Auto"/>
<RowDefinition Height="*"/>
</Grid.RowDefinitions>
<u:AppBar>
<u:AppBarIconButton
x:Name="button_Upload"
Command="{Binding UploadCommand}"
Text="Upload"
IconUri="/Images/appbar.upload.rest.png" />
</u:AppBar>
<StackPanel x:Name="TitlePanel" Grid.Row="0" Margin="12,17,0,28">
<TextBlock Text="Windows Phone Unleashed"
Style="{StaticResource PhoneTextNormalStyle}"/>
<TextBlock Text="share" Margin="9,-7,0,0"
Style="{StaticResource PhoneTextTitle1Style}"/>
</StackPanel>
<Grid x:Name="ContentPanel" Grid.Row="1" Margin="12,0,12,0">
<Image x:Name="image" />
<ProgressBar x:Name="progressBar"
IsIndeterminate="True"
Visibility="Collapsed" />
</Grid>
</Grid>
As soon as an image is selected by the user, it is displayed in the Image control. The user can then use the application bar icon button to upload the image to the WCF service (see Figure 3).
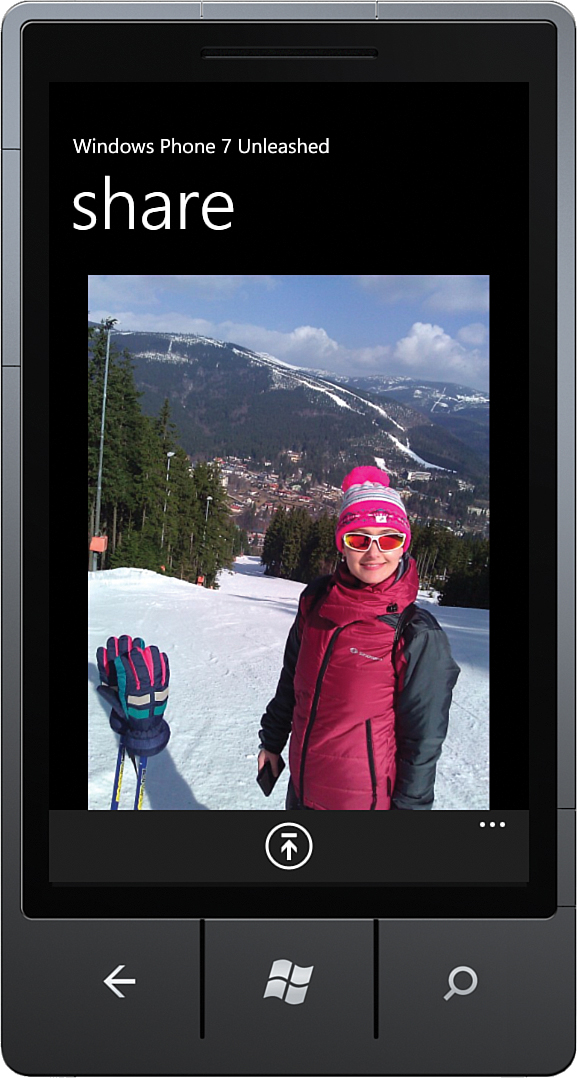
FIGURE 3 The sample photo share application.
When the WCF service client completes the image upload, the completed handler is called, as shown:
void HandleUploadImageCompleted(object sender, AsyncCompletedEventArgs e)
{
SetProgressBarVisibility(false);
if (e.Error != null)
{
MessageBox.Show("Error uploading image.");
return;
}
MessageBox.Show("Image uploaded");
}
If the image bytes are successfully uploaded, a confirmation message is displayed (see Figure 4).

FIGURE 4 A message box confirms that the image was successfully uploaded.