As our first introduction to
detecting motion, we’ll create the Orientation application. Orientation
won’t be wowing users, it’s simply going to say which of six possible
orientations the iPhone is currently in. The Orientation application
will detect standing-up, upside-down, left-side, right-side, face-down,
and face-up orientations.
Setting Up the Project
Create a new view-based iPhone application in Xcode and call it Orientation. Click the OrientationViewController.h file in the Classes group and add an outlet property (orientationLabel) for an orientation label. The OrientationViewController.h file should read as shown in Listing 1.
Listing 1.
#import <UIKit/UIKit.h>

@interface OrientationViewController : UIViewController {
    IBOutlet UILabel *orientationLabel;
}

@property (nonatomic, retain) UILabel *orientationLabel;

@end
|
Add the appropriate @synthesize directive following the @implementation line:
@synthesize orientationLabel;
Finally, release the label in the implementation file’s dealloc method:
- (void)dealloc {
   [orientation release];
   [super dealloc];
}
Preparing the Interface
Orientation’s UI is simple (and very stylish), just a yellow text label in a field of black, which we’ll construct as follows:
1. | Open Interface Builder by double-clicking the OrientationViewController.xib file in the Resources group.
|
2. | Click the empty view and open the Attributes Inspector (Command+1).
|
3. | Click the Background attribute and change the view’s background to black.
|
4. | Open the Library (Shift+Command+L) and drag a label (UILabel)
to the center of the view; expand the size the label to the edge sizing
guidelines on each side of the view. Set the label’s text to read Face Up.
|
5. | With the label selected, open the Attributes Inspector (Command+1).
|
6. | Click
the Color attribute and change the label’s text color to yellow, use
the Alignment attribute to center the label’s text, and then update the
Font attribute to change the font size to 36 points.
|
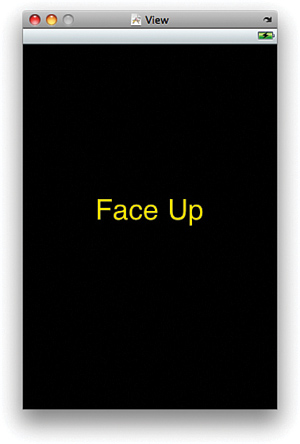
The finished view should look like Figure 1.

Our
application will need to be able to change the text of the label when
the accelerometer indicates that the orientation of the device has
changed. To do this, we’ll need to connect the outlet we created earlier
to the label.
Control-drag from the File’s Owner icon in the Document window to the label in the view. Choose the orientationLabel outlet when prompted. Save the XIB file and return to Xcode.
Reacting to Changes in Orientation
When our custom view is shown, we need to register a method in our application to receive UIDeviceOrientationDidChangeNotification
notifications from iOS. We also need to tell the device itself that it
should begin generating these notifications so that we can react to
them. All of this setup work can be accomplished in the Orientation.m viewDidLoad method. Let’s implement that now. Uncomment and edit the viewDidLoad method to read as shown in Listing 2.
Listing 2.
 1: - (void)viewDidLoad {
 2:
 3:     [[UIDevice currentDevice]beginGeneratingDeviceOrientationNotifications];
 4:
 5:     [[NSNotificationCenter defaultCenter]
 6:                     addObserver:self selector:@selector(orientationChanged:)
 7:                     name:@"UIDeviceOrientationDidChangeNotification"
 8:                     object:nil];
 9:
10:     [super viewDidLoad];
11: }
|
In line 3, we use the method [UIDevice currentDevice] to return an instance of UIDevice that refers to the iPhone our application is running on. We then use the beginGeneratingDeviceOrientationNotifications to tell the device that we’re interested in hearing about it if the user changes the orientation of his or her phone.
Lines 5–8 tell the NSNotificationCenter object that we are interested in subscribing to any notifications with the name UIDeviceOrientationDidChangeNotification that it may receive. We also tell that the class that is interested in the notifications is OrientationViewController by way of the addObserver:self message, and, finally, we use @selector(orientationChanged:) to say that we will be implementing a method called orientationChanged. In fact, coding up orientationChanged is the only thing left to do!
Determining Orientation
To determine the orientation of the device, we’ll use the UIDevice property orientation.The orientation property is of the type UIDeviceOrientation (simple constant, not an object). This means that we can check each possible orientation via a simple switch statement and update the orientationLabel in the interface as needed.
Implement the orientationChanged method as shown in Listing 3.
Listing 3.
 1: - (void)orientationChanged:(NSNotification *)notification {
 2:
 3:     UIDeviceOrientation orientation;
 4:     orientation = [[UIDevice currentDevice] orientation];
 5:
 6:     switch (orientation) {
 7:         case UIDeviceOrientationFaceUp:
 8:             orientationLabel.text=@"Face Up";
 9:             break;
10:         case UIDeviceOrientationFaceDown:
11:             orientationLabel.text=@"Face Down";
12:             break;
13:         case UIDeviceOrientationPortrait:
14:             orientationLabel.text=@"Standing Up";
15:             break;
16:         case UIDeviceOrientationPortraitUpsideDown:
17:             orientationLabel.text=@"Upside Down";
18:             break;
19:         case UIDeviceOrientationLandscapeLeft:
20:             orientationLabel.text=@"Left Side";
21:             break;
22:         case UIDeviceOrientationLandscapeRight:
23:             orientationLabel.text=@"Right Side";
24:             break;
25:         default:
26:             orientationLabel.text=@"Unknown";
27:             break;
28:     }
29: }
|
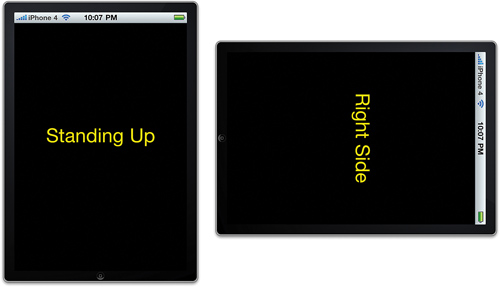
Run the application when complete. Your results should resemble Figure 2.
