There are many other times apart from the loading of
the page at which we might want to perform a task. Just as JavaScript
allows us to intercept the page load event with <body onload=""> or window.onload, it provides similar hooks for user-initiated events such as mouse clicks (onclick), form fields being modified (onchange), and windows changing size (onresize). When assigned directly to elements in the DOM, these hooks have similar drawbacks to the ones we outlined for onload. Therefore, jQuery offers an improved way of handling these events as well.
A simple style switcher
To illustrate some event
handling techniques, suppose we wish to have a single page rendered in
several different styles based on user input. We will allow the user to
click buttons to toggle between a normal view, a view in which the text
is constrained to a narrow column, and a view with large print for the
content area.
In a real-world example, a good web citizen will employ the principle of progressive enhancement
here. The style switcher should either be hidden when JavaScript is
unavailable or, better yet, should still function through links to
alternative versions of the page. For the purposes of this tutorial,
we'll assume that all users have JavaScript turned on.
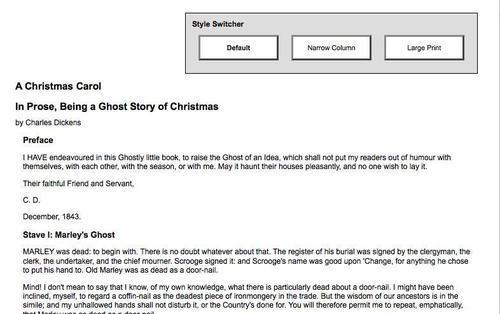
The HTML markup for the style switcher is as follows:
<div id="switcher">
<h3>Style Switcher</h3>
<div class="button selected" id="switcher-default">
Default
</div>
<div class="button" id="switcher-narrow">
Narrow Column
</div>
<div class="button" id="switcher-large">
Large Print
</div>
</div>
Combined with the rest of the page's HTML markup and some basic CSS, we get a page that looks like the following figure:
To begin, we'll make the Large Print button operate. We need a bit of CSS to implement our alternative view of the page:
body.large .chapter {
font-size: 1.5em;
}
Our goal, then, is to apply the large class to the<body>
tag. This will allow the stylesheet to reformat the page appropriately. We already know the statement
needed to accomplish this:
'body').addClass('large');
However, we want this to
occur when the button is clicked, not when the page loaded as we have
seen so far. To do this, we'll introduce the .bind() method. This method allows us to specify any JavaScript event, and to attach a behavior to it. In this case, the event is called click, and the behavior is a function consisting of our one-liner above:
$(document).ready(function() {
$('#switcher-large').bind('click', function() {
$('body').addClass('large');
});
});
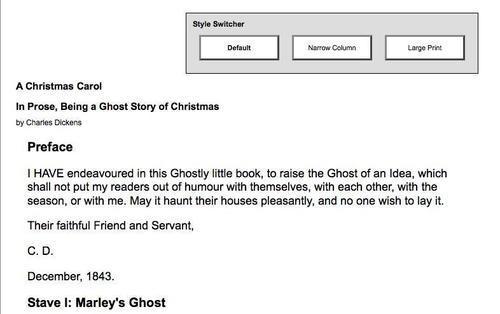
Now when the button gets clicked, our code runs and the text is enlarged as shown in the following figure:
That's all there is to binding an event. The advantages we discussed with the .ready() method apply here, as well. Multiple calls to .bind() coexist nicely, appending additional behaviors to the same event as necessary.
This is not necessarily the
most elegant or efficient way to accomplish this task.
Enabling the other buttons
We now have a Large Print button that works as advertised, but we need to apply similar handling to the other two buttons (Default and Narrow Column) to make them perform their tasks. This is straightforward; we use .bind() to add a click handler to each of them, removing and adding classes as necessary. The new code reads as follows:
$(document).ready(function() {
style switcher, eventslarge print button, enabling$('#switcher-default').bind('click', function() {
$('body').removeClass('narrow');
$('body').removeClass('large');
});
$('#switcher-narrow').bind('click', function() {
$('body').addClass('narrow');
$('body').removeClass('large');
});
$('#switcher-large').bind('click', function() {
$('body').removeClass('narrow');
$('body').addClass('large');
});
});
This is combined with a CSS rule for the narrow class:
body.narrow .chapter {
width: 400px;
}
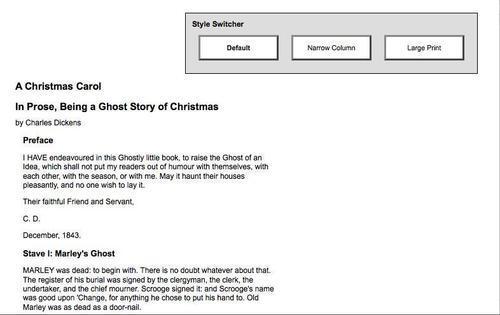
Now, after clicking the Narrow Column button, its corresponding CSS is applied and the text gets laid out differently as shown in the following figure:
Clicking Default removes both class names from the<body> tag, returning the page to its initial rendering.
Event handler context
Our switcher is behaving
correctly, but we are not giving the user any feedback about which
button is currently active. Our approach for handling this will be to
apply the selected class to the button when it is clicked, and remove this class from the other buttons. The selected class simply makes the button's text bold:
.selected {
font-weight: bold;
}
We could accomplish this class
modification as we do above, by referring to each button by ID and
applying or removing classes as necessary, but instead we'll explore a
more elegant and scalable solution that exploits the context in which event handlers run.
When any event handler is triggered, the keyword this refers to the DOM element to which the behavior was attached. Earlier we noted that the $()
factory function could take a DOM element as its argument; this is one
of the key reasons that facility is available. By writing $(this)
within the event handler, we create a jQuery object corresponding to
the element, and can act on it just as if we had located it with a CSS
selector.
With this in mind, we can write:
$(this).addClass('selected');
Placing this line in each
of the three handlers will add the class when a button is clicked. To
remove the class from the other buttons, we can take advantage of
jQuery's implicit iteration feature, and write:
$('#switcher .button').removeClass('selected');
This line removes the
class from every button inside the style switcher. So, placing these in
the correct order, we have the code as:
$(document).ready(function() {
$('#switcher-default').bind('click', function() {
$('body').removeClass('narrow');
$('body').removeClass('large');
$('#switcher .button').removeClass('selected');
$(this).addClass('selected');
});
$('#switcher-narrow').bind('click', function() {
$('body').addClass('narrow');
$('body').removeClass('large');
$('#switcher .button').removeClass('selected');
$(this).addClass('selected');
});
$('#switcher-large').bind('click', function() {
$('body').removeClass('narrow');
$('body').addClass('large');
$('#switcher .button').removeClass('selected');
$(this).addClass('selected');
});
});
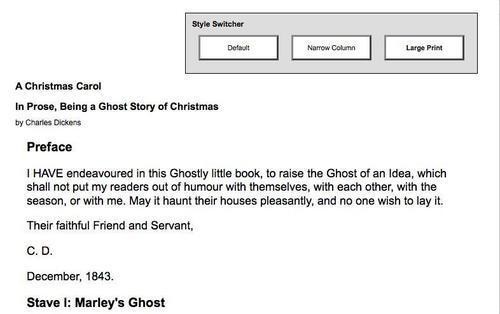
Now the style switcher gives appropriate feedback as shown in the following figure:
Generalizing the
statements by using the handler context allows us to be yet more
efficient. We can factor the highlighting routine out into a separate
handler, as shown in the following code, because it is the same for all
three buttons:
$(document).ready(function() {
$('#switcher-default').bind('click', function() {
$('body').removeClass('narrow').removeClass('large');
});
$('#switcher-narrow').bind('click', function() {
$('body').addClass('narrow').removeClass('large');
});
$('#switcher-large').bind('click', function() {
$('body').removeClass('narrow').addClass('large');
});
$('#switcher .button').bind('click', function() {
$('#switcher .button').removeClass('selected');
$(this).addClass('selected');
});
});
This optimization takes advantage of the three jQuery features we have discussed. First, implicit iteration is once again useful when we bind the same click handler to each button with a single call to .bind(). Second, behavior queuing allows us to bind two functions to the same click event, without the second overwriting the first. Lastly, we're using jQuery's chaining capabilities to collapse the adding and removing of classes into a single line of code each time.
Further consolidation
The code optimization we've just completed is an example of refactoring—modifying
existing code to perform the same task in a more efficient or elegant
way. To explore further refactoring opportunities, let's look at the
behaviors we have bound to each button. The .removeClass() method's parameter is optional; when omitted, it removes all classes from the element. We can streamline our code a bit by exploiting this as follows:
$(document).ready(function() {
$('#switcher-default').bind('click', function() {
$('body').removeClass();
});
$('#switcher-narrow').bind('click', function() {
$('body').removeClass().addClass('narrow');
});
$('#switcher-large').bind('click', function() {
$('body').removeClass().addClass('large');
});
$('#switcher .button').bind('click', function() {
$('#switcher .button').removeClass('selected');
$(this).addClass('selected');
});
});
Note that the order of operations has changed a bit to accommodate our more general class removal; we need to execute .removeClass() first so that it doesn't undo the .addClass() we perform in the same breath.
We can only safely
remove all classes because we are in charge of the HTML in this case.
When we are writing code for reuse (such as for a plugin), we need to
respect any classes that might be present and leave them intact.
Now we are executing some of
the same code in each of the buttons' handlers. This can be easily
factored out into our general button click handler:
$(document).ready(function() {
$('#switcher .button').bind('click', function() {
$('body').removeClass();
$('#switcher .button').removeClass('selected');
$(this).addClass('selected');
});
$('#switcher-narrow').bind('click', function() {
$('body').addClass('narrow');
});
$('#switcher-large').bind('click', function() {
$('body').addClass('large');
});
});
Note that we need to move the general handler above the specific ones now. The .removeClass() needs to happen before the .addClass(), and we can count on this because jQuery always triggers event handlers in the order in which they were registered.
Finally, we can get rid of the specific handlers entirely by once again exploiting event context. Since the context keyword this
gives us a DOM element rather than a jQuery object, we can use native
DOM properties to determine the ID of the element that was clicked. We
can thus bind the same handler to all the buttons, and within the
handler perform different actions for each button:
$(document).ready(function() {
style switcher, eventsevent context, exploiting$('#switcher .button').bind('click', function() {
$('body').removeClass();
if (this.id == 'switcher-narrow') {
$('body').addClass('narrow');
}
else if (this.id == 'switcher-large') {
$('body').addClass('large');
}
$('#switcher .button').removeClass('selected');
$(this).addClass('selected');
});
});
Shorthand events
Binding a handler for an event (like a simple click event) is such a common task that jQuery provides an even terser way to accomplish it; shorthand event methods .bind() counterparts with a couple fewer keystrokes. work in the same way as their
For example, our style switcher could be written using .click() instead of .bind() as follows:
$(document).ready(function() {
$('#switcher .button').click(function() {
$('body').removeClass();
if (this.id == 'switcher-narrow') {
$('body').addClass('narrow');
}
else if (this.id == 'switcher-large') {
$('body').addClass('large');
}
$('#switcher .button').removeClass('selected');
$(this).addClass('selected');
});
});
Shorthand event methods such as this exist for all standard DOM events:
blur
change
click
dblclick
error
focus
keydown
keypress
keyup
load
mousedown
mousemove
mouseout
mouseover
mouseup
resize
scroll
select
submit
unload
Each shortcut method binds a handler to the event with the corresponding name.