1. Creating Distribution Groups
To create a distribution group in the EMC:
Navigate to Microsoft Exchange => Microsoft Exchange On-Premises (server) => Recipient Configuration => Distribution Group.
In the Actions pane, click New Distribution Group.
Click New Group, and click Next.
Choose Distribution/Security.
(Optional) Select an organizational unit.
Enter a name and alias, and then click Next.
On the New Distribution Group screen, click New.
Highlight Distribution Group, and then click Properties in the Actions pane.
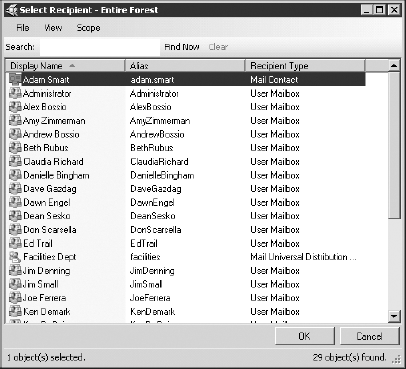
Click the Members tab, and then click Add.
As you can see in Figure 4,
you can add mailboxes, mail contacts, and even other distribution
groups. Highlight those you'd like to add to the distribution group,
and click OK. Then click OK again.

You can accomplish both the task of creating a
distribution group as well as adding members in one line of code in the
Exchange Management Shell using something like this:
New-DistributionGroup -name "Program Managers" |
Add-DistributionGroupMember -member "Amy Zimmerman"
2. Organizational Health
Now that you've configured some settings in Exchange
Server 2010, we can look at a high-level overview called Organizational
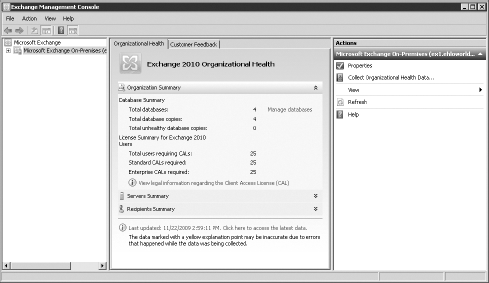
Health. This view shows us some statistical data about the Exchange
organization, such as the number of licenses required, number of
servers, databases, and recipients. This is a great snapshot of
Exchange that is collected as needed. To collect and view this
information in the Exchange Management Console:
Navigate to Microsoft Exchange => Microsoft Exchange On-Premises (server).
In the Actions pane, click Collect Organizational Health Data.
On the Introduction screen, choose Immediately, and then click Next.
On the Collect Organizational Health Data screen, click Collect.
When completed, click Finish, and review the data presented in the center pane as shown in Figure 5.
