1. Installation Options
You have choices when it comes to installing SQL Server 2008 R2,
although if you use it to support a particular line-of-business
application, the decision might already be made for you. SBS 2011
Premium Add-on consists of licenses for the 64-bit versions of Windows
Server 2008 R2 and SQL Server 2008 R2. If you want, you can downgrade
to 32-bit versions of Windows Server 2008 and SQL Server
2008.
SQL Server 64-bit can be installed on your Windows SBS 2011
Server or, preferably, on a second server running Windows Server 2008
R2 64-bit.
The downgraded SQL Server 2008 32-bit can be installed on a
second server running Windows Server 2008 32-bit.
1.1. Installation Restrictions
Before you begin the process of installing and deploying SQL Server, you
should be aware of the following restrictions.
The version of SQL Server included in SBS 2011 Premium Add-on
is licensed for installation only in your Windows SBS 2011 network.
You cannot install SQL Server on a server that is not in the Windows
SBS 2011 domain.
The Windows SBS 2011 CAL Suite for Premium Users or Devices is
required for users who, or devices that, access SQL Server.
You can install SQL Server on the server running Windows SBS
2011 or on the second server that you set up for your Windows SBS
2011 domain. However, for security reasons, it’s a bad idea to
install the SQL Server on a domain controller. Use the second server
in the Windows SBS 2011 domain.
You can move the Windows SharePoint Services content database
to SQL Server Standard Edition, but it’s not a sensible idea because
then you’ll need a SQL Server CAL for everyone who accesses
SharePoint.
2. Installing SQL Server (Part One)
To install SQL Server, insert the DVD in the drive on the server
and follow these steps:
If the startup sequence doesn’t start automatically, select
Computer from the Start menu and double-click the DVD
drive.
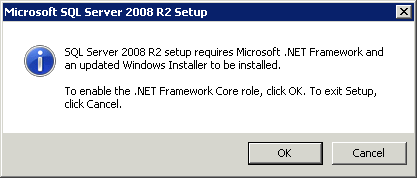
The first dialog box that appears, shown in Figure 1, advises that Microsoft
.NET Framework and an updated Windows Installer will be installed
as part of the SQL Server installation. Click OK.

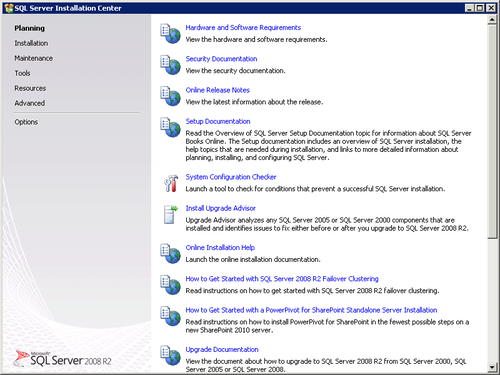
The SQL Server Installation Center, shown in Figure 2, opens. The
following sections describe the links on each page.
