Scenario/Problem: As a site manager, you want to change what is displayed on a specific page in a site.
Solution:
To change the display, you must view the page in editing mode—a mode
that enables you to edit the page. You can make such changes after you
switch to editing mode.
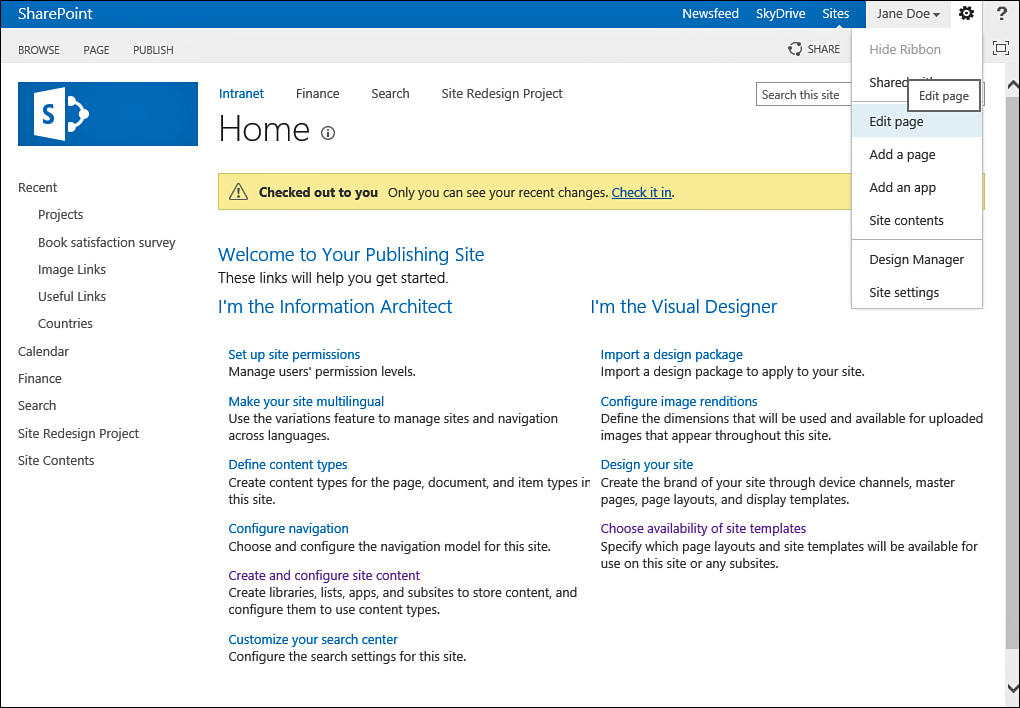
When you have the
permissions to edit a page, and if the page is not currently checked
out by someone else, you edit the page by navigating to it in the
browser, opening the site settings menu, and choosing Edit Page, as
shown in Figure 1.

FIGURE 1 Opening the site actions menu and choosing Edit Page to get to page editing mode.
Note
If the page is checked out to another user, the Edit Page menu option is not available until that page is checked in.
When the page is in editing mode, it looks
different than it looks normally, showing either web part zones (where
you can add web parts) and/or editing controls, depending on the type
of page .
For example, a wiki page by default has only the page body control—a
control in which you can type. Publishing pages might have additional
controls, depending on their layouts, whereas web part pages show web
part zones to allow you to add web parts, as well as the existing web
parts for you to edit.
When you are finished editing the
page, save your changes. How you do this depends on the configuration
of the library the page is in. In libraries that do not keep track of
page versioning and do not require checking in or checking out the
page, you can just click the Stop Editing button on the Page ribbon. In
libraries that maintain version control over pages, use the Save &
Close button in the Page ribbon, along with a Check In button. If
publishing is required in the document library, you have a Publish
ribbon with buttons for publishing the page after you check it in.