3.4 Using an Existing Database
Because the underlying database is SQL CE, you
might want to use an existing database (.sdf file). To do this, you can
simply add it to your phone project (as Content), as shown in Figure 1.
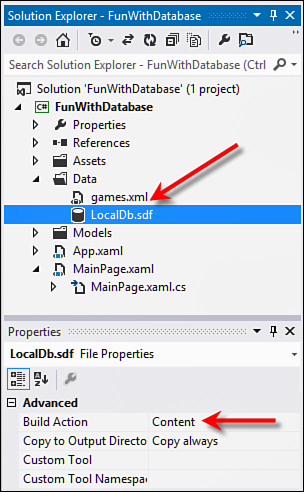
FIGURE 1 SQL Server CE database as content
By marking the database as Content, it will be
deployed to the application data folder when your application is
installed. Using an existing database means you will have to build your
context and class files to match the existing database. Currently, there
are no tools to build these classes for you.
When you have a database as part of your
project, you can refer to it using the appdata moniker when setting up a
context object, like so:
public class AppContext : DataContext
{
public AppContext()
: base("DataSource=appdata:/DB/LocalDB.sdf;File Mode=read only;")
{
}
// ...
}
When you use a database directly in the
application directory, the database can be accessed only for reading.
That means you must include the “file mode” directive in the connection
string as well to indicate that the database is read-only.
It is often preferable to use the database in
the application directory as a template for your database. To do this,
you must first copy the database to the local folder:
// Get a Stream of the database from the Application Directory
var dbUri = new Uri("/DB/LocalDB.sdf", UriKind.Relative);
using (var dbStream = Application.GetResourceStream(dbUri).Stream)
{
// Open a file in the local folder for writing
var folder = ApplicationData.Current.LocalFolder;
var file = await folder.CreateFileAsync("LocalDB.sdf",
CreationCollisionOption.ReplaceExisting);
using (var stream = await file.OpenStreamForWriteAsync())
{
byte[] buffer = new byte[4096];
int sizeRead;
// Write the database out
while ((sizeRead = dbStream.Read(buffer, 0, buffer.Length)) > 0)
{
file.Write(buffer, 0, sizeRead);
}
}
}
You can do this by simply copying the database from the application directory using Windows Phone’s Application
class to get a stream that contains the database. Then just create a
new file in isolated storage to save
the database as a new file. If you copy the database, you can use your
context class with the simple isostore moniker to read and write to the newly copied database.
3.5 Schema Updates
So, you’ve created your database-driven
application, and now you’re ready to update it to a new version. But
your users have been dutifully adding data to your database, and you
have to change the database. What do you do?
The local database stack for the Windows Phone SDK can help you accomplish this. In the SDK is a DatabaseSchemaUpdater
class that can take an existing database and make additive changes that
are safe for the database. These include adding nullable columns,
adding tables, adding associations, and adding indexes.
To get started, you must get an instance of the DatabaseSchemaUpdater class. You retrieve this using the DataContext class’s CreateDatabaseSchemaUpdater method:
using (AppContext ctx = new AppContext())
{
// Grab the DatabaseSchemaUpdater
var updater = ctx.CreateDatabaseSchemaUpdater();
}
This updater class enables you to
not only make additive changes, but also handle a database version. This
gives you a simple way to determine the update level of any database.
The updater class supports a simple property called DatabaseSchemaVersion:
var version = updater.DatabaseSchemaVersion;
With the database version, you can make incremental updates:
// If specific version, then update
if (version == 0)
{
// Some simple updates (Add stuff, no remove or migrate)
updater.AddColumn<Game>("IsPublished");
updater.DatabaseSchemaVersion = 1;
updater.Execute();
}
The database version always starts at zero and
can be changed to a specific database version using the updater. As is
typical for a schema change, you would add any of
the new columns, tables, indexes, or associations. You would then update
the database schema version to ensure that this update can’t be
executed a second time. Then, over time, you can test for more version
blocks. For example, as your application receives more updates, the code
might look like this:
// If specific version, then update
if (version == 0)
{
// So simple updates (Add stuff, no remove or migrate)
updater.AddColumn<Game>("IsPublished");
updater.DatabaseSchemaVersion = 1;
updater.Execute();
}
else if (version == 1)
{
// So simple updates (Add stuff, no remove or migrate)
updater.AddIndex<Game>("NameIndex");
updater.DatabaseSchemaVersion = 2;
updater.Execute();
}
You can see that, for the first update, the
version was incremented. Then when the application matured, it added a
new update. This is the central use for the database version.
The four updates that are supported are as follows:
updater.AddTable<Genre>();
updater.AddColumn<Game>("IsPublished");
updater.AddIndex<Game>("NameIndex");
updater.AddAssociation<Game>("Genre");
When adding a table, the entire table is added
(including all columns, associations, and indexes). This means that when
you add a table, you do not need to enumerate all the columns, indexes,
and associations specifically. Adding a column adds a specific new
column. Any new columns must be nullable because there is no way to
specify migration to non-nullable columns. Adding an index is based on
the name of the index. Finally, an association is added and is based on
the property that contains the Association attribute.
3.6 Database Security
Although you are the only person who will have
access to the database contained in the application directory or in
isolated storage, at times you might want to increase the security of
the database by adding levels of security to the database itself.
The two main ways to secure your database are to
add a password for access to the database and to enable encryption.
When creating a Windows Phone application, you can do both of these at
the same time. You can specify a password for the database directly in
the connection string to the database. This is typically specified in
the DataContext class:
public class AppContext : DataContext
{
public AppContext()
: base("DataSource=isostore:/Games.sdf;Password=P@ssw0rd!;")
{
}
public Table<Game> Games;
public Table<Publisher> Publishers;
}
When you specify a password before you create
the database, the database is password-protected as well as encrypted.
You cannot add a password or encryption after the database has been
created. If you decide after your application has been deployed to add a
password (and encryption), you must create a new database and migrate
all your data manually.