By default, Windows Home
Server always backs up all the computer’s drives (or, more accurately,
it backs up all the computer’s NTFS drives). This is ideal because it
means that if a computer crashes and can’t be recovered, you can still
get the machine back on its feet by using a bootable USB recovery drive
to restore one of the complete backups. However, there may be situations in which you don’t
want or need certain parts of a computer included in the backups:
You have a folder that contains some
extremely large files (for example, ripped DVDs), and you don’t want
those files taking up space in the backups.
You
have a folder that contains files you’re going to delete anyway. For
example, most people delete recorded TV shows after viewing them.
Because these files tend to be huge, it’s a good idea to exclude the
Recorded TV folder from the backups to save space. (If you have shows
you want to save, consider moving them to a separate folder that does get backed up.)
You
have an external hard drive that you occasionally bring home from work
or borrow from someone else. Because the files on this drive aren’t
really yours, you probably don’t want them backed up.
You
have an external hard drive that gets swapped among your family
members. This could cause problems with Windows Home Server if it
expects the drive to be on one computer and finds it “missing” the next
time it tries to back up that machine.
For these and similar scenarios, you can exclude one
or more drives and folders from a computer’s backup configuration. The
next two sections show you how to do this.
Excluding a Disk Drive from a Backup
To exclude one or more hard disk drives or hard disk partitions from a computer’s backup configuration, follow these steps:
1. | Log on to the Windows Home Server Dashboard.
|
2. | Display the Computers and Backup tab.
|
3. | Click the computer you want to work with.
|
4. | Click Customize Backup for the Computer. Windows Home Server launches the Customize Backup for Computer Wizard (where Computer is the name of the computer you’re configuring).
|
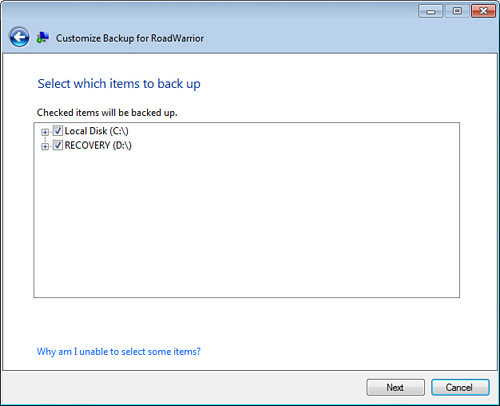
5. | Click
Add or Remove Backup Items. The wizard examines the computer and then
displays a list of disk drives and partitions, as shown in Figure 1.
|
6. | Deactivate the check box for each partition that you want to exclude from the backup.
|
7. | Click Next. The wizard displays a summary of what will and won’t be backed up for the computer.
|
8. | Click Save Changes to complete the configuration.
|
Excluding Folders from a Backup
To exclude one or more folders from a computer’s backup configuration, follow these steps:
1. | Log on to the Windows Home Server Dashboard.
|
2. | Display the Computers and Backup tab.
|
3. | Click the computer you want to configure.
|
4. | Click Customize Backup for the Computer. Windows Home Server launches the Customize Backup for Computer Wizard (where Computer is the name of the computer you’re configuring).
|
5. | Click Add or Remove Backup Items. The wizard examines the computer and then displays a list of disk drives and partitions.
|
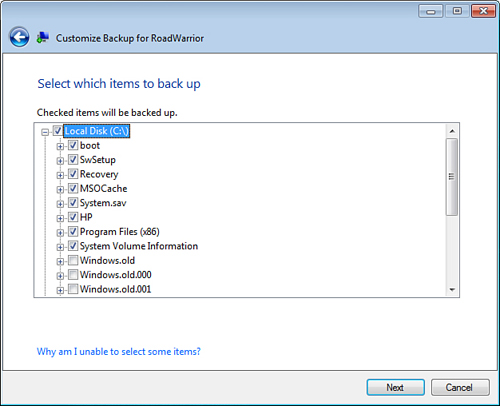
6. | Click
the plus sign (+) beside the drive that contains the folder or folders
you want to exclude. A list of the folders on that drive appears.
|
7. | Repeat
step 6 until you drill down to the folder you want to exclude. (You may
need to drill down into various levels of subfolders to find the one
you want.)
|
8. | Deactivate the check box for each folder that you want to exclude from the backup, as shown in Figure 2.
|
9. | Repeat steps 6–8 to exclude other folders, as needed.
|
10. | Click Next. The wizard displays a summary of what will and won’t be backed up for the computer.
|
11. | Click Save Changes to complete the configuration.
|
Adding a New Hard Drive to a Backup
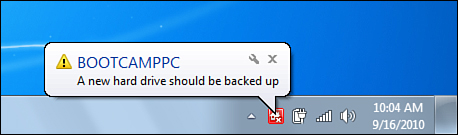
If
you add a hard drive to a computer, Windows Home Server eventually
detects the new drive, changes the network status to At Risk, and
displays the alert shown in Figure 3 on each client.
If you don’t want to include this drive in the computer’s backups, follow these steps to handle the warning:
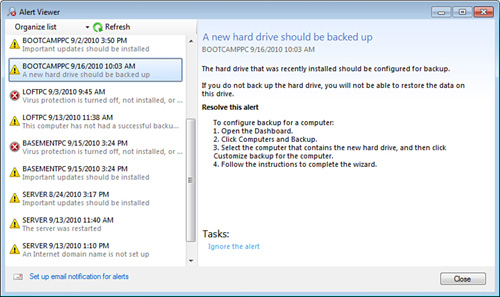
1. | Click
the alert. (If the alert no longer appears, right-click the Launchpad
icon in the notification area, and then click View Alerts.) The Alert
Viewer appears.
|
2. | Select the warning, as shown in Figure 4.
|
3. | Click Ignore the Alert. Windows Home Server asks you to confirm.
|
4. | Click Yes.
|
5. | Click Close.
|
On
the other hand, you might prefer to include the new drive in the
computer’s nightly backups. In that case, you need to work through the
following steps to reconfigure the computer:
1. | Log on to the Windows Home Server Dashboard.
|
2. | Display the Computers and Backup tab.
|
3. | Click the computer that has the new drive.
|
4. | Click Customize Backup for the Computer. Windows Home Server launches the Customize Backup for Computer Wizard (where Computer is the name of the computer you’re configuring).
|
5. | Click Add or Remove Backup Items. The wizard examines the computer and then displays a list of disk drives and partitions.
|
6. | Activate the check box for the new drive.
|
7. | Click Save Changes. Windows Home Server adds the new drive to the computer’s backup configuration.
|
Turning Off Backups for a Computer
There might be times when you don’t want a particular computer to get backed up:
You might know that you’ll be using the
computer during the backup time, and you don’t want the backup process
to slow down your work.
You might need
the computer to run an all-night job (such as compiling a large
application or rendering a 3D image), and you don’t want the backup to
interfere.
The computer might be a backup or spare with no important information on it.
You might be running out of storage space on the server, and you want to prevent backups until you can add more storage.
For
these and similar situations, you can tell Windows Home Server not to
back up one or more computers. Here are the steps to follow:
1. | Log on to the Windows Home Server Dashboard.
|
2. | Display the Computers and Backups tab.
|
3. | Click the computer you want to configure.
|
4. | Click Customize Backup for the Computer. Windows Home Server launches the Customize Backup for Computer Wizard (where Computer is the name of the computer you’re configuring).
|
5. | Click Disable Backup for This Computer. The wizard asks what you want to do with the computer’s existing backups.
|
6. | If
you’re disabling the computer’s backups only temporarily, click Keep
the Existing Backups for This Computer; if you’re turning off the
computer’s backups permanently (or if you want to free up space on the
server), click Delete the Existing Backups for This Computer, instead.
|
7. | Click Save Changes.
|
8. | Click Close. Windows Home Server changes the computer’s backup status to Not Set Up.
|
To tell Windows Home Server to resume backing up the
computer, follow steps 1–4, click Back Up All of My Files and Folders
for the Computer, and then click Save Changes.
Configuring Time Machine to Back Up Your Mac
One of the great new features in Windows Home Server
2011 is support for Macs right out of the box. This not only includes
using Launchpad on your Mac to access shared folders and Remote Web
Access, but it includes the welcome capability to configure Time Machine
to back up your Mac to Windows Home Server. Here’s how you set this up:
1. | On your Mac, open Launchpad.
|
2. | Click the drop-down icon in the upper-right corner of the Launchpad window.
|
3. | Click Settings to open the Launchpad Settings dialog box.
|
4. | Click the Time Machine tab.
|
5. | Click Configure Time Machine. Launchpad launches the Time Machine preferences dialog box.
|
6. | Click Select Backup Disk. Time Machine displays a list of available backup volumes.
|
7. | Click the Windows Home Server volume.
|
8. | Click Use for Backup.
|