3. Adding a Mirror
When your data is mission-critical and you want to make sure
that the data is protected and always available no matter what
happens to one of your hard disks, consider mirroring the data onto
a second drive. SBS can mirror a dynamic disk onto a second dynamic
disk that is at least the same size as the original so that the
failure of either disk does not result in loss of data. To mirror a
volume, you can either select a mirrored volume when you create the
volume or you can add a mirror to an existing volume. To add a
mirror to an existing volume, complete the following
steps:
In the Disk Management console, right-click the volume you
want to mirror. If a potential mirror is available, the shortcut
menu lists the Add Mirror command.
Choose Add Mirror to display the Add Mirror dialog box,
shown in Figure 15.
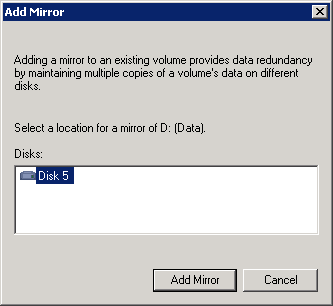
Select the disk to use for the mirror, and click Add
Mirror. If either or both of the disks are basic disks, you’ll
get a warning that the change will convert the disks to dynamic
disks. Click Yes to proceed.
The mirror is created immediately and starts duplicating
the data from the original disk to the second half of the
mirror. This process is called
regeneration, or sometimes
resynching. (The process of regeneration is
also used to distribute data across the disks when a RAID-5
volume is created.)
Note:
Regeneration is both CPU-intensive and disk-intensive. When
possible, create mirrors during slack times or during normally
scheduled downtime. Balance this goal, however, with the equally
important goal of providing redundancy and failure protection as expeditiously as
possible.
Tip:
BEST PRACTICES To improve
your overall data security and reliability, mirror your volumes
onto disks that use separate controllers whenever possible. This
process is known as duplexing and eliminates
the disk controller as a single point of failure. It can also
speed up both reading and writing to the mirror, because the
controller and bus are no longer potential bottlenecks.
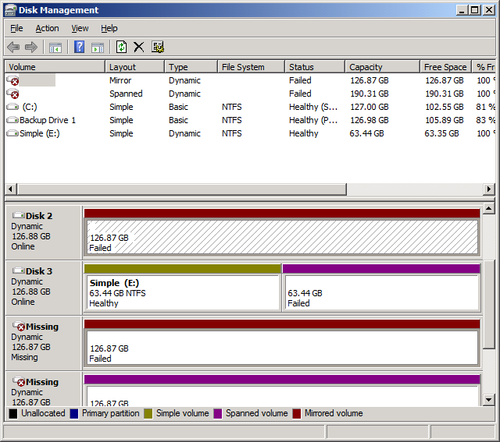
4. Drive Failure in a Mirrored Volume
If one of the disks in a mirrored volume fails, you can
continue to have full access to all your data without loss. SBS
marks the failed disk as missing and takes it offline. It also,
however, takes the other half of the mirror and marks it as failed,
as shown in Figure 16. This doesn’t
mean your data is lost. But it does mean you can’t access it until
you break the mirror. The missing disk will then need to be replaced
and the mirror re-created to restore redundancy.
To recover access to the data that was on the failed mirror,
you need to remove the mirror and reactivate the good disk by
following these steps:
Open Disk Management if it isn’t already open.
Right-click the mirrored disk that shows as online (Disk 2
in Figure 16).
Select Remove Mirror from the shortcut menu to open the
Remove Mirror dialog box shown in Figure 17.
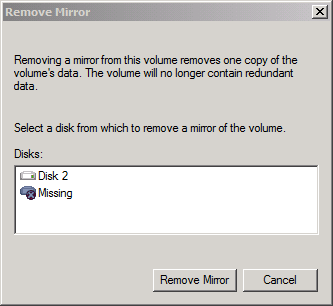
Select the missing or offline disk, and click Remove
Mirror. You’ll be prompted to confirm the removal. Click Yes,
and the mirror is removed, but the disk is still not available
because the drive letter mapping has to be reestablished.
Right-click the now healthy volume, and select Change
Drive Letter And Paths to open the dialog box shown in Figure 18.
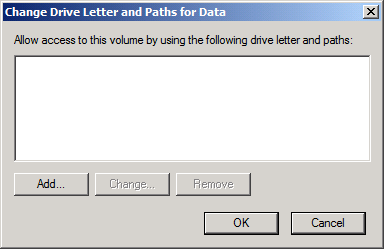
Click Add to open the Add Drive Letter Or Path dialog box,
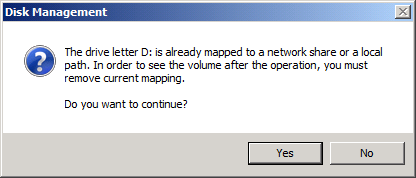
select a drive letter from the drop-down list, and click OK. If you
attempt to use the same drive letter as the drive had in the
past, you’ll see the warning message shown in Figure 19.
Click Yes, and the drive letter is assigned and the disk
is available.
If you need to make additional disk space available on your
system and you have no additional disks available, you can remove
the mirror from a mirrored volume. When you remove a mirror, the
data on one of the disks is untouched, but the other disk becomes
unallocated space. Of course, you will have lost all redundancy and
protection for the data, so you need to take steps to restore the
mirror as soon as possible. Until then, you might want to modify
your backup schedule for the remaining disk. To remove a mirror,
complete the following steps:
In the Disk Management console, right-click either half of
the mirror. Choose Remove Mirror from the shortcut menu. The
Remove Mirror dialog box opens.
Select the disk you want to remove from the mirror. Click Remove Mirror. You get one
last chance to change your mind. Click OK, and the disk you
highlighted becomes unallocated space.