Pictures + Videos
Pictures
+ Videos is simply a slideshow presenter and video manager. You point
the program to the directory (the default is Pictures) containing your
digital photos, and you can step through the pictures manually
or let the slideshow feature run automatically. Actually, the slideshow
effect is quite pleasing because it does a cross-fade and some panning
around in a bit of a random way to give a little more professional feel
to your slideshow. (Some people call this the “Ken Burns” effect, after
the documentary film maker Ken Burns who so often uses old still images
in his productions.)
Windows 7 introduces
the new Ambient Slideshow that launches as a screensaver when you
initiate Play Favorites from the Pictures + Videos menu. All pictures
you personally rate 3 stars or higher are pulled into the Ambient
Slideshow with zoom in, zoom out, and zooming animation features. It
can also play slideshows within a slideshow selection. The animation
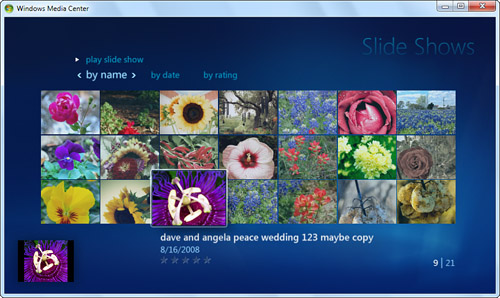
starts off as a gallery wall of your pictures (see Figure 2).
The new ratings system places your rated pictures into various buckets
that WMC uses to draw its slideshow images from to produce the gallery
wall and other effects.

The
Shared category of the Pictures Library inherits the Shared library,
which includes images from other computers on the network. You can also
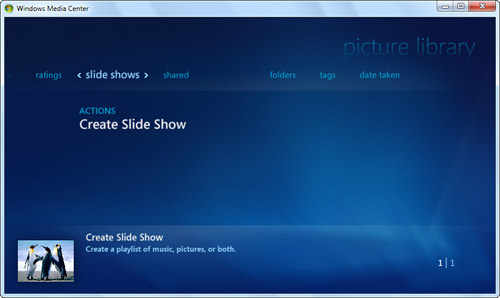
create custom slideshows using the Create Slide Show action under the
Slide Shows category heading, as shown in Figure 3. If you hold down left or right directional arrows on your remote, Turbo Scroll will fast-forward images through the slideshow.

Personally,
I have all my photos stored in my external FireWire drive because there
are so many of them. So, I have to direct Pictures to find them there.
You can do this by adding a folder to watch (Tasks, Settings, Library
Setup) or creating a shortcut to the actual source of your files and
putting that in Pictures:
1. | Arrange Windows Explorer so that you can right-click and drag your photo folder into Pictures.
|
2. | Left-click the relocated photo folder and select Create Shortcut Here from the context menu that appears.
|
3. | When
you go to Pictures in WMC, you’ll now see a folder there with the name
of your photo folder. Open that folder to see the pictures.
|
When
you play your slideshow, it begins at the level of the open folder. If
you have your photos arranged in folders, like I do, first drill down
into the folder to be included in the slideshow. Photos in the folders
below the current level will not be displayed. You can use the remote
control or keyboard to step through the slides.
If
you just stick in a memory card from your camera, you can view those
photos without even loading them onto the hard disk. Just do the
following:
1. | Insert a memory card.
|
2. | When prompted by AutoPlay, select View Pictures Using Windows Media Center.
|
3. | The
Play Slide Show menu appears with the memory card selected. The name
varies depending on the type of media inserted. For example, if your
pictures are on a memory stick, the media is called MEMORYSTICK. If you are using an SD memory card, the media is called Microsoft WPD FileSystem driver. |
You
can add music to your slideshow (and even a playlist consisting of a
number of files). This is a nice feature to spice up your slideshows.
This way, even if you are boring your audience with endless pictures of
your baby, at least they’ll have some music to listen to.
Follow these steps:
1. | From the WMC Start screen, go to Music and start your music playing first.
Tip You
can print a picture when stepping through images from WMC. When the
picture you want to print is onscreen, press the More Info/Details
button on the remote control. Then, choose Picture Details. Next,
choose Print from the menu and Print once more when prompted to confirm
your selection to print the image. |
|
2. | Return to the WMC Start screen and go to Pictures.
|
3. | Click Tasks, Settings, Pictures to choose whether the song information shows onscreen while songs are being played.
|
4. | Move back a page by clicking the Back button at the top of the WMC window. (It looks like a green left arrow.)
|
5. | Start your slideshow by selecting Slide Show.
|
Music
This
feature works in conjunction with Windows Media Player. WMC puts its
interface (skin) on top of WMP. You can play audio CDs, copy CD tracks
to your Music library, or play your library. When playing CDs or files
from the library, song and album information (if available) is
displayed onscreen. If you use another program—such as iTunes,
MusicMatch, or WinAMP—to organize and play your MP3, WMA, or AAC files,
you’re out of luck unless you also import your files into WMP. But be
careful that you don’t rearrange your files in WMP and then mess up
your song organization in your other player.
For dropping in a CD and playing it straight away, do the following:
1. | Run WMC or press Start on the WMC remote.
|
2. | Insert the CD. It should start to play.
|
3. | If you want to copy the CD files into your Music library, select Copy CD.
|
When
your MP3 files are all organized using WMP, run Music. You can play
back tunes and view visualizations on your TV or computer monitor. You
have to use WMP to create playlists, manage your files, and modify ID3
tags (things like genre, artists’ names, and so forth), however.
Click
the Visualize button to switch the screen to a series of
sometimes-lovely and mesmerizing motion graphics. WMC uses the same
visualizations as WMP. You can find and install new ones by searching
the Web for “visualization” and downloading ones designed for WMP.