UA strikes gold once again with its Fairchild
emulation plug-in series.
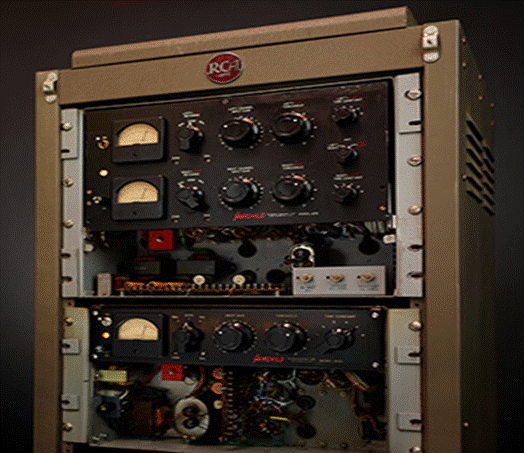
Fairchild compressor/limiters are revered for good reason,
as they can be heard on some of the greatest records of all time, but keeping
those vintage hardware units running—complete with 20 tubes and 14
transformers—is not an easy task. Luckily for us, Universal Audio has modeled a
few classic “golden reference units” from Ocean Way Studios, then added several
modern touches for its own Fairchild emulations, now available direct from
their website.

Universal Audio
Fairchild Tube Limiter Plug-in Collection
Features
The collection includes new 660 and 670 models, as well as
the original 670 Legacy unit, each of which can only run via UA’s proprietary
UAD-2 platform. They can be instantiated as either mono or mono/stereo;
historically, the 660 is mono and the 670 is stereo with Mid/Side capabilities.
While these monsters sound great on drums, vocals, and master bus (or just
about any-thing, for that matter), let’s explore a few simple ideas about how
the new 660 and 670 emulations work on guitars and bass.
One of the first aspects to understand is the use of Input
Gain versus Threshold. As the manual notes, the original unit’s input control
is behind the input transformer and ahead of the tubes in its signal chain.
When you increase the Input, the input tube is hit harder, increasing
distortion. If you want the character of your guitar or bass to have extra
grit, turn up the Input Control knob and turn down Threshold. To get a lot of
squash and grit, crank up both Input and Threshold.
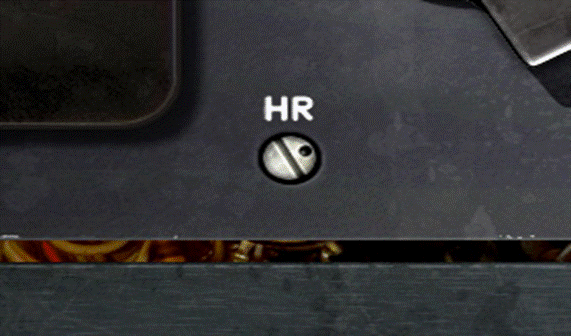
Further, users can play with the small-but-useful HR
(Headroom Control) knob, which lowers the internal operating level. The default
position is where the small dot is at 12 o’clock (a value of 16 dB). To get
more harmonic distortion, turn the knob clockwise (which increases the operating
level). The unit tends to compress more when doing that, which means you’ll
probably need to turn up the Output control to compensate for gain reduction.

Blend Sounds with
the Wet/Dry Mix Control
It’s also useful to understand the Time Constant knob with
variable attack and release times. It’s a six-position switch where settings 1
to 4 are progressively slower behaviors and 5 and 6 are program dependent.
Additional attack/release variations are also possible, enabling the Sidechain
Link and disabling the Controls Link.

Add Grit with the
Headroom Control
In Use
An edgy, aggressive bass sound can be easily made by turning
up the Input Channel, Headroom Control and Output. I like to set the Time
Constant to 1 or 2, where the unit tends to react fairly quickly. Also, I set
the Metering knob to GR (Gain Reduction), which allows me to see (in dB) how
hard the compressor is ‘hit.’ Of course, I adjust all parameters depending on
the material, but bass, in particular, can really scream via UA’s Fairchild.
With it, I can undeniably hear an increase in smoothness, punch and character.

Enhance Drums with
Sidechain Filters
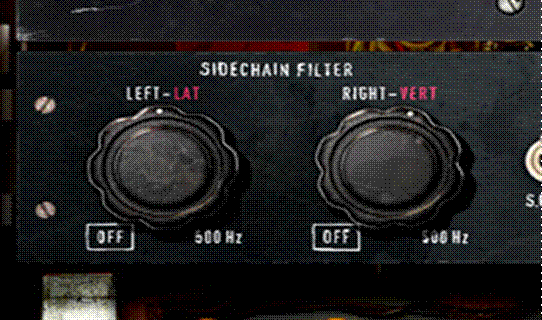
Taking it a step further, there are two additional controls
that offer quite a bit of flexibility. The Sidechain Filter controls a 12 dB per
octave low-cut filter that goes from 20 to 500 Hz. Simply put, this lets you
take bass frequencies out of the compressor to limit excessive gain reduction.
Without the Sidechain Filter, the entire spectrum of frequencies in the track
will be compressed—which has its place, of course. But by pushing up the
Sidechain Filter value, users essentially leave those frequencies alone and
compress those above it.
With heavy electric guitar parts, I like to set the
Sidechain Filter around 400 Hz. What this does is enable the compressor not to
“squash” as much overall, because I essentially removed the low end from
hitting the compressor. Those frequencies gets left alone while the lower mids,
mids and top get tightened up. Certainly, it’s also quite useful on bass parts.
Normally, I tend not to compress electric parts very much,
especially distorted tube amps, but with this filter, I can get it to be smooth
and punchy while also using the Output for some extra gain. Sometimes,
however—especially with plug-in based guitar amp emulations—it sounds best to
squash the whole signal, leaving the Sidechain off. It’s useful to have the
option when you need it.
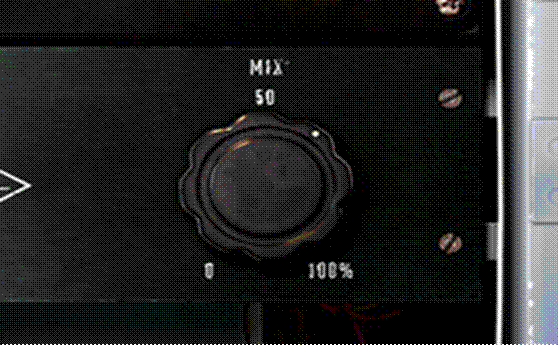
Last but not least, UA built in a Mix knob—a feature I would
like to have on every plug in, actually! While simple in theory, it’s
incredibly useful in taste and touch. It sets the output balance between the
dry signal and that of the one processed by the compressor. This lets you hit a
bass or guitar hard with overall compression, then pull it back from 100
percent (Wet) to get an ideal blend of processed and unprocessed. To navigate
this quickly, you can click on the Mix graphic to move to 50 percent, the 0 for
0 percent, and so on.
Summary
Overall, the Fairlight Collection is a great compliment to
most any type of production track. Specifically on guitar and bass, users can
control individual track dynamics while increasing thickness and punch, yet
it’s the combination of Input Gain, Threshold, Time Constant, Headroom,
Sidechain Filter and Mix that helps me take tracks to the next level. Best of
all, you’ll never have to change a UA Fairlight tube.