Creating an embedded macro is similar to creating a
standard macro. The main difference is that the macro is embedded in the
object with which it is associated and does not appear in the list of
macros in the Navigation Pane. Here’s how to create an embedded macro:
1. | In Design view, click to select the object to which you want to associate the macro (for example, a command button).
|
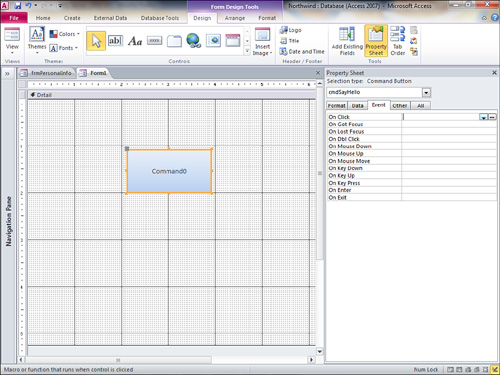
2. | Open the Property Sheet, as shown in Figure 1.

|
3. | Click the Event tab of the Property Sheet.
|
4. | Click within the event to which you want to associate the embedded macro. In Figure 1 the On Click event is selected.
|
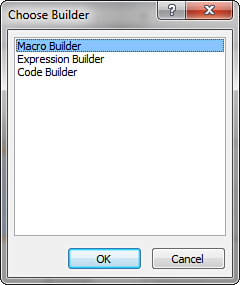
5. | Click the build button (the ellipse). The Choose Builder dialog box appears (see Figure 2).

|
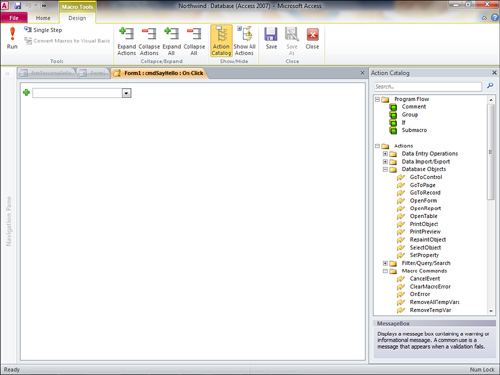
6. | Select Macro Builder and click OK. A Macro Design window appears, as shown in Figure 3. Notice in Figure 10.16 that the Macro tab is labeled cmdSayHello: On Click, indicating that the macro is associated with the On Click event of cmdSayHello.

|
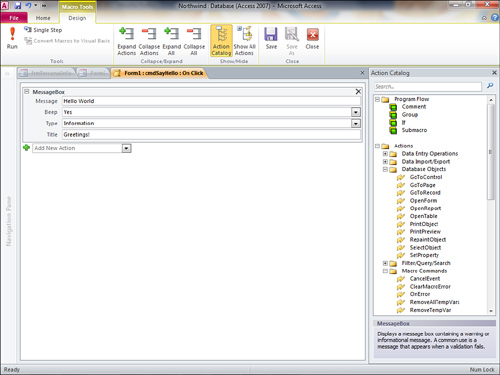
7. | Enter the macro commands as you would for any macro, as shown in Figure 4.

|
8. | Close the Macro Design window. Access prompts you to save changes to the macro and update the property, as in Figure 5.

|
9. | Click Yes to save your changes and close the dialog box. You have now created the embedded macro.
|
One advantage of embedded
macros is that if you copy the object containing the embedded macro, the
macro copies with the object. For example, if you copy a command button
from one form to another, the entire embedded macro will be associated
with the command button on the second form. If you then change one of
the embedded macros, it does not affect the other one.