Although OneNote is still a comparatively
young program compared with flagship Microsoft Office applications like
Word and Excel, it boasts an impressive arsenal of formatting tools.
Although many of these are almost identical to the tools in other Office
applications that you’ve learned to depend on over the years, there are
some that are decidedly different because of OneNote’s unique canvas.
In this section, let’s take a closer look at some of
the ways in which you can add formatting to your notes pages and the
information you collect on them. Almost every single formatting feature
serves as a reminder why a traditional paper notebook can’t hold a
candle to the things you can do with your OneNote notebooks.
1. Setting the Default Font
Typed text in OneNote 2010 defaults to 11-point
Calibri—a very legible font that’s included with all Microsoft Office
2010 applications. If you have a different preference for how new text
should appear in your notes, you can specify your preferred default
font, font size, and font color.
To set the default font, follow these steps:
1. | On the File tab, click Options.
|
2. | In the OneNote Options dialog box that opens, look for the Default Font section.
|
3. | Select
your preferences from the Font, Font Size, and Font Color drop-down
menus, and then click OK. Your preferences will be applied to all new
text that you create in your notes.
|
|
If
you have existing notes that were formatted in a different font and you
want to quickly change all the text on your page to match the new
default font you selected, press Ctrl+A on your keyboard to select all
note containers on the page, and then change the Font, Font Size, and
Font Color options on the Home tab to match those of your custom default
font selection.
If your cursor is blinking in any note container on
the page when you do this, you may need to press Ctrl+A three times in a
row to make OneNote select all note containers, including the active
one.
|
2. Changing Basic Text Formatting
If you’ve ever used text formatting tools in
Microsoft Word, WordPad, or most other Windows programs, you likely
already know most of the basic text formatting tools that are also
available in OneNote.
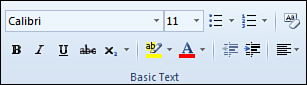
Using the boxes and buttons in the Basic Text group (see Figure 1) on the Home tab of the ribbon, you can apply any of the following formatting choices to text that you have selected:
Font
Font size
Bold
Italic
Underline
Strikethrough
Superscript or subscript
Text highlight color
Font color
|
If
you want to change any formatting that you have already applied to
selected text (for example, a specific font size), reselect the text, if
necessary, and then simply make a different selection. If you applied
formatting by using a button or command, for example, Bold or Italic,
click the same button or command again to remove that effect. If you
accidentally apply some text formatting that you don’t want to keep, you
can use the Undo command (Ctrl+Z) to restore text to the way it was
before you applied the unwanted formatting.
|
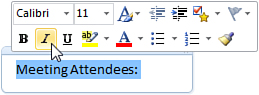
If you do a lot of text formatting on a page and
prefer not to repeatedly move the mouse back and forth between the
ribbon and your page, you can use the Mini toolbar that appears when
you’re selecting text on a page (see Figure 2).
As soon as you see the Mini toolbar appear over the text you’re
interacting with, move the mouse pointer directly over the toolbar, and
then click the drop-down menus and buttons to make your formatting
selections.
3. Using the Styles Gallery
OneNote 2010 is the first version to support a basic
gallery of styles that let you easily apply predefined text formatting.
Using styles can give your notes a consistent look, improve their
legibility, and speed up your note-taking and formatting.
To apply a style from the gallery, follow these steps:
1. | On the page, select the text you want to format with a style.
|
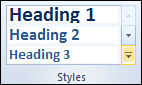
2. | On the Home tab, in the Styles group, click the name of the style you want to apply (see Figure 3).
If the style you want is not visible, either scroll through the list or
click the More button in the lower-right corner of the Styles gallery
to display the entire list of styles.
|
Although it is not possible to modify or customize
these styles like you can do in Microsoft Word 2010, you can easily use
any of the 11 built-in styles as the basis for any further text
formatting that you manually apply.
For example, you can apply the “Heading 3” style from
the list, and then, while the text is still selected, click the
Underline button in the Basic Text group to also add underline
formatting to the heading. Using this method, you can apply as many
combinations of style formatting and manual text formatting as you want.
|
Like the regular text formatting commands, styles are
available for quick access on the Mini toolbar that appears over text
when you select it (see Figure 5.19).
On the Mini toolbar, immediately next to the Font Size box, click the
Quick Styles button to display the full Styles list, and then click the
text style you want.
|
If you plan to apply styles to your notes rather
frequently, you might want to learn and use the keyboard shortcuts that
are available for some of them (see Table 1).
Table 1. Keyboard Shortcuts
| To Apply | Press |
|---|
| Heading 1 | Ctrl+Alt+1 |
| Heading 2 | Ctrl+Alt+2 |
| Heading 3 | Ctrl+Alt+3 |
| Heading 4 | Ctrl+Alt+4 |
| Heading 5 | Ctrl+Alt+5 |
| Heading 6 | Ctrl+Alt+6 |
| Normal | Ctrl+Shift+N |
Note that the Page Title, Citation, Quote, and Code styles cannot be applied with keyboard shortcuts.