Note-taking and capturing information in
OneNote isn’t just limited to typing or importing text. In certain
situations where you’re given more information than you can jot down
quickly (for example, in a class lecture, in a group presentation, or in
an interview), you can make use of OneNote’s excellent audio and video
recording features.
Audio and video clips that you record in OneNote are
stored as part of your notes, so even though they are saved in their
native Windows Media formats, you’ll always have everything together in
your notebook, even if you move it to a different location.
In OneNote 2010, audio recordings are particularly
useful. That’s because spoken words in audio clips can be included in a
notebook search. If an audio clip (or the audio portion of a video clip)
contains the words or phrase you’re looking for, the clip
will be included as a search result. Additionally, you can link audio
recordings that you create with OneNote to notes you type during the
recording. When you play back the audio clip afterward, OneNote
automatically moves the cursor through your notes to indicate which
paragraph of text goes with a particular part of the audio recording.
The usefulness of audio and video notes in OneNote
2010 should not be underestimated, especially by people in certain
professions. Journalists, doctors, attorneys, teachers, students,
corporate trainers, administrative assistants, and people in similar
professions may consider these features to be indispensable.
Creating an Audio Recording
Before you attempt to create an audio recording with
OneNote, make sure you have a microphone connected to your computer.
Many laptops have a built-in microphone, which can also be used.
To create an audio recording, follow these steps:
1. | On the ribbon, click the Insert tab, and then, in the Recording group, click Record Audio.
|
2. | OneNote displays the contextual Audio & Video ribbon tab at the top of the program window (see Figure 1). This tab contains the controls and commands for using audio and video recordings in OneNote.

|
3. | When you have finished recording an audio clip, click the Stop button in the Playback ribbon group.
|
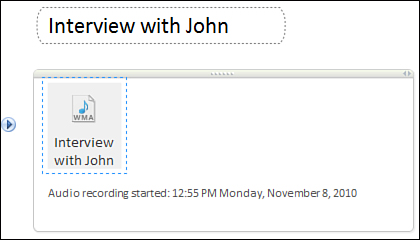
When the recording begins, OneNote places a WMA
(Windows Media Audio) file icon on the current page and marks it with a
date and time stamp (see Figure 2).

While
OneNote is recording the audio clip, you can type notes underneath the
audio icon in the same way you would normally do on a notes page. Taking
notes while recording audio establishes an automatic link between the
recording’s timeline and the position of your cursor within your notes.
When you later play back the recording, you can choose to see the
playback cursor move from line to line in your notes to show you which
parts of your notes correspond to segments in your recording.
|
If you’re unable to create an audio recording, verify
that your microphone is properly configured. Open the Windows Control
Panel, click Hardware and Sound, and then click Sound. In the dialog box
that opens, click the Recording tab, select your recording device, and
then click Properties. To fine-tune audio settings in OneNote, click the
File tab on the ribbon, click Options, and then click Audio &
Video. Under Audio Recording Settings, verify that the correct recording
device, input method, codec, and sound format are selected.
|
Playing Back an Audio Recording
To play back an audio clip in OneNote, you can do any of the following:
Click to select the WMA audio file icon on the page and then click the Play button in the Playback group on the ribbon.
Click
to select the WMA audio file icon on the page and then click the small,
round Play icon that appears just to the left of the notes container.
Double-click the WMA audio file icon on the page.
Right-click
the WMA audio file icon on the page and then click Play on the shortcut
menu. (Alternately, click Open if you want to play back the audio file
in Windows Media Player instead.)
|
While an audio recording is being played back, you
can use additional command buttons in the Playback group on the
ribbon—including Pause, Stop, Rewind 10 Minutes, Rewind 10 Seconds, Fast
Forward 10 Seconds, and Fast Forward 10 Minutes.
|
Exporting an Audio Recording
Any audio recordings that you create with OneNote
will automatically be saved as part of the notebook they appear in. If
you copy or move the notebook folder, the recordings travel with the
notebook. However, there might be times when you want to export a
particular audio recording to your file system so you can use it in
other programs or send a copy to other people. To export any OneNote
audio recording, follow these steps:
1. | Right-click the WMA audio file icon of the recording you want to export, and then click Save As on the shortcut menu.
|
2. | Navigate to the folder on your hard drive where you want to save the file, and then click Save.
|
Creating a Video Recording
Before you attempt to create a video recording with
OneNote, make sure you have a webcam connected to your computer. Many
laptops have a built-in webcam, which can also be used.
To create a video recording, follow these steps:
1. | On the ribbon, click the Insert tab, and then, in the Recording group, click Record Video.
|
2. | OneNote
opens a pop-up window that lets you monitor the current recording.
Behind it, the contextual Audio & Video ribbon tab containing the
audio and video controls appears at the top of the OneNote program
window.
|
3. | When you have finished recording a video clip, click the Stop button in the Playback ribbon group.
|
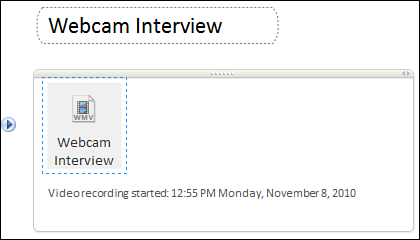
When the recording begins, OneNote places a WMV
(Windows Media Video) file icon on the current page and marks it with a
date and time stamp (see Figure 3).

|
If you’re unable to create a video recording, verify
that your webcam is properly configured. Open the Windows Control Panel,
click Hardware and Sound, and then click Devices and Printers. Find
your webcam or camera device in the list, right-click its icon, and then
click Properties. Alternately, you can right-click the device icon and
click Troubleshoot to see tips for proper configuration. If the webcam
or camera did not come with your computer, refer to the documentation
and installation software from the manufacturer and check their website
for updates and compatibility. To fine-tune video settings in OneNote,
click the File tab on the ribbon, click Options, and then click Audio
& Video. Under Video Recording Settings, verify that the correct
video recording device and Windows Media profile are selected.
|
Playing Back a Video Recording
To play back a video clip in OneNote, you can do any of the following:
Click to select the WMV video file icon on the page and then click the Play button in the Playback group on the ribbon.
Click
to select the WMV video file icon on the page and then click the small,
round Play icon that appears just to the left of the notes container.
Double-click the WMV video file icon on the page.
Right-click
the WMV video file icon on the page and then click Play on the shortcut
menu. (Alternately, click Open if you want to play back the video file
in Windows Media Player instead.)
|
While a video recording is being played back, you can
use additional command buttons in the Playback group on the
ribbon—including Pause, Stop, Rewind 10 Minutes, Rewind 10 Seconds, Fast
Forward 10 Seconds, and Fast Forward 10 Minutes.
|
Exporting a Video Recording
Like audio recordings, any video recordings that you
create with OneNote will automatically be saved as part of the notebook
they appear in. If you copy or move the notebook folder, the recordings
travel with the notebook. However, there might be times when you want to
export a particular video recording to your file system so you can use
it in other programs or send a copy to other people. To export any
OneNote video recording, follow these steps:
1. | Right-click the WMV video file icon of the recording you want to export, and then click Save As on the shortcut menu.
|
2. | Navigate to the folder on your hard drive where you want to save the file and then click Save.
|
Enabling Searching in Audio and Video Recordings
One of OneNote’s most impressive features is the
ability to instantly find any information again in your notes. However, if you plan to frequently
record audio or video notes instead of typing them, you can enable the
ability to search for keywords and phrases within your OneNote
recordings.
To enable searching in audio and video recordings, follow these steps:
1. | Click the File tab and then click Options.
|
2. | In the OneNote Options dialog box that appears, click the Audio & Video category in the left column.
|
3. | On the right side, under Audio Search, select the Enable searching audio and video recordings for words check box.
|
The success rate of finding spoken words in
audio recordings and in the audio portion of video recordings depends on
the sound quality of each recording. This, in turn, depends on several
factors, including the quality of the audio components in your computer,
proper tuning and configuration of your microphone and webcam, the
right distance between the speaker’s mouth and the microphone, and the
presence of ambient noise. Before you routinely make recordings with
OneNote, spend some time fine-tuning your equipment to make sure the
results match your expectations.