Pardon me for being obvious, but in the
interest of being complete, I have to describe what a WebPart is before
using a WebPart in the demonstration feature and solution.
A WebPart is the Microsoft equivalent of a portlet
or a widget. Imagine a webpage on which the administrator could drop a
widget, customize it right through
the browser, and provide some functionality to the users of the site.
Not only that, imagine that if every end user could further tweak such
widgets on the web page, or maybe even drop more widgets to fully personalize
their experience on the site. Also, sometimes these widgets need to
present their own complex UI to provide such customizability or
personalization, and perhaps in certain scenarios, these widgets may
also need to talk with each other.
Well, assuming that you're working with SharePoint,
those "widgets " that you're dropping on the web page are called
WebParts. Those complex UIs that these widgets, or WebParts, present to
edit themselves are called WebPart Editors. Finally, the ability of
WebParts to talk to each other is referred to as WebPart connections.
Let's try out a simple WebPart to solidify your understanding here.
In this exercise, you will create edit a SharePoint web page and add and customize a simple WebPart.
If you don't already have a web application on port 80, go ahead and create one.
Create a fresh site collection using the Blank site definition at the port 80 web site.
Visit the port 80 web site in the browser.
Click
the Site Actions button on the top left of the page, and choose Edit
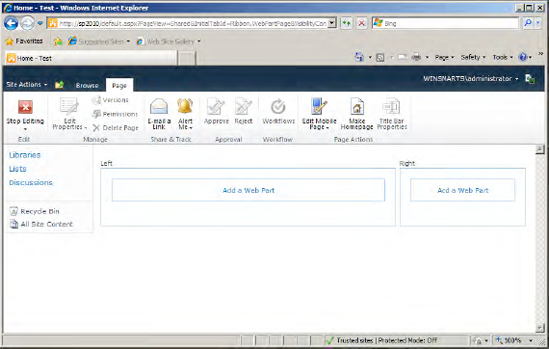
Page. You should see two WebPart zones appear, as shown in Figure 1.

Those
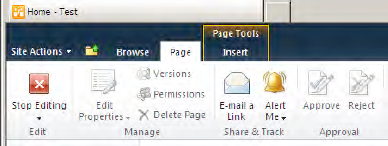
rectangles you see are WebPartzones. Now click one of them. You will
notice that a new menu item appears on the ribbon called Page
Tools/Insert, as shown in Figure 2.

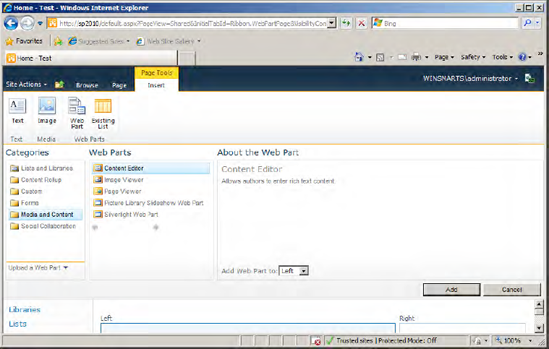
Click Insert and choose "WebPart " in the ribbon.
In
the navigation area for available WebParts below the ribbon, choose the
Content Editor WebPart and click the Add button, as shown in Figure 3.

You
will note that the content editor WebPart is now added to the left
WebPart zone. In the WebPart, you will see a link that says "Click here
to add new content". Go ahead and click that and type in some text.
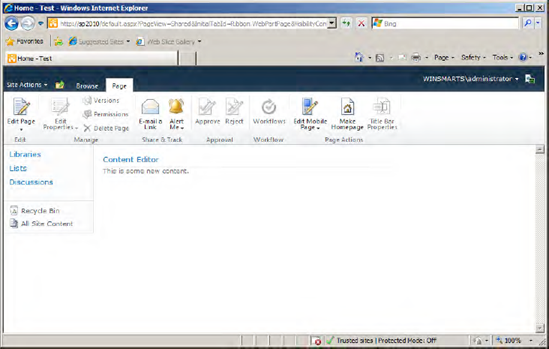
Next, in the ribbon under the Page tab, click Stop editing. Your final page should look like the one shown in Figure 4.

Congratulations, you just worked with a WebPart! Go ahead and play with some other WebParts available to you in SharePoint.