Adding a Drive for Server Backups
Windows Home Server 2011 may
not have Drive Extender’s folder duplication to protect the files stored
on the server, but it does come with a decent Server Backup program
that can backup not only the shared folder data, but also the client
computer backups, and any extra hard drives you have added to the
system. You can also use Server Backup to create a system image, which
you can use to restore your entire system should your system drive go
belly up.
Note
Server Backup has a limit of 2TB for any partition
included in the backup. If your Windows Home Server system includes any
partitions larger than that, you won’t be able to back them up.
With a new (ideally external) hard drive installed
and formatted, follow these steps to add it as the Windows Home Server
backup drive:
1. | Open the Windows Home Server Dashboard.
|
2. | Click Server Folders and Hard Drives.
|
3. | Display the Hard Drives tab.
|
4. | In the Hard Drives section, click the drive you want to add.
|
5. | Click Add the Hard Drive to Server Backup. Windows Home Server launches the Set Up Server Backup Wizard.
|
6. | Click
Next in the wizard’s initial dialog box. The wizard displays a list of
hard drives that are suitable (and available) for use as server backup
drives.
|
7. | Activate
the check box beside the drive you want to use, and then click Next.
The wizard asks whether you want to format the new hard drive.
|
8. | Click Yes. The wizard prompts you for a drive name.
|
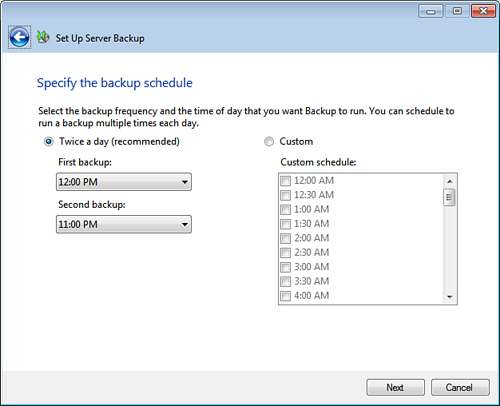
9. | Type a name for the drive, and then click Next. The wizard prompts you to specify a backup schedule, as shown in Figure 1.

|
10. | You have two choices:
- Twice a Day—Select this option to run a twice-daily backup, and use the First Backup and Second Backup lists to select the backup times.
- Custom—Select
this option if you want to run only a single backup, or if you want to
run three or more daily backups. Use the check boxes in the Custom
Schedule list to select the backup time or times you want to use.
|
11. | Click Next. The wizard prompts you to select the items you want to include in the backup.
|
12. | Activate the check box beside each item you want to include in the backup, and then click Next.
|
13. | Click Apply Settings. The wizard sets up the server backup.
|
14. | Click
Close. Windows Home Server Dashboard creates a new section in the Hard
Drives tab called Server Backup, and it displays your new drive in that
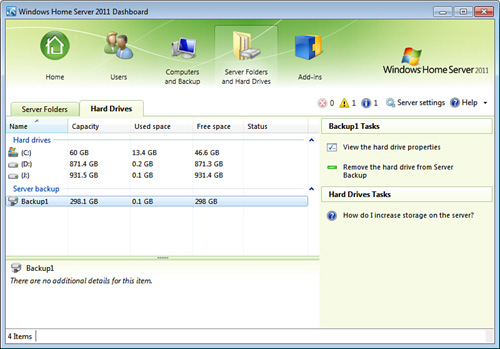
section (see Figure 2). (Your Windows Home Server machine also now appears in the Computers and Backup section of the Dashboard.)

|
Note
You can use multiple drives with Server Backup, which
is useful if a single hard drive isn’t large enough to store the entire
backup (particularly the Windows Home Server system image). Repeat the
steps in this section to add more drives to the server backup.
Removing a Server Backup Drive
If
you have a hard drive that’s currently being used as a backup device
for Windows Home Server, follow these steps to remove it:
1. | Launch the Windows Home Server Dashboard.
|
2. | Click Server Folders and Hard Drives.
|
3. | Display the Hard Drives tab.
|
4. | Click the drive you want to remove from the system.
|
5. | Click Remove the Hard Drive from Server Backup. Windows Home Server starts the Customize Server Backup Wizard.
|
6. | Click Next. The wizard displays the Configuration Options dialog box.
|
7. | Click Change Server Backup Settings. The wizard displays the Select the Backup Destination dialog box.
|
8. | Deactivate the check box beside the drive you want to remove.
|
9. | Click Next until you reach the Confirm the Backup Settings dialog box.
|
10. | Click Apply Settings. Windows Home Server removes the hard drive from the server backup pool.
|
11. | Click Close to shut down the wizard.
|