You learn how to create new shares on Windows Home Server .
However, it’s entirely possible (albeit unlikely) that you won’t have
to create new shares. That’s because Windows Home Server comes with a
few predefined shared folders. Here’s a summary of what’s on the system
by default:
Documents— Use this shared folder for nonmedia files. Music— Use this shared folder for music and other digital audio files. Pictures— Use this shared folder for digital photos, images, artwork, and other graphics files. Recorded TV— Use this shared folder to store TV shows that you’ve recorded. Videos— Use this shared folder to store digital video files, movies, and animations.
If you have access to the server (either directly via
monitor, mouse, and keyboard, or indirectly via a Remote Desktop
connection), you can access the shares using either the D:\ServerFolders folder (if Windows Home Server 2011 is installed on a machine with a single hard drive) or the E:\ServerFolders folder (if Windows Home Server 2011 is installed on a multi-drive system).
Setting User Permissions on Shared Folders
The first thing you should do with the existing
Windows Home Server shared folders is set user permissions on those
shares. Permissions specify the level of access that each user has to
the folder. Read/Write—
This level of access means that the user has both read and write
permission on the share. The user can open subfolders, launch programs,
open documents, edit documents, create new files and folders, and delete
files and folders. Read—
This level of access means that the user has read-only permission on
the shared folder. The user can open subfolders, launch programs, and
open documents, but he can’t make changes to the shared folder or any of
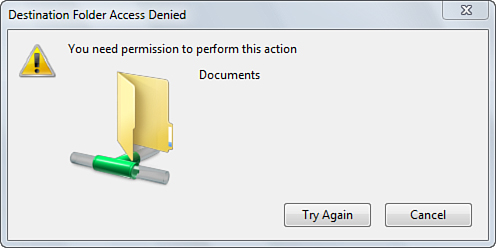
its contents. If a user with Read access tries to create a new file or
folder, the user sees an error message similar to the one shown in Figure 1.
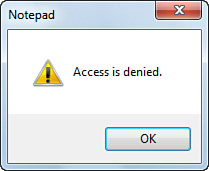
If the read-only user changes a file and then attempts to save it, an
error message appears, and what that message says depends on the editing
program. For example, Notepad displays the Access is denied error, as shown in Figure 2.
No Access— This
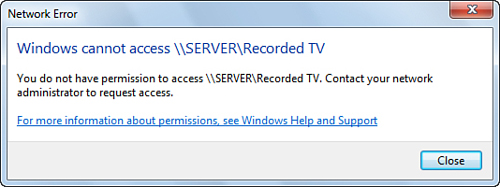
level of access means that the user can’t view a shared folder. If the
user double-clicks the shared folder to open it, he receives a Windows Cannot Access Share error (see Figure 3).
Modifying Permissions for a Windows Home Server Shared Folder
Here are the steps to follow to modify the user access levels for a shared Windows Home Server folder:
1. | Launch the Windows Home Server Dashboard.
| 2. | Select the Server Folders and Hard Drives section.
| 3. | Display the Server Folders tab.
| 4. | Click the folder you want to work with, and then click View the Folder Properties. The folder’s Properties dialog box appears.
| 5. | Display the Sharing tab.
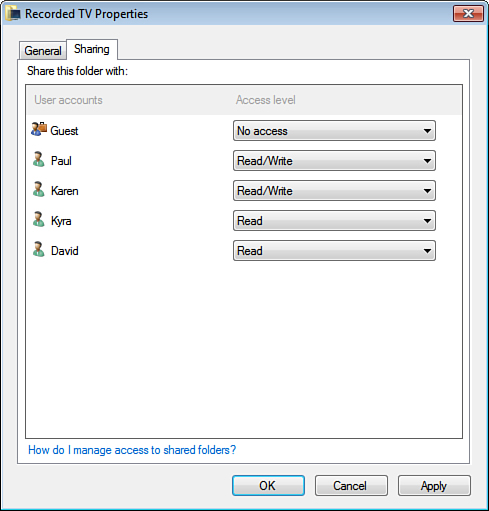
| 6. | For
each user, use the Access Level list to select the option that
corresponds to the access level you want to apply: Read/Write, Read, or
No Access (see Figure 4).
| 7. | Click OK. Windows Home Server sets the new permissions.
|
Sharing Server Folders Outside the Dashboard
The
shared folders that Windows Home Server maintains will in most cases
mean that home users need not share other folders, particularly on the
server. However, there might be scenarios in which you need to share a
server folder outside the Windows Home Server Dashboard. For example, if
you use the server for development work, you might store scripts, code,
and other files in the Administrator account’s My Documents folder, and you might need to share those files with one or more client machines. Because you can’t include My Documents with the Windows Home Server shares, you need to set up a regular share for that folder.
Follow these steps to share a folder outside the Dashboard:
1. | Log on to the server.
| 2. | In
Windows Explorer, right-click the drive or folder, and then click
Properties. (Make sure you right-click a folder and not a library; you
can’t share libraries.) Windows Home Server displays the object’s
property sheet.
| 3. | Select the Sharing tab.
| 4. | Click Advanced Sharing to open the Advanced Sharing dialog box.
| 5. | Activate the Share This Folder check box, as shown in Figure 5.
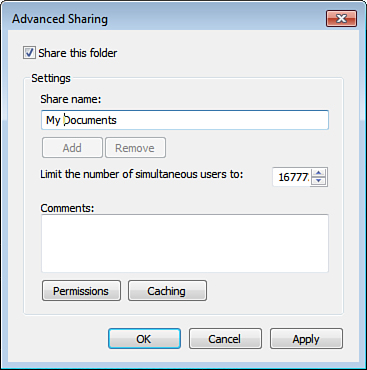
| 6. | Edit the Share Name, if desired, and add a comment. (The latter is optional.)
| 7. | Click Permissions to display the Permissions dialog box, shown in Figure 6.
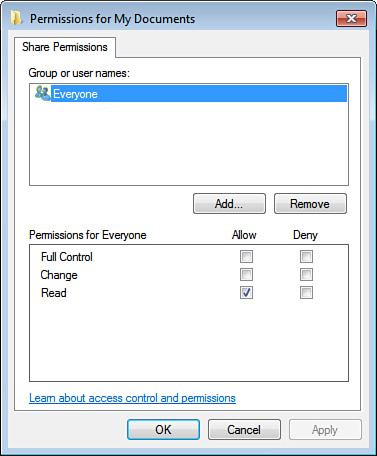
| 8. | Select the Everyone group in the Group or User Names list, and then click Remove.
| 9. | Click Add to display the Select Users or Groups dialog box.
| 10. | In
the Enter the Object Names to Select text box, type the name of the
user or group you want to give permission to access the shared resource.
(Separate multiple usernames or group names with semicolons.) Click OK
when you’re done.
| 11. | Select an item in the Group or User Names list.
| 12. | Using the Permissions list, you can allow or deny the following permissions:
- Read— Gives the group or user
the ability only to read the contents of a folder or file. The user
can’t modify those contents in any way.
- Change— Gives the group or user Read permission and allows the group or user to modify the contents of the shared resource.
- Full Control— Gives the group or user Change permission and allows the group or user to take ownership of the shared resource.
| 13. | Repeat steps 9 through 12 to add and configure sharing for other users and groups.
| 14. | Click OK to return to the folder’s property sheet.
| 15. | Display the Security tab.
| 16. | Click Edit.
| 17. | Repeat steps 9 through 12 to add the same users and groups that you earlier added to the Sharing tab.
| 18. | Using the Permissions list, you can allow or deny the following permissions:
- Full Control— Gives the group or user the ability to perform any of the actions listed. The group or user can also change permissions.
- Modify—
Gives the group or user the ability to view the folder contents, open
files, edit files, create new files and subfolders, delete files, and
run programs.
- Read and Execute— Gives the group or user the ability to view the folder contents, open files, and run programs.
- List Folder Contents— Gives the group or user the ability to view the folder contents.
- Read— Gives the group or user the ability to open files but not edit them.
- Write— Gives the group or user the ability to create new files and subfolders and open and edit existing files.
- Special Permissions— Gives the group or user advanced settings for permissions, auditing, ownership, and effective permissions.
| 19. | Repeat steps 17 and 18 to add and configure security for other users and groups.
| 20. | Click OK to share the resource with the network.
|
|