4.Rotate Canvas Command
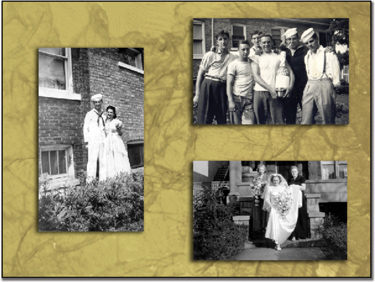
Sometimes your image will need to be rotated or
flipped. Loading your image upside down on the scanner, loading a slide
backwards into a slide scanner, or turning the camera on its side when
taking a portrait can cause inverted or reverse images. You may also
want to make a change to your image for compositional purposes.
The Rotate Canvas command offers several choices. You
can choose to rotate the image 180° (half a rotation), 90° clockwise or
counterclockwise, or an arbitrary amount (the user types in a number of
degrees). Additionally, the entire canvas can be flipped (creating a mirrored image). You can choose to flip the canvas horizontally or vertically:
1. | Open the image Ch04_Rotate.tif from.
|
2. | Choose Image > Rotate Canvas 90° CW (clockwise). The image is now properly oriented.
|
|
There may be times when you want to freely rotate
your view (just as you might angle a piece of paper to make it easier to
draw). In this case, you are rotating just the view, not the actual
image. Just press R to access the Rotate View tool. You can then click
within the canvas and rotate the image for distortion-free viewing at
any desired angle. This makes it really easy when painting or cloning to
avoid having to crank your head or wrist in the middle of a brush
stroke. Photoshop provides a compass to help you stay oriented, and you
can click the Reset View button in the Options bar to return the canvas
to its default orientation. You’ll need an Open GL capable graphics card
to use this feature.
|
5. Free Transform Command
The Free Transform command is another useful way to
rotate and size an image. It works best when you have an object located
on its own floating layer (not a Background)
or if you have an active selection.
1. | Open the file Ch04_Free_Transform_ Basic.psd.
This image has two layers: a background, which is a pattern, and a
vector shape layer. A vector layer is a special layer in Photoshop. It
can be resized and transformed repeatedly with no degradation in
quality. Vector layers use math to describe curves and can be freely
manipulated.
|
2. | If it’s not visible, call up the Layers panel by selecting Windows > Layers.
|
3. | Select the Vector Shape layer so it is active.
|
4. | Choose Edit > Free Transform or press Command+T (Ctrl+T).
 |
You can access several controls for the Free
Transform command by right-clicking/Control-clicking. Try the following
transformations on the Vector Shape layer. You can press the Esc key to
cancel the transformation or Return (Enter) to apply it.
Scale. You
can scale by dragging a handle. Hold down the Shift key as you drag a
corner handle to scale proportionately. Hold down the Option (Alt) key
to scale in both directions simultaneously. To scale numerically, enter a
value in the Options bar.
Rotate.
You can rotate a preset amount by selecting Rotate 180°, Rotate 90° CW,
or Rotate 90° CCW. To rotate freely by dragging, move your mouse
outside the Free Transform box. It will become a curved, two-headed
arrow. Hold down the Shift key while rotating to constrain the rotation
to 15° increments. Additionally, you can rotate numerically by entering
degrees in the rotation box in the Options bar.

Skew.
Skewing an image creates a sense of distortion, as if the image were
leaning. To skew the image, hold down Command+Shift (Ctrl+Shift) and
drag a side handle (not a corner handle). The cursor will change to a
white arrowhead with a small double arrow.
Distort.
If you want to distort an image freely, choose Distort. This allows you
to move the corners of the image freely (a process also known as
corner-pinning). You can also access this command by pressing Command
(Ctrl) while dragging a corner point.
Perspective. Transforming
perspective creates the illusion that the image is being viewed from
above or from the side. You can access this command by pressing
Command+Option+Shift (Ctrl+Alt+Shift) or from the context menu. This is a
useful command to fix perspective problems or to add perspective
effects.
Warp.
The Warp command was first introduced in Photoshop CS2. It allows you
to distort an image into a number of predefined shapes available in the
Options bar (such as Arch, Flag, or Twist). By choosing Custom, several
points can be freely dragged to distort the image as desired.

Flip Horizontal and Flip Vertical. These simple commands let you flip an individual layer without flipping the entire canvas.
The Free Transform command has one major benefit over
choosing individual transform commands from the Image menu: Free
Transform lets you apply transformations in one continuous operation,
which reduces quality loss in raster images.
Open the file
Ch04_Free_Transform_Additional.psd. Using the Free Transform command,
you can rotate, size, and flip the images to create a better layout.