To be useful, an iPhone
application needs to utilize the amazing set of UI elements available
from the SDK. Our generated iPhone application contains a single UI
element: a window.
All iPhone apps have windows (usually one.) A window
is a specialized view that is used to host other views. A view is a
rectangle piece of real-estate on the 320 × 480 iPhone screen. You can
draw in a view, animate a view by flipping it, and you can receive
multi-touch events on it. In iPhone development, most of your work goes
towards creating views, managing their content, and animating their
appearance and disappearance.
Views are arranged into a hierarchy that takes the
shape of a tree. A tree has a root element and zero or more child
elements. In iPhone OS, the window is the root element and it contains
several child views. These child views can in turn contain other child
views and so on and so forth.
To generate views and manage their hierarchy, you can
use both Interface Builder (IB) and Objective-C code. IB is an
application that comes with the SDK that allows you to graphically build
your view and save it to a file. This file is then loaded at run-time
and the views stored within it come to life on the iPhone screen.
As we mentioned before, you can also use Objective-C
code to build the views and manage their hierarchy. Using code is
preferred over using IB for the following reasons. First, as beginner,
you need to understand all aspects of the views and their hierarchy.
Using a graphical tool, although it simplifies the process, does hide
important aspects of the process. Second, in advanced projects, your
views' layouts are not static and change depending on the data. Only
code will allow you to manage this situation. Finally, IB does not
support every UI element all the time. Therefore, you will sometimes
need to go in there and generate the views yourself.
1. Interface Builder
The project has a basic window resource file. This file can be found under the Resources group. Expand the Resources group and locate the file MainWindow.xib. This file contains the main window of the application. This file is an .xib
file that stores the serialized objects in the interface. When the
project is built, this file is converted to the more optimized format .nib and loaded into memory when one or more of the UI components stored in it are requested.
Double-click on the MainWindow.xib file to
launch IB. IB starts by opening four windows. The first window shows the
main window stored in the file. The second window shows the document
window listing the different objects stored in the file. The third
window is the Library window containing all the UI objects that you can
add to the file. The fourth and final window is the Inspector window
with its four panes.
The Inspector window shows the attributes of the
currently selected object. If you click on an object, the Inspector
windows shows you its attributes distributed among four different panes.
Each pane has several sections. You can change these attributes (such
as color, position, and connections) and the changes will propagate to
your project's user interface.
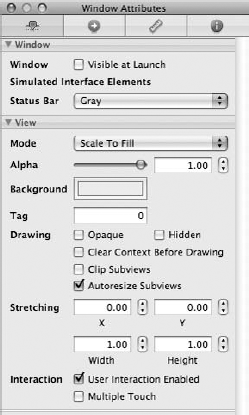
The main window of the application is white; let's
change it to yellow. Click on the window object in the document window.
In the Inspector window, make sure that the left-most pane is selected.
In the View section of this pane, change the background color to yellow
as shown in Figure 1.
Go to XCode and run the application. Notice how the
main window of the application has changed to yellow. It is important to
keep the project open in XCode while working with IB. XCode and IB
communicate well when both applications are open.
To build a user interface, you start with a view and
add to it subviews of different types. You are encouraged to store
separate views in separate .xib files. This is important as
referencing one object in a file will result in loading all objects to
main memory. Let's go ahead and add a label view to our window. This
label will hold the static text "Hello iPhone."
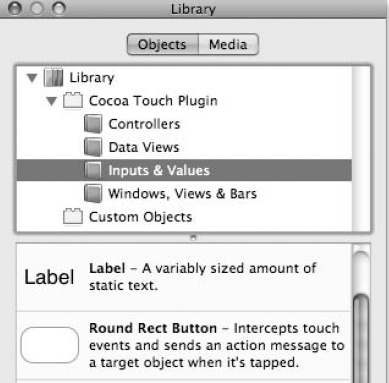
A label is one of the many UI components available for you. These components are listed under several groups in the Library. Locate the Library window and click on Inputs & Values as shown in Figure 2.
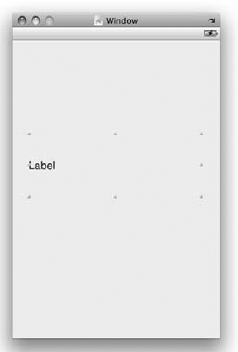
Click on the Label item and drag it onto the middle of the window. Expand the dimensions of the label as shown in Figure 3.
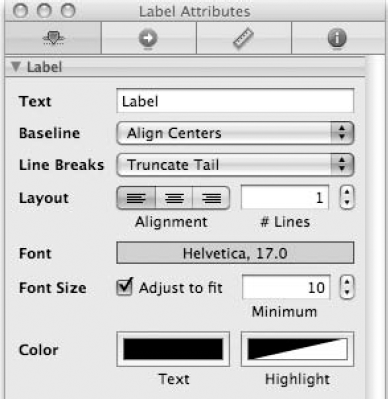
When the label is selected, the Inspector window changes to reflect the attributes of the label. Figure 4
shows a portion of the attributes of a label in the Inspector window.
You can change these attributes and observe the effect they have on the
object instantaneously.
The label's text is left justified; let's make it center. In the Layout
item of the attributes, click on the icon indicating center. Notice how
the label text becomes centered. The text of the label can be changed
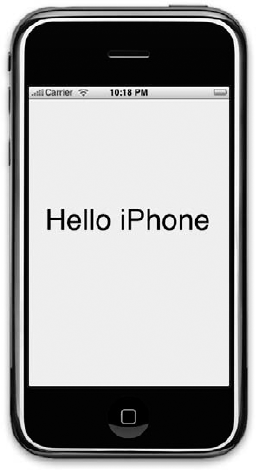
in the Text item. Change Label to Hello iPhone. GotoXCodeandhit Build and Go. You will notice the window showing Hello iPhone in the middle.
The text of the label is small, so let's make it
bigger. Click on the Text item and choose a text size of 48 points. Go
to XCode and hit Build and Go. Figure 5 shows a screenshot of the completed Hello iPhone application.
Congratulations on your first successful iPhone application!
You deliver the product to the client and he is
happy. However, he wants the application to have more interaction with
the user. He asks you to revise the application by adding a button that
the user can tap on to change the text displayed in the label.
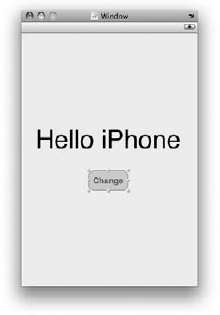
Open the MainWindow.xib document if it is not already open. Locate the Round Rect Button item under Items & Values in the Library window. Drag and drop it under the label in the main window. Change the button's title by entering "Change" in the Title field found in the fourth section of the attributes window. The main window should look like the one shown in Figure 6.
Now that we have a button, we want to have a method
(a function) in our code to get executed when the user touches the
button. We can achieve that by adding a connection between the button's
touch event and our method.
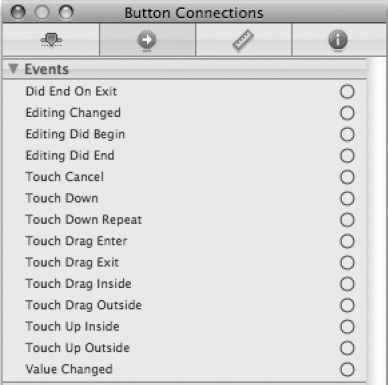
Click on the button so that it becomes selected.
Click on the second pane in the Inspector window. This pane shows the
connections between an object and our code. The pane should look like
the one in Figure 7.
Now, we want to add a connection between the Touch Down event and a method we call button-Tapped. Let's first add this method in My_ProjectAppDelegate class.
In the My_ProjectAppDelegate.h file, add the following before
@end
.
-(IBAction)buttonTapped;
In the My_ProjectAppDelegate.m file, add the buttonTapped method body. The My_Project-AppDelegate.m file should look something like the one in Listing 1.
Example 1. The application delegate class after adding a new method.
#import  "My_ProjectAppDelegate.h"
@implementation  My_ProjectAppDelegate
@synthesize window;
- (void )applicationDidFinishLaunching:(UIApplication *)application {

    // Override point for customization after application launch
    [window makeKeyAndVisible];
}

-(IBAction)buttonTapped{
  UILabel *label = (UILabel*)[window viewWithTag:55];
  if ([label.text isEqualToString:@"Hello iPhone"])
    label.text = @"Hello World";
  else
    label.text = @"Hello iPhone";
}

- (void )dealloc {
    [window release];
    [super  dealloc];
}
@end
|
The buttonTapped method simply obtains a
reference to the label and changes its text to either "Hello World" or
"Hello iPhone". You don't need to understand this code at this stage.
All you need to understand is that the label on the screen is
encapsulated by the UILabel class and it's tagged with the number 55.
Now, let's switch to IB and add a tag to the
label so that it can be retrieved from the code. Click on the label and
in the Inspector window, choose the first pane. In the second section,
enter 55 for the Tag field (fourth item.)
We still need to perform one last step. We need to
connect the touch event with the method we just created. Click on the
button and choose the connections pane (second pane). Control-click or
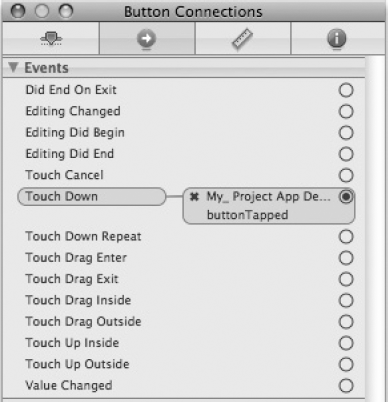
right-click on the circle on the right-hand side of Touch Down event and drag it on top of the My_ProjectAppDelegate object in the Document window and let go as shown in Figure 8.

When you release the mouse, IB shows you potential
methods (actions) that you can connect this event to. Right now we only
have one action and that action is buttonTapped. Select that action and you'll notice that a connection has been made as shown in Figure 9.
Now, switch to XCode and hit Build and Go. You'll notice that tapping on the button changes the text value of the label.