Generating an Index
After you have marked all the items for your index,
you can tell Word to compile the index and add it to the document.
Here’s how:
1. | Place
the insertion point on a blank paragraph at the end of the document.
Word inserts the index at the insertion point’s location.
|
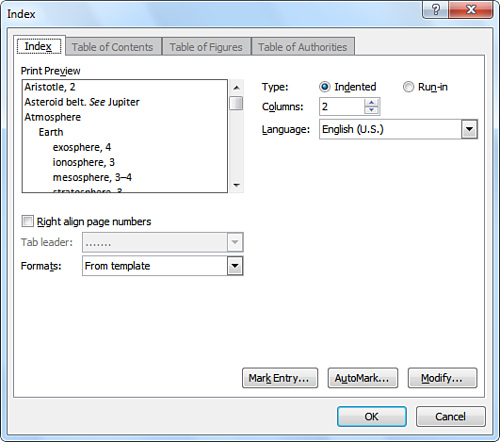
2. | On the References tab, click Insert Index. The Index dialog box opens, as shown in Figure 2. You can use this dialog box to format the index.

|
3. | To
select a different overall format for the index, click the Formats
drop-down arrow, and then click a formatting option. You can preview
the selected format in the Print Preview box.
|
4. | If
you want the page numbers to be aligned along the right margin of the
index’s page or columns, check the Right Align Page Numbers check box.
Otherwise, Word places each page number immediately after its entry.
|
5. | To
select a different type of leader (the line of dots separating the
items from the page numbers), click the Tab Leader drop-down arrow and
select a different option.
|
6. | Do one of the following:
- If you want subentries to be indented beneath main entries, click the Indented option.
- If you prefer subentries to appear on the same line with the main entries, click Run-In.
|
7. | Use
the Columns spin control to specify the number of columns for the
index. If your entries are short, a two- or three-column index looks
nice.
|
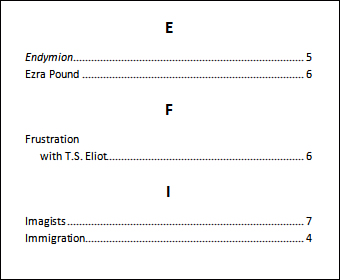
8. | When you are finished customizing the index, click OK. Figure 3 shows a portion of a formatted index.

|
Updating an Index
If you make any change to a document that might
affect the index, you should update the index to reflect the changes.
To update the index, click it, and then click Update Index on the
References tab.
Deleting an Index
To remove an index from a document, select the entire index by dragging the pointer over it; then press Del.