Don’t you just hate hand-addressing an
envelope? I do. But thanks to Word, I haven’t done that in years. (I’m
not sure if I can remember how to write anything by hand.) You don’t
have to, either.
You can use Word to address envelopes in three different ways:
- Address an
envelope without a letter (for example, if you’re paying a bill, and
the biller didn’t bother to send you a self-addressed envelope).
- Address an envelope by attaching it to a letter.
- Addressing untold thousands of envelopes during a mail merge.
Addressing an Envelope by Itself
You don’t have to create a letter to address an envelope. Here’s how to address a single envelope:
1. | With any document (even a blank one) open, click the Mailings tab.
|
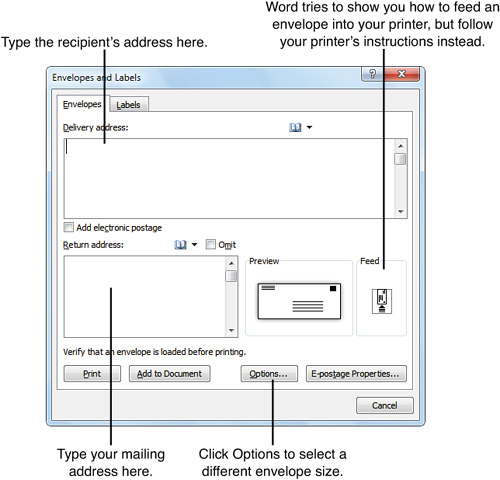
2. | Click Envelopes. The Envelopes and Labels dialog box opens, as shown in Figure 1.
|
3. | Click in the Delivery Address text box and type the recipient’s address.
|
4. | Click
in the Return Address text box and type your address. Word remembers
the return address after you type it for the first time.
|
5. | Feed an envelope into your printer, orienting it as directed by the printer’s documentation.
By default, Word assumes that you are printing a standard business-size
(4 1/8” × 9 1/2”) envelope. To use a different-size envelope, click the
Options button. The Envelope Options dialog box opens; click the
Envelope Size drop-down arrow, and choose the size you want. Click OK
to return to the Envelopes and Labels dialog box. |
6. | Click Print. Word prints one copy of the envelope.
If this is the first time you have typed an address in the Return
Address text box (or if you changed the address that was already
there), Word asks if you want to use it as the default return address.
In the message box, click Yes or No, depending on whether you want Word
to remember the return address you are using.
|
Adding an Envelope to a Letter
You can create a pre-addressed envelope and attach
it to a letter. Word saves the envelope information with the letter.
That way, you can go back and modify the letter and then print and mail
the revised version without having to create a new envelope. Here’s how
to attach an envelope to a letter:
1. | Select the entire delivery address in the letter.
|
2. | On
the Mailings tab, click Envelopes. The Envelopes and Labels dialog box
opens with the selected address in the Delivery Address text box.
|
3. | If
necessary, click in the Return Address text box and type your address.
If you have typed a return address before, it should already appear in
the text box.
|
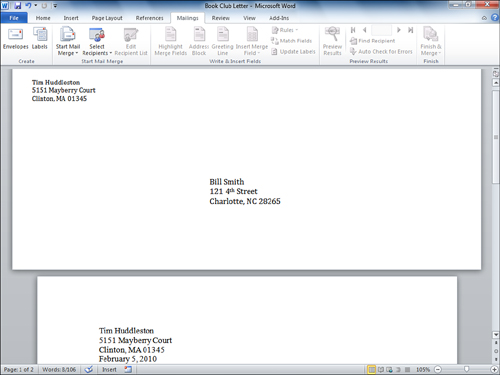
4. | Click
Add to Document. Word generates a pre-addressed envelope and inserts it
in a new section at the top of the letter, as shown in Figure 2.
|
5. | Save the document to keep the envelope with it.
|
By default, when you print a letter with an
attached envelope, Word prints the letter first and then the envelope.
Before printing, be sure to load your printer with paper and envelopes
in the correct order.